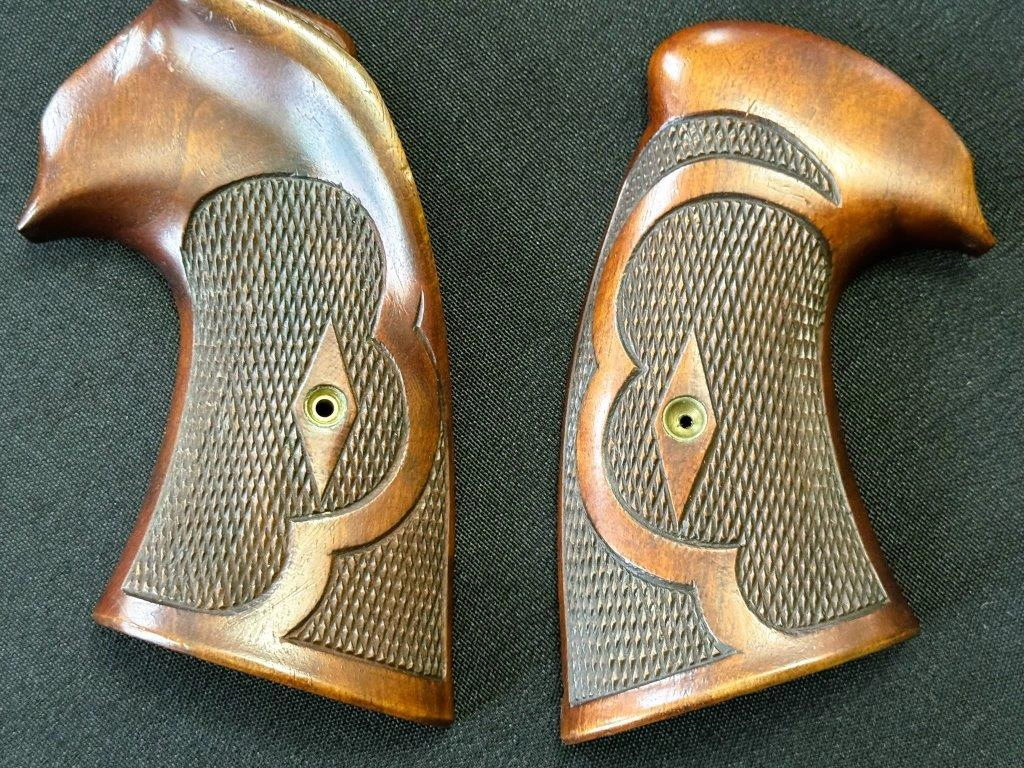
Roper grips are among the most recognizable American target stocks because the outside and the inside both tell a story. The outside shows the sculpted thumb rest, ribbon checkering, palm swell, finger placement, and hand-filling contour. The reverse side shows inletting, screw hardware, handwritten or impressed fit notes, and, on many period examples, the small jig holes collectors study closely.
A careful evaluation should never rest on one feature. The strongest identification comes from a pattern: reverse-side jig marks, period workmanship, frame-specific fit, appropriate wood and hardware, Roper-style checkering, honest age, and documentation when available.
What Roper Grips Are
Walter F. Roper was the designer, shooter, writer, and promoter behind the famous target-stock pattern. Collector literature commonly credits the woodworking to Mathias Gagne, a highly skilled craftsman whose hand work translated Roper’s ideas into wood. Surviving examples vary because these were not modern molded parts; they were hand-shaped stocks made for a shooter, a hand, and a particular handgun frame.
The classic Roper idea was practical before it was decorative. The stocks were meant to repeat the shooter’s hand position, fill empty space behind and below the frame, support the middle finger, and place the thumb and palm consistently. That is why a real inspection must include the grip’s three-dimensional shape, not just its checkering pattern.
Reverse-Side Jig Holes: The Feature Collectors Look For First
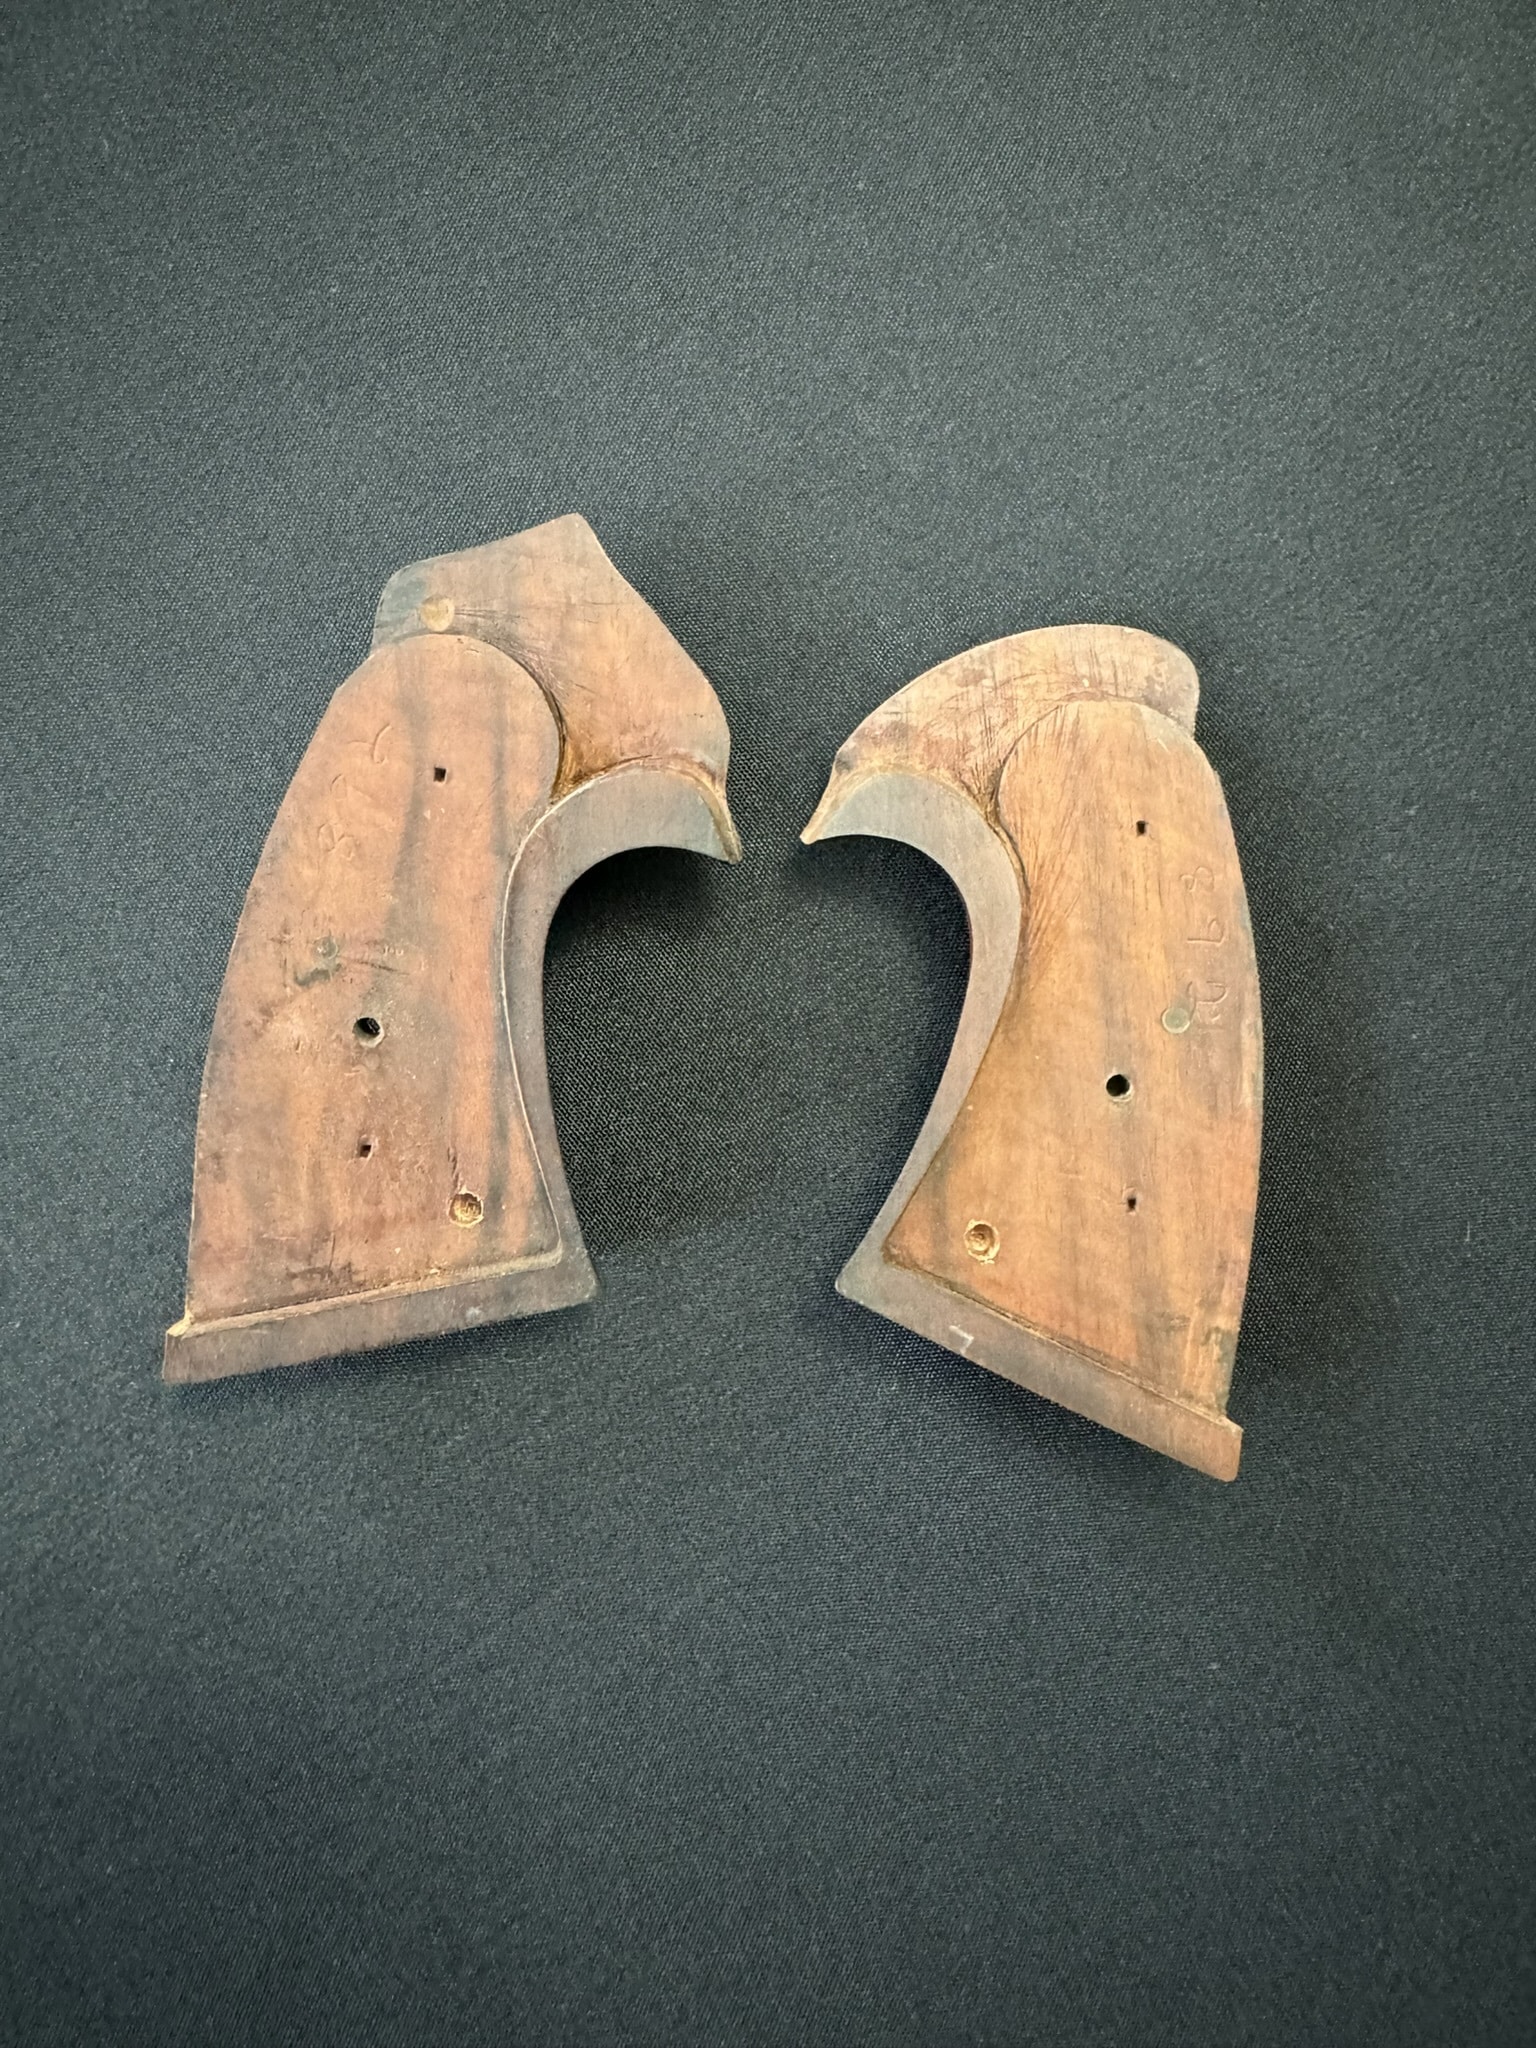
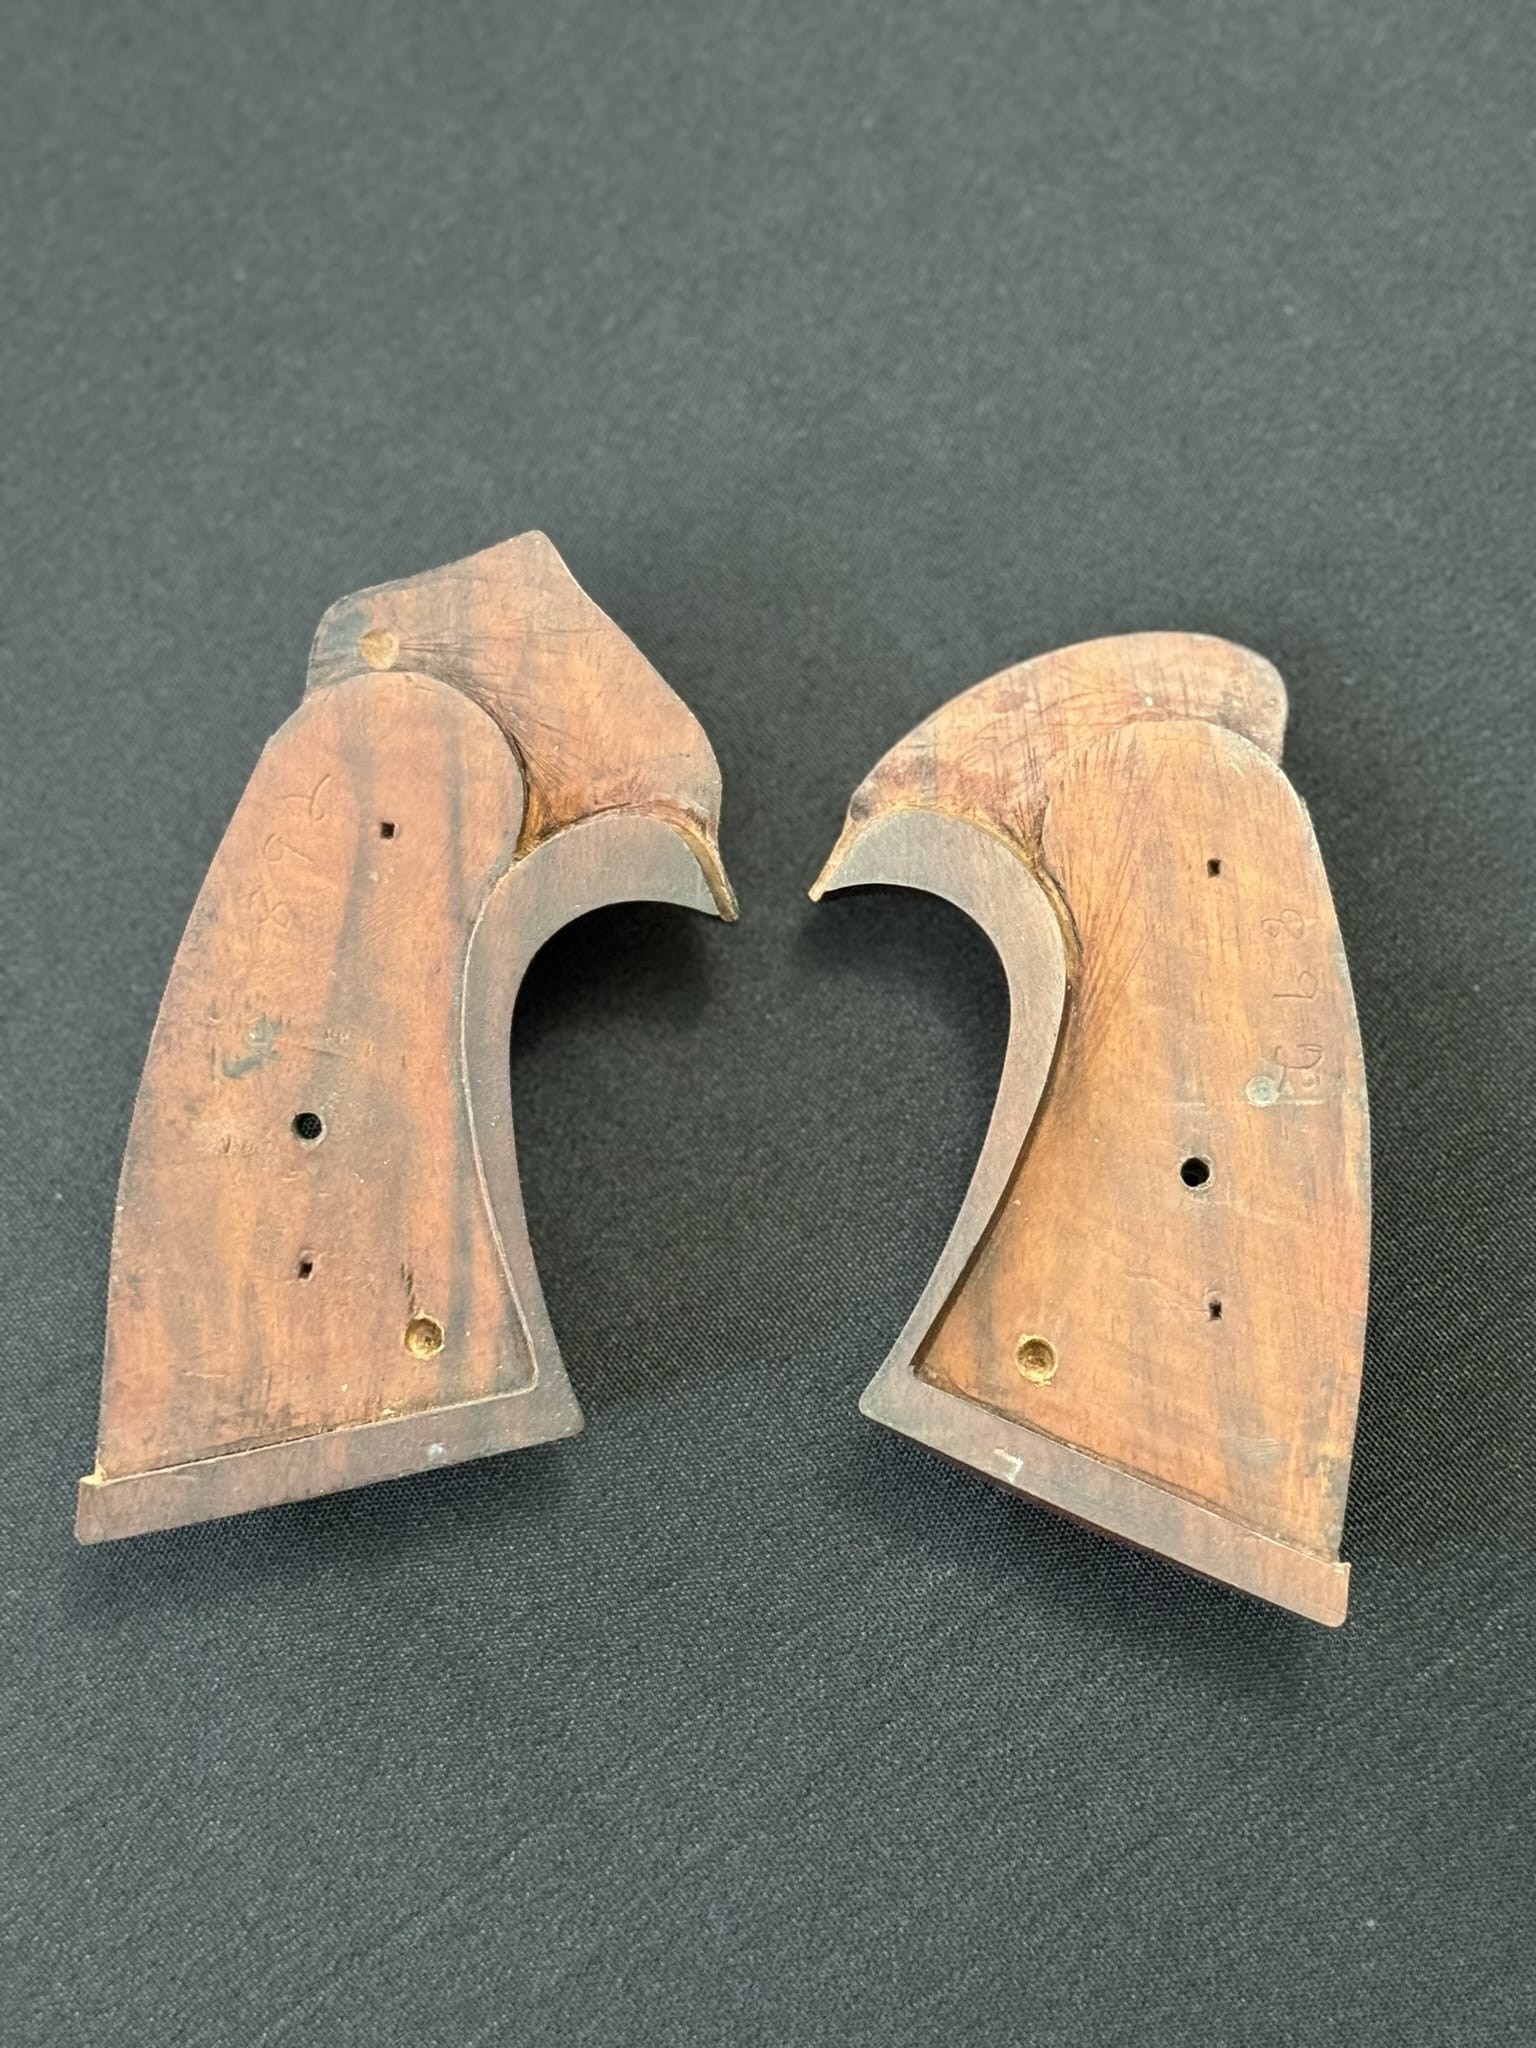
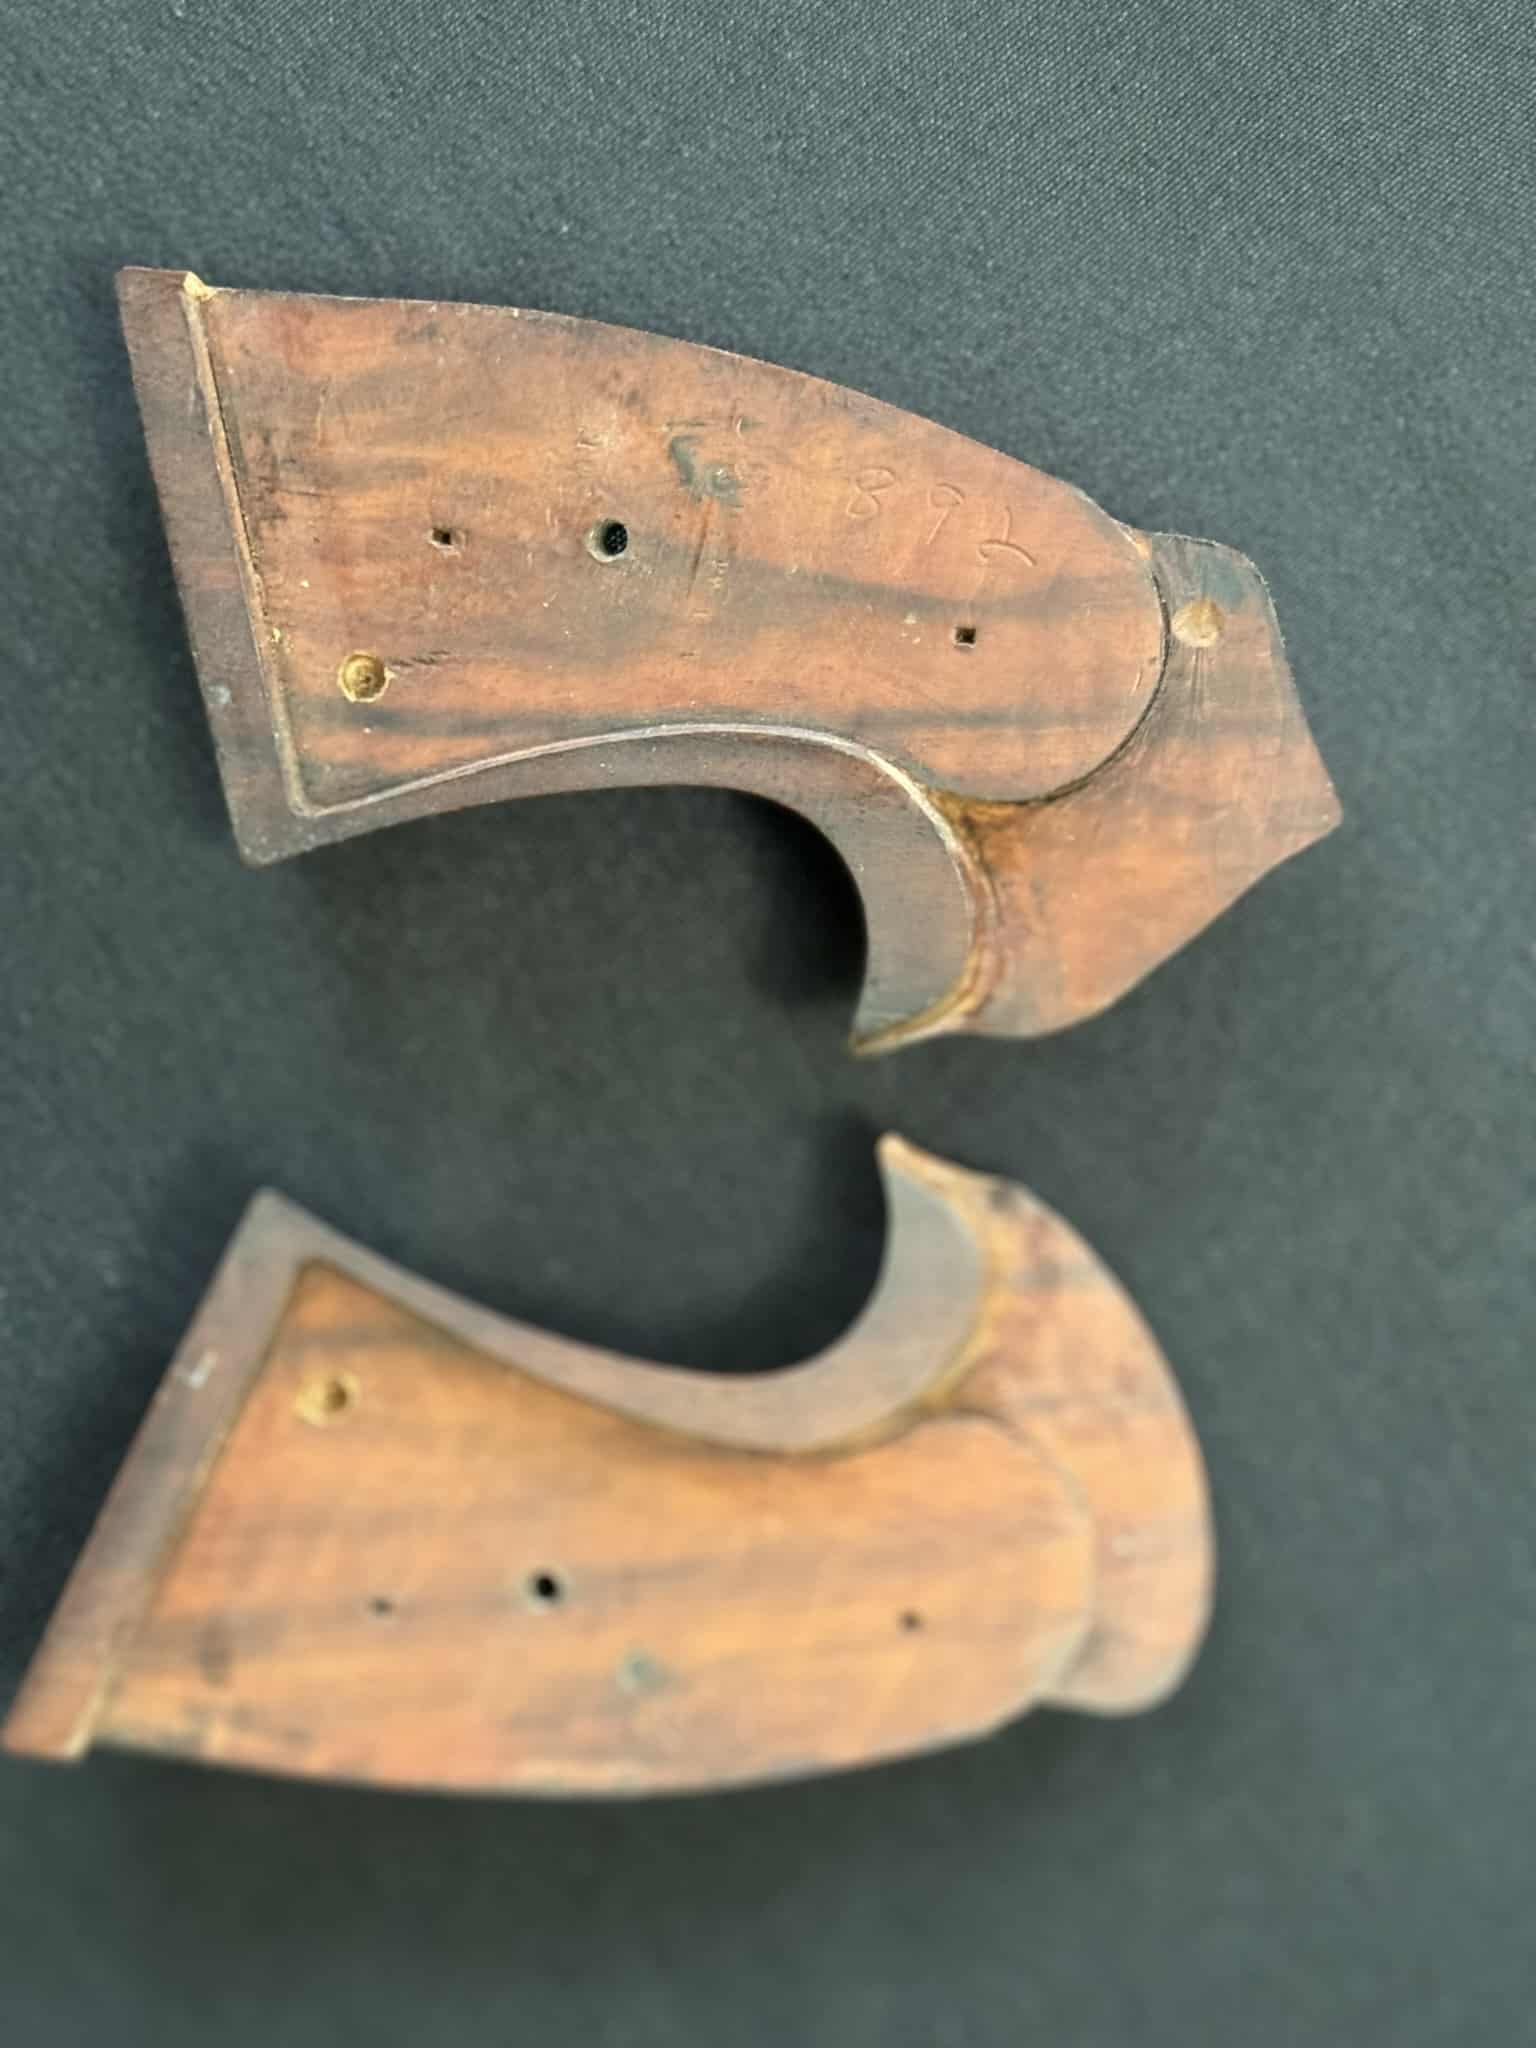
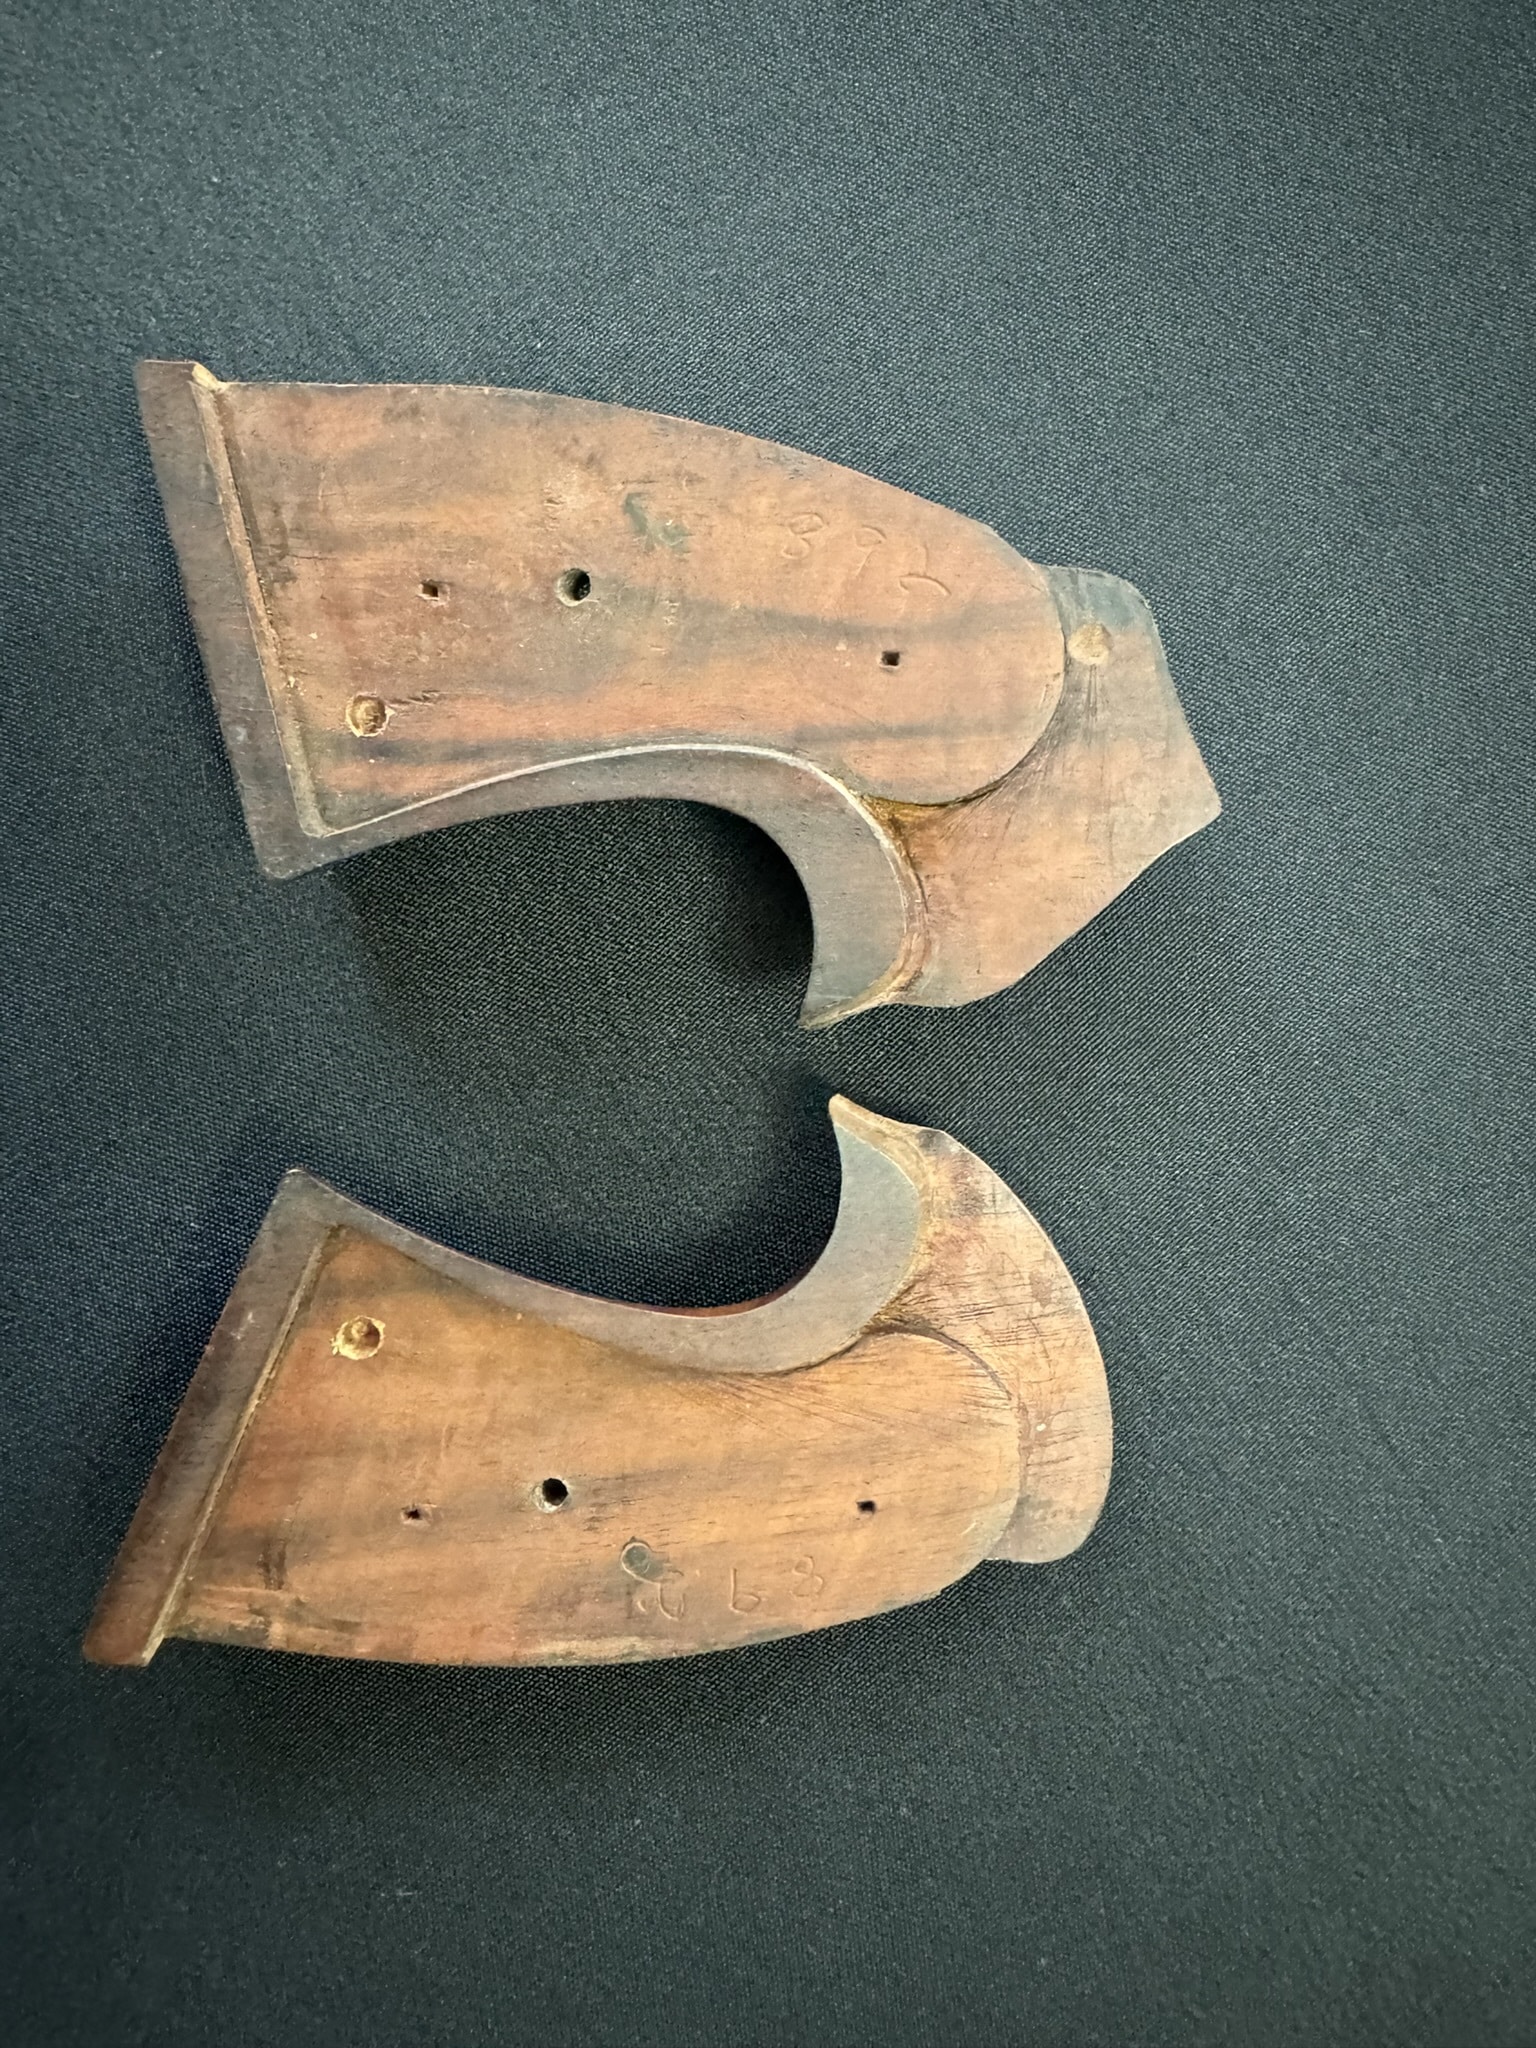
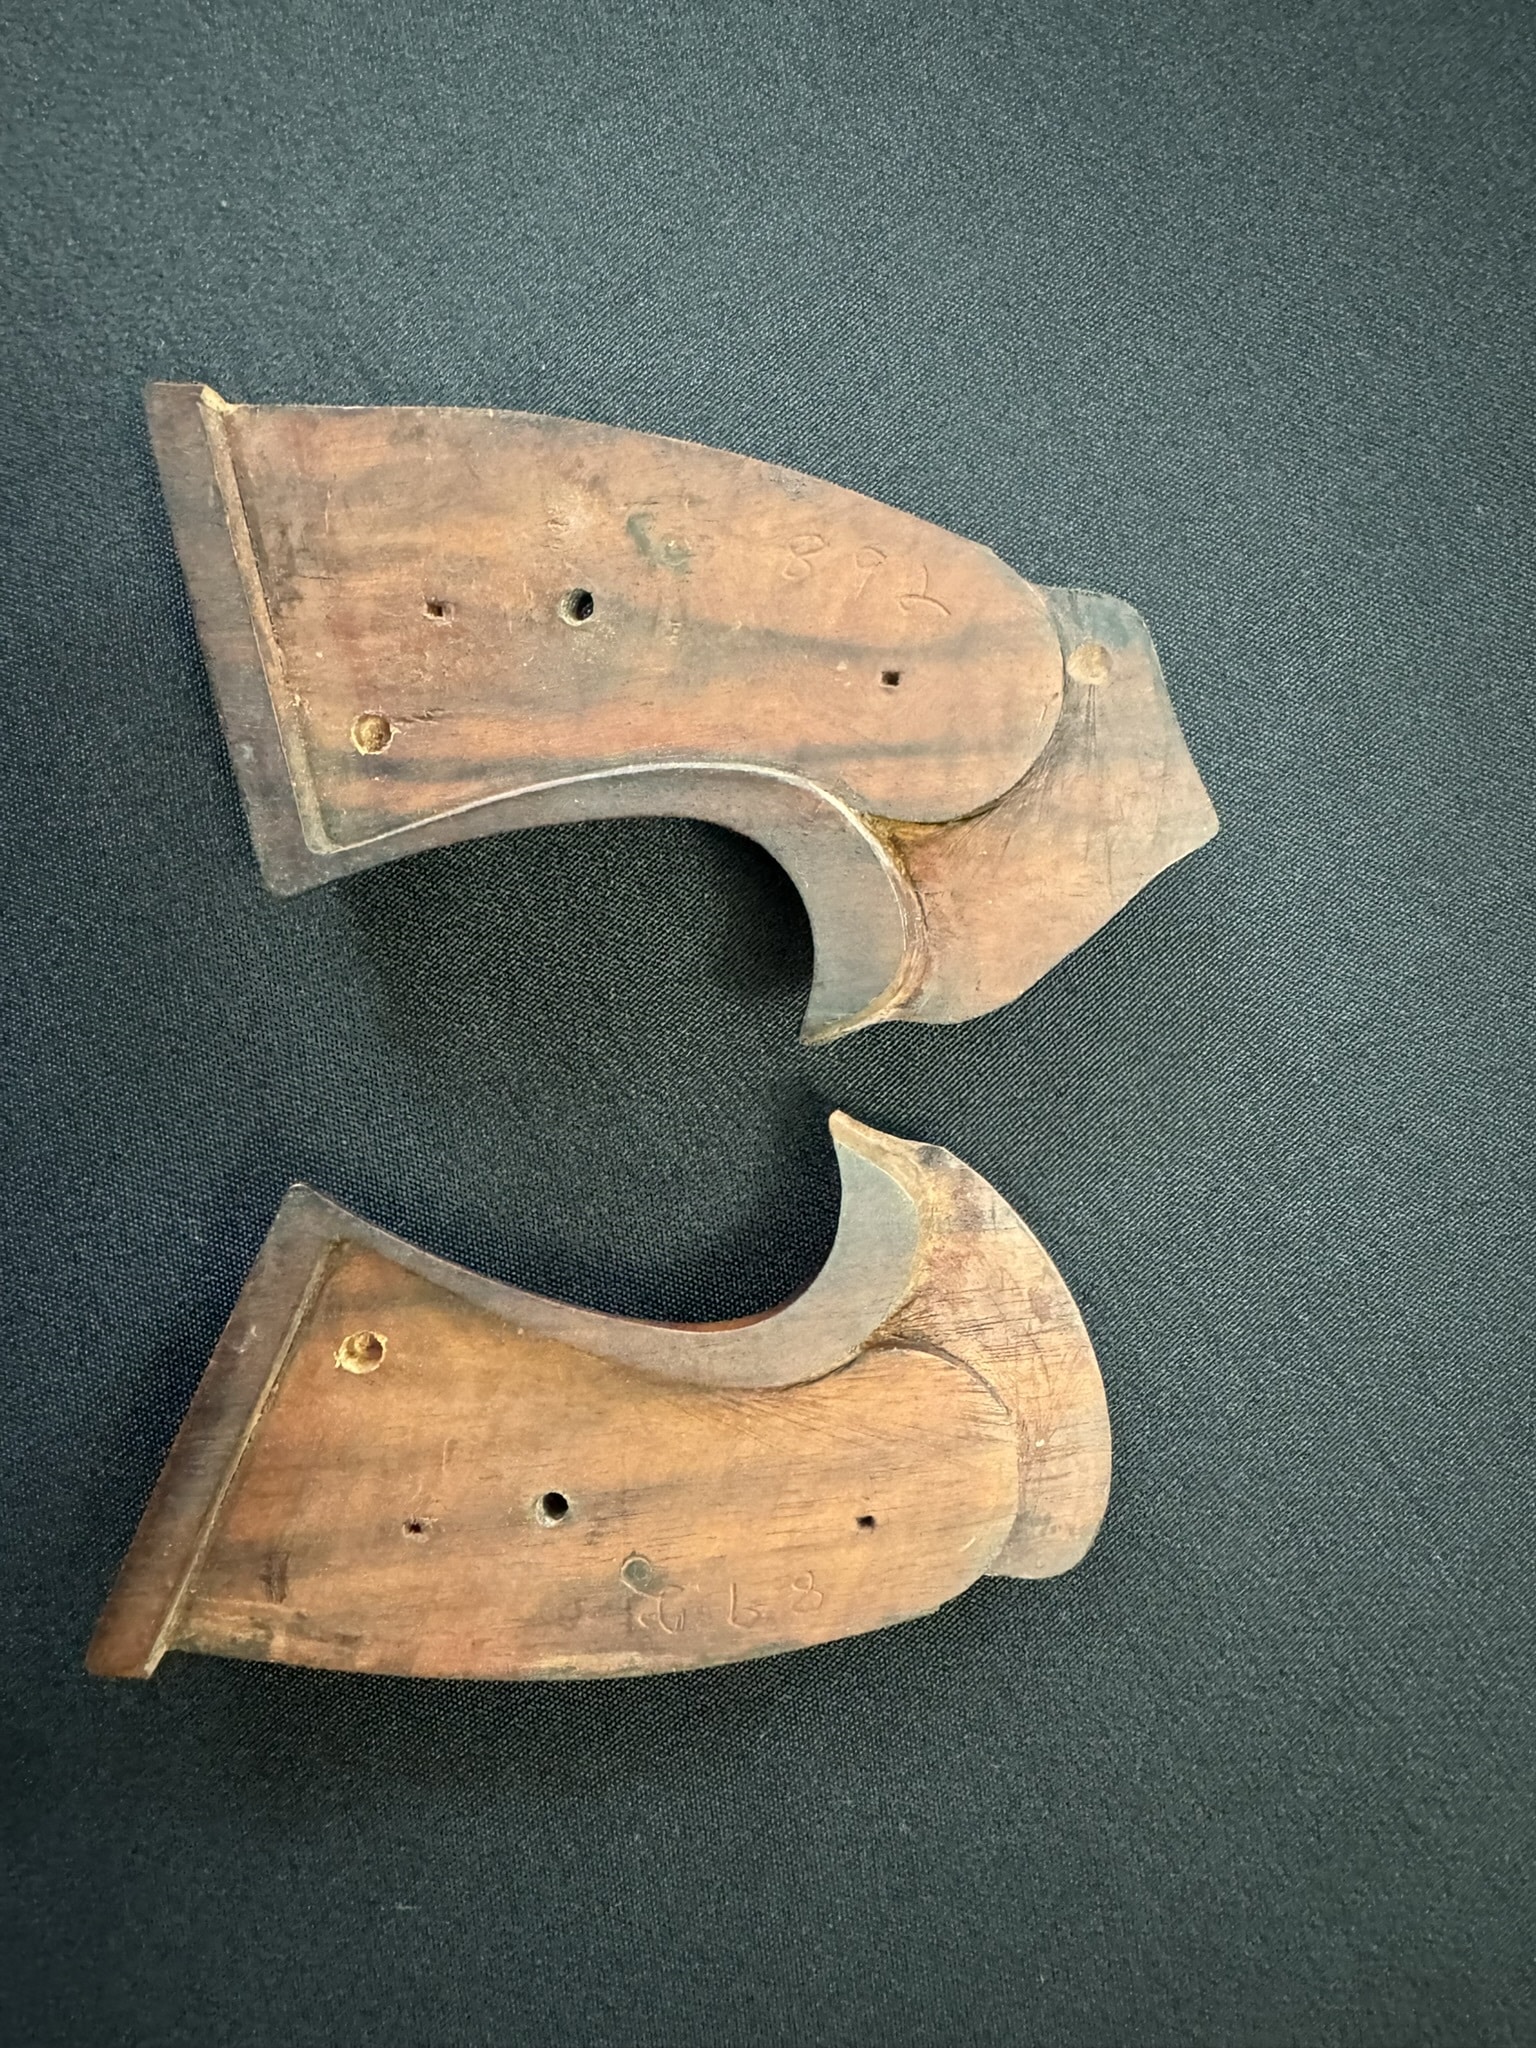
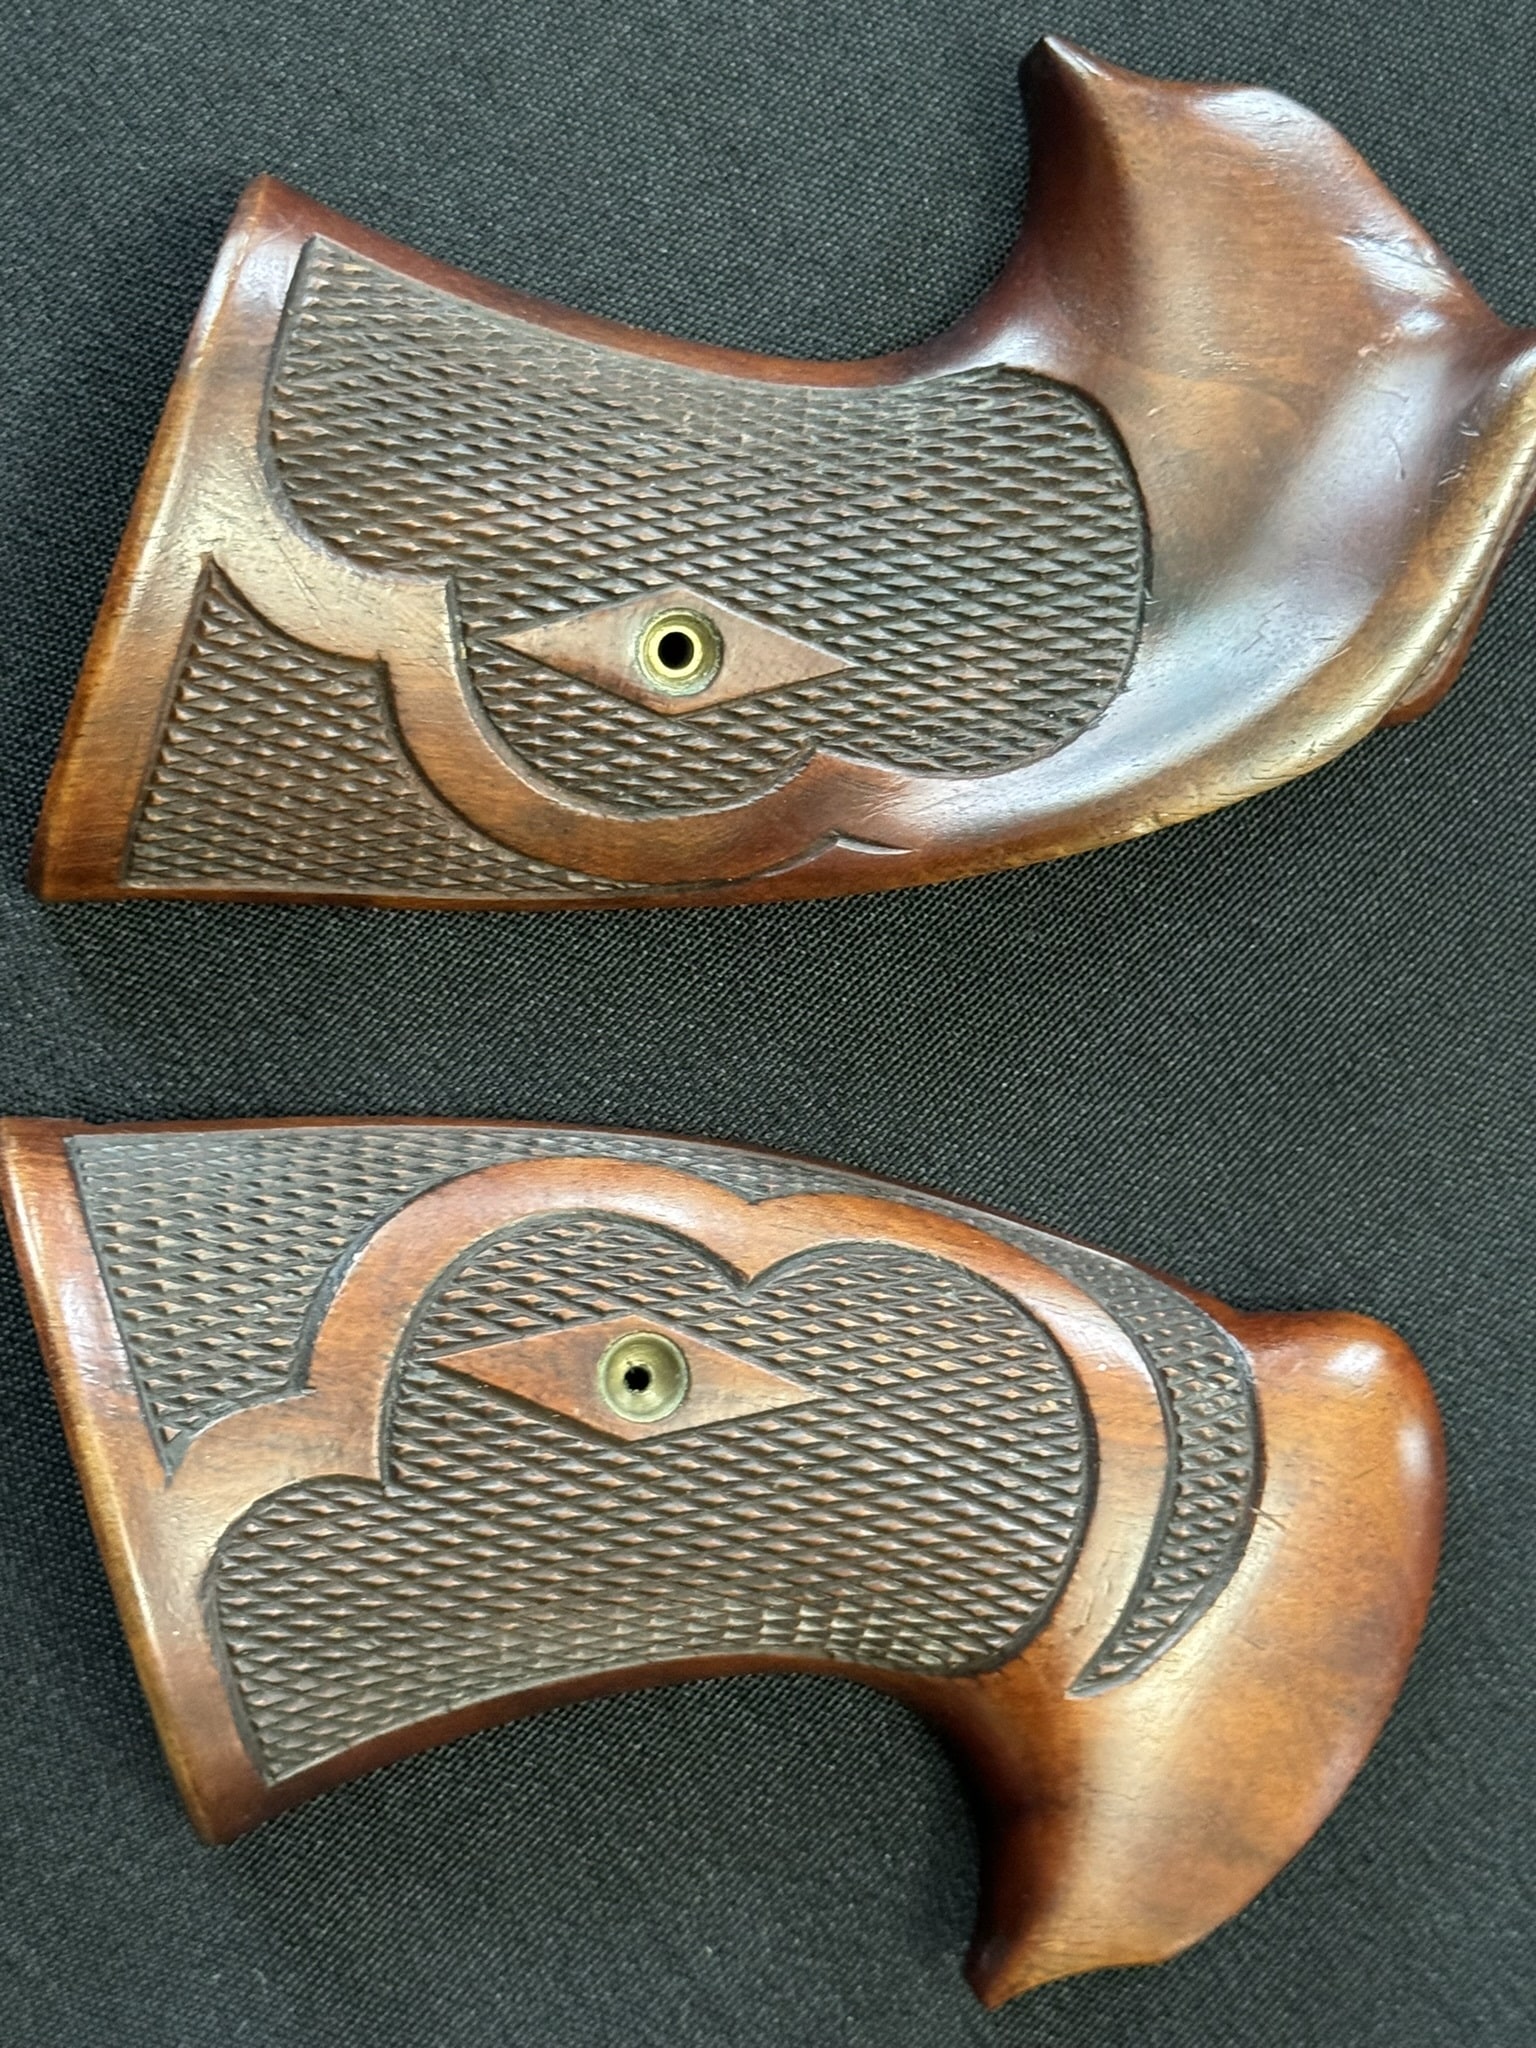
The most important inspection point is on the back of the grips. Many original Roper-shop examples show small square or rectangular holes, slots, or indentations on the inside of the panels. These are separate from the main grip-screw hole and are widely understood as marks left by a fixture or checkering saddle used to hold the wood while the checkering was cut.
Use cautious language when evaluating them. Matching jig holes on both panels are strong supporting evidence, especially when the marks have age-consistent edges and sit naturally within the inletting. However, their absence does not automatically condemn a set, and their presence does not automatically authenticate one. Other makers used shop fixtures too, and altered or copied stocks can confuse the picture.
The large screw opening and escutcheon hardware serve the grip screw. The small square or rectangular marks are the identification clues.
Look for corresponding fixture marks, similar aging, matching inletting, and a consistent hand-made layout.
Fresh, sharp, or splintered edges can suggest later drilling, while darkened worn edges better match period handling.
| Reverse-Side Clue | What to Look For | How to Interpret It |
|---|---|---|
| Small jig holes or slots | Square or rectangular marks inside the panels, separate from the grip-screw passage. | Strong supporting evidence for period Roper-shop construction when paired with the right exterior and inletting. |
| Main grip-screw hole | Central hole aligned with the screw, escutcheon, or bushing. | Necessary hardware feature, but not the same thing as a jig-hole identification mark. |
| Panel-to-panel consistency | Similar aging, comparable fixture marks, and compatible inletting on both sides. | Helps detect mismatched panels, later repair work, or altered stocks. |
| Pencil, stamped, or carved notes | Numbers, frame notes, or hand-written fit references inside the wood. | Useful provenance clues, but they should agree with the frame fit and overall age. |
| Fresh cuts or extra holes | Bright raw wood, rough drilling, plugged holes, or sanding around the inletting. | Possible signs of later alteration, forced fit, or reproduction work. |
Reverse-Side and Detail Photo Study
Click any photograph to expand it. The expanded image includes an × close button, and the Escape key also closes the viewer.
Exterior Design Features That Support the Identification
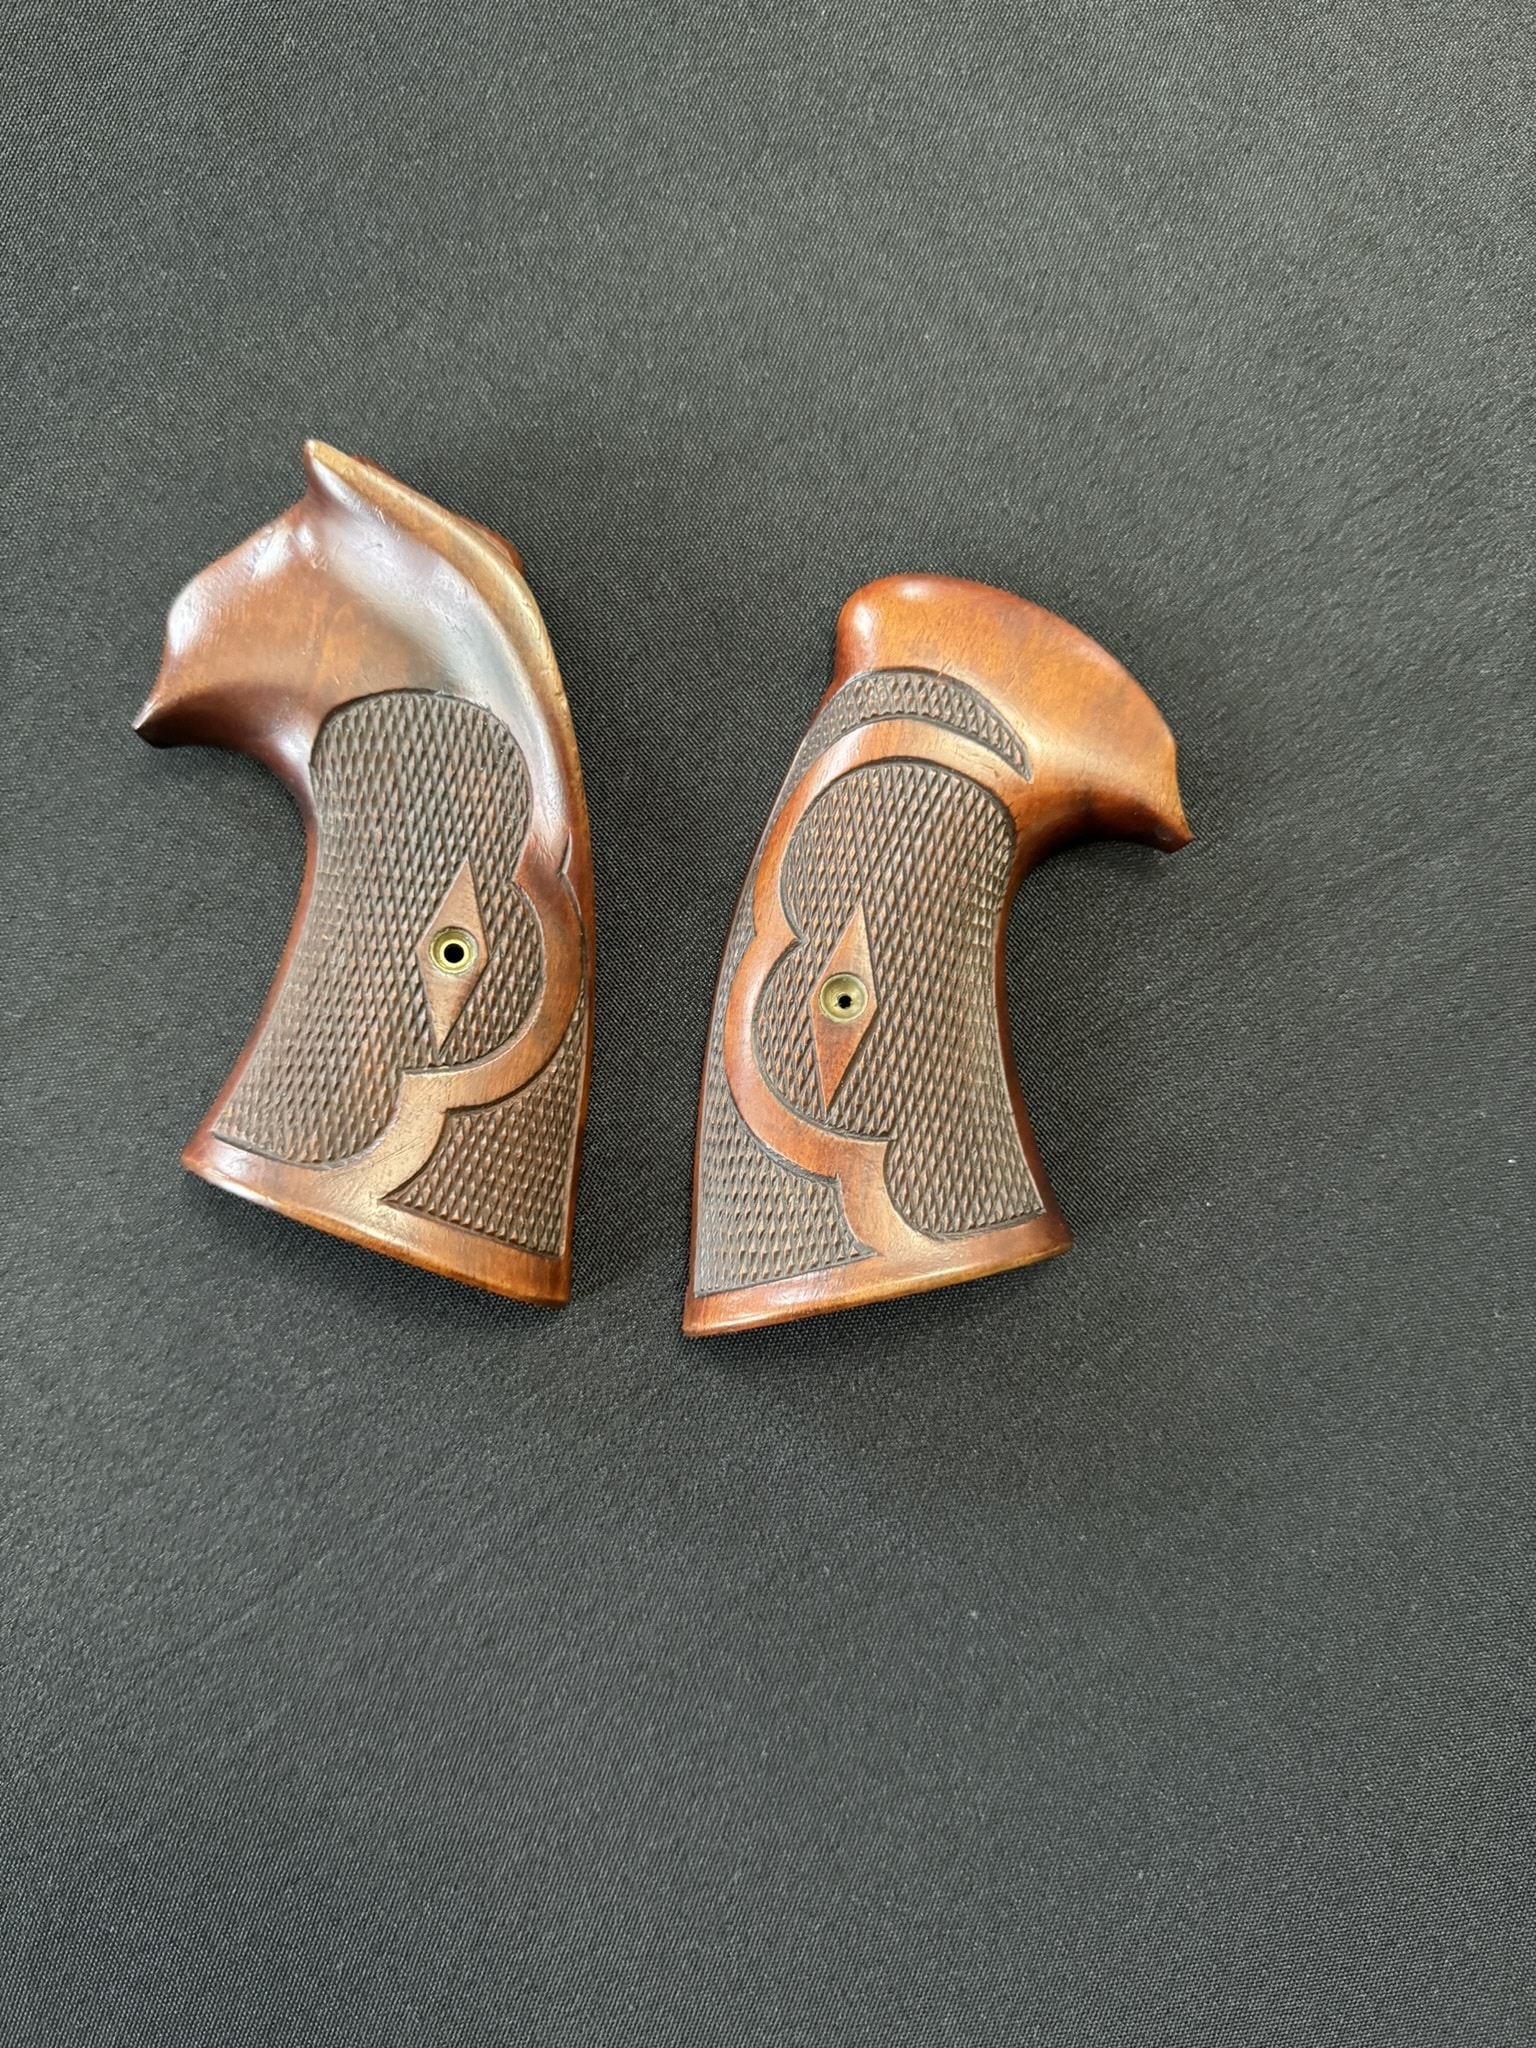
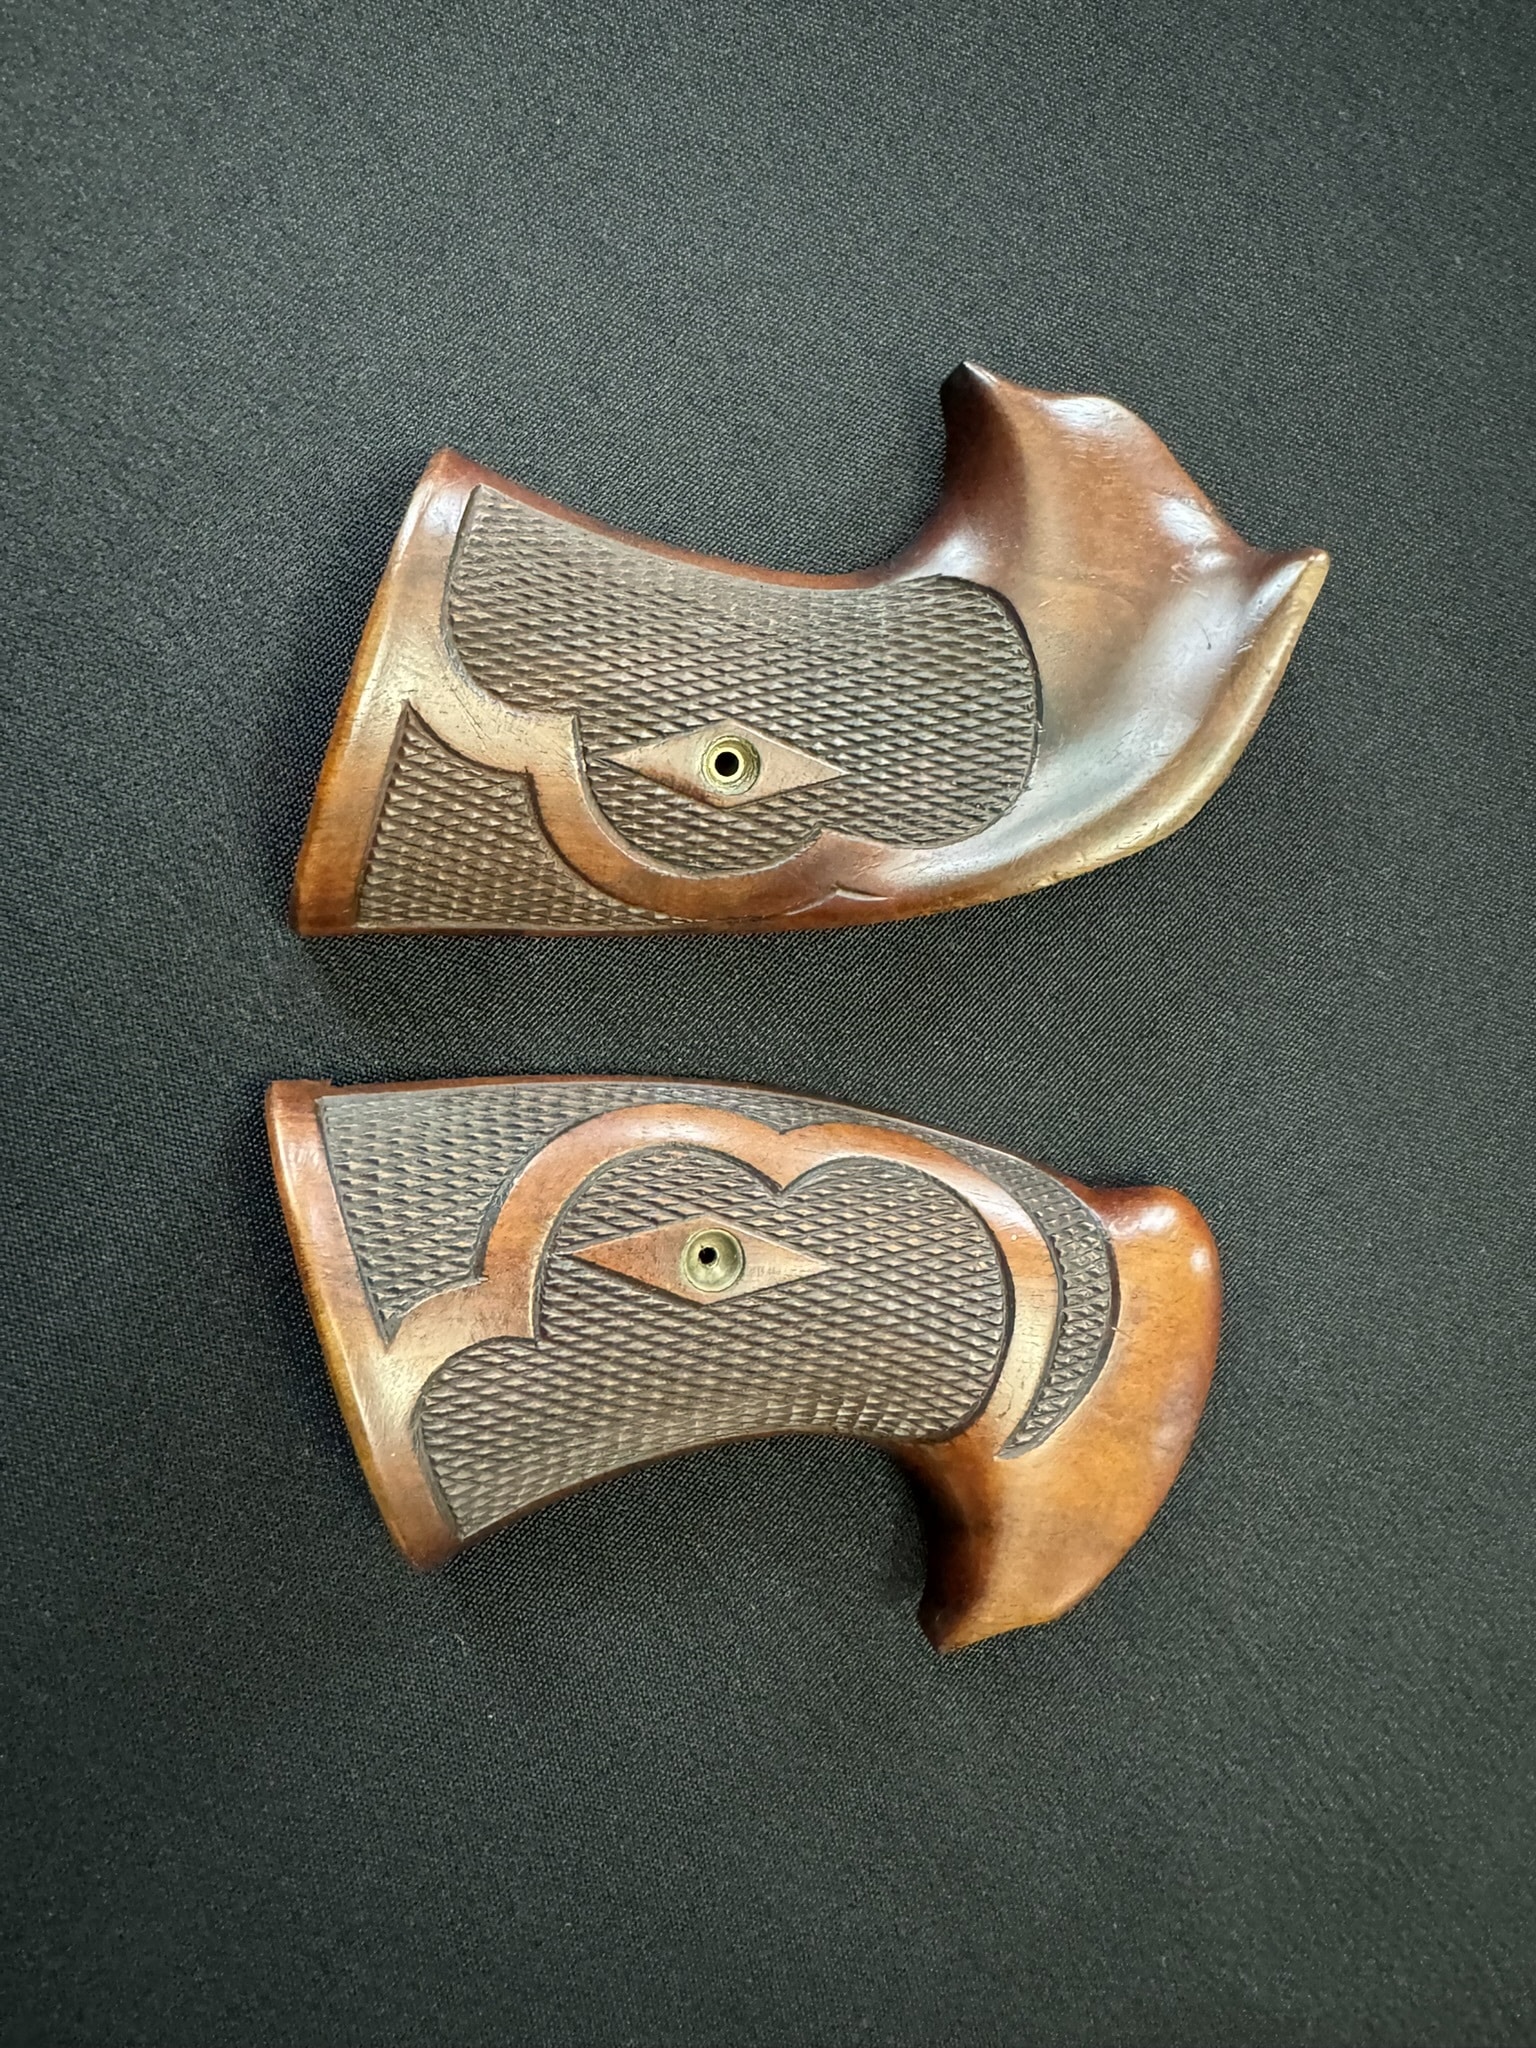
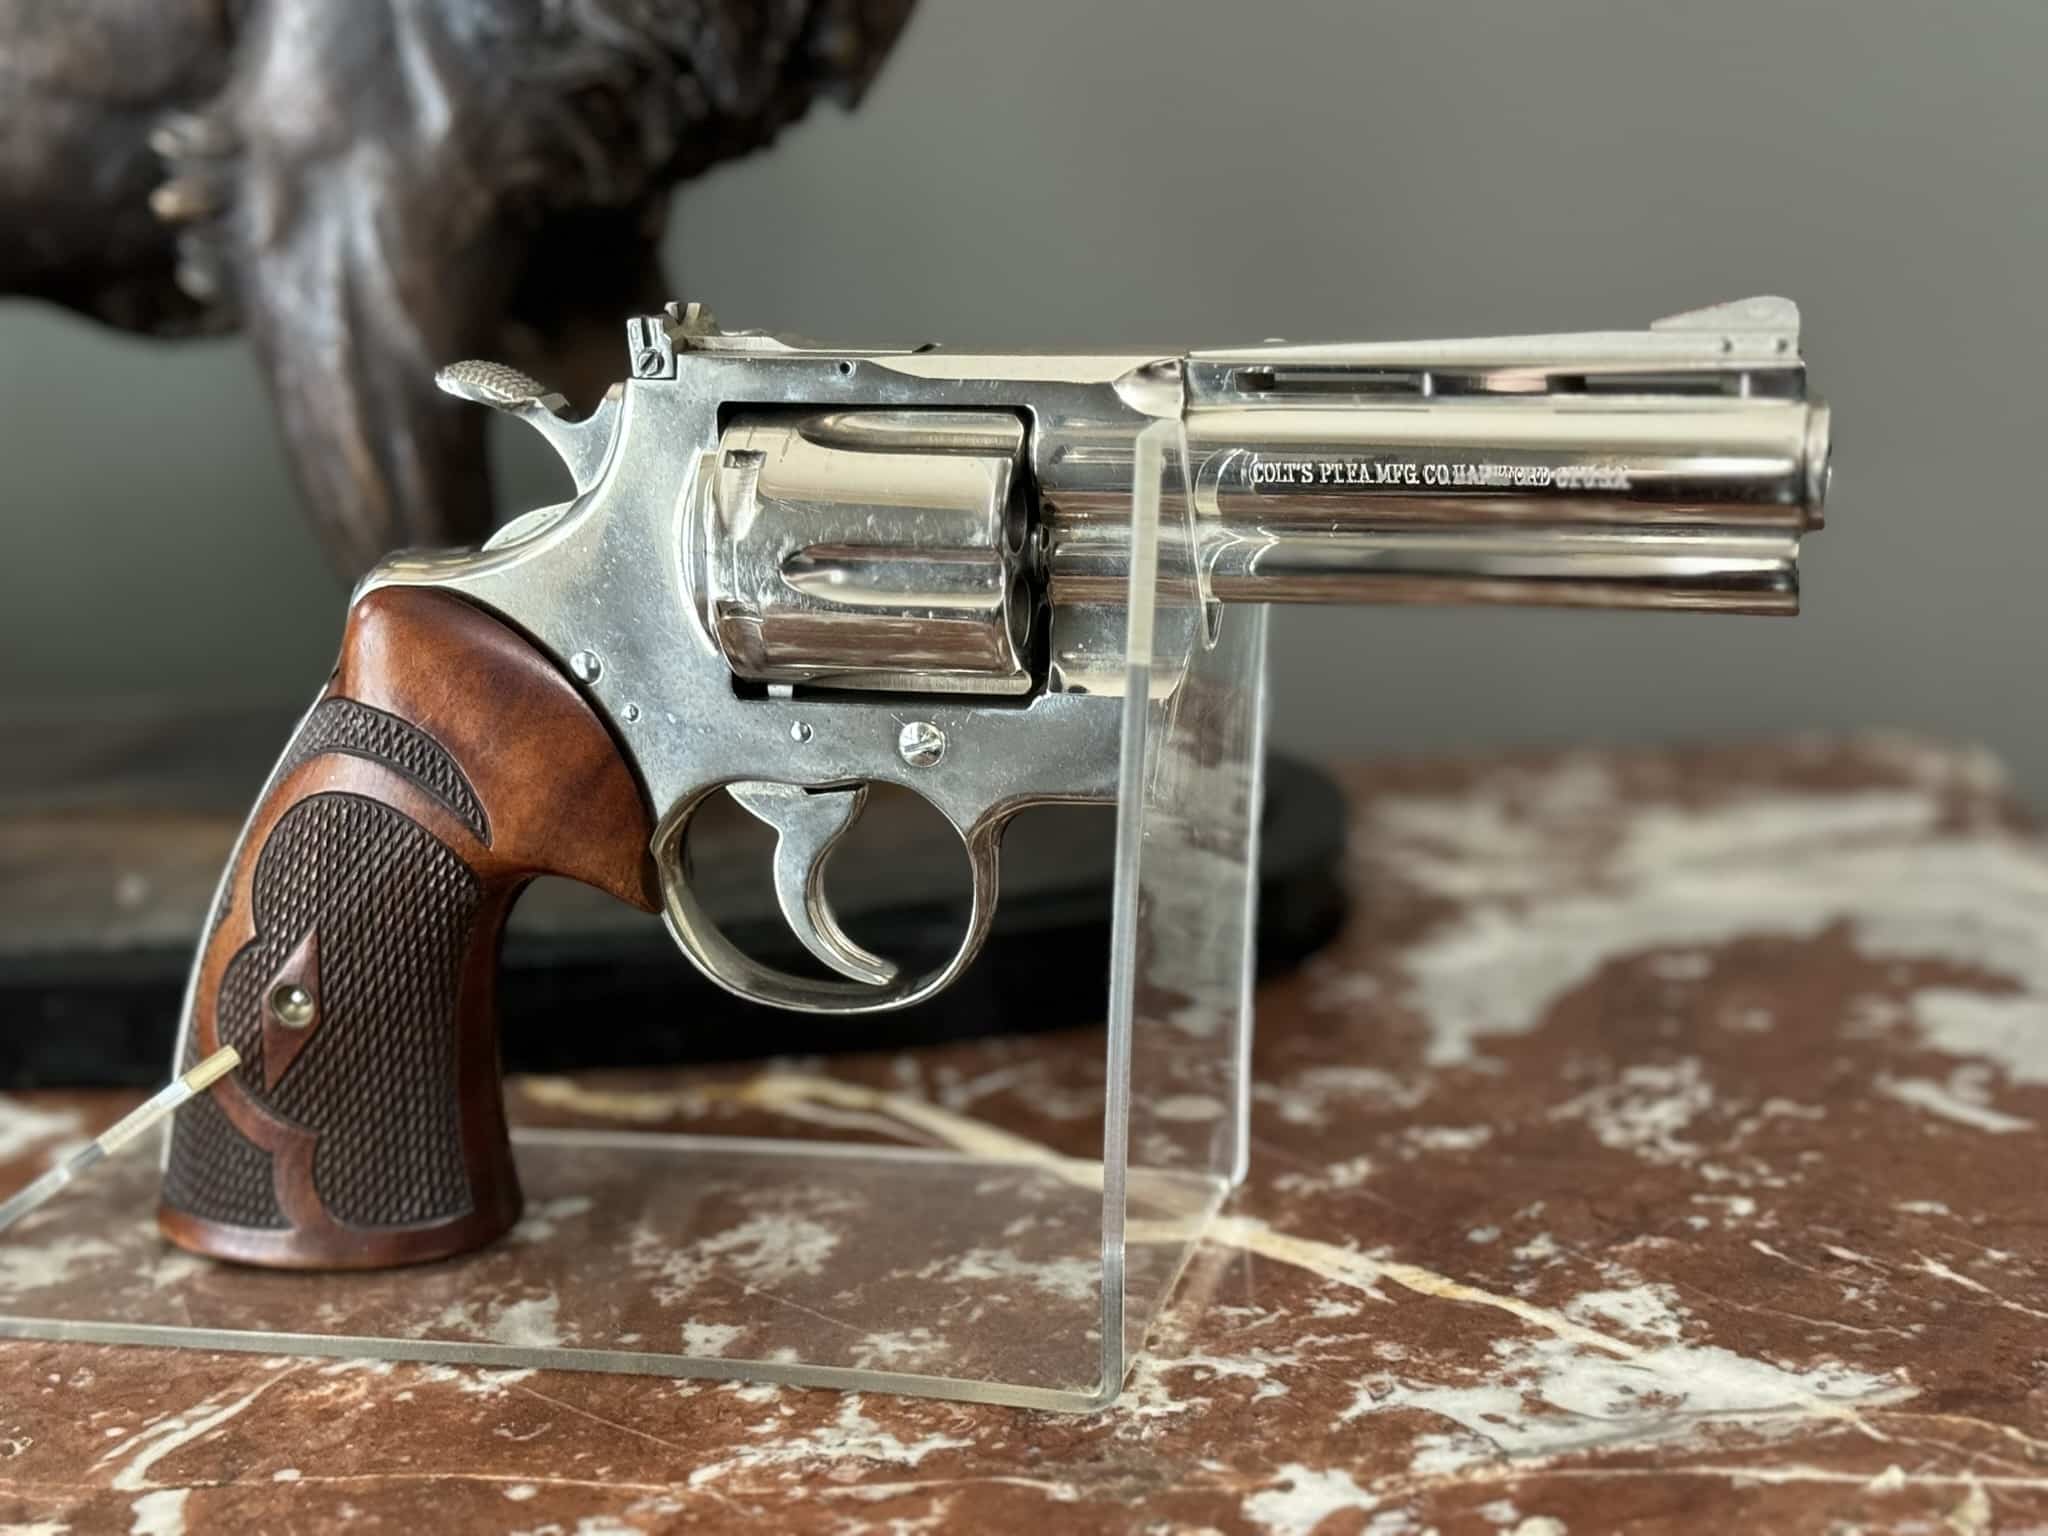
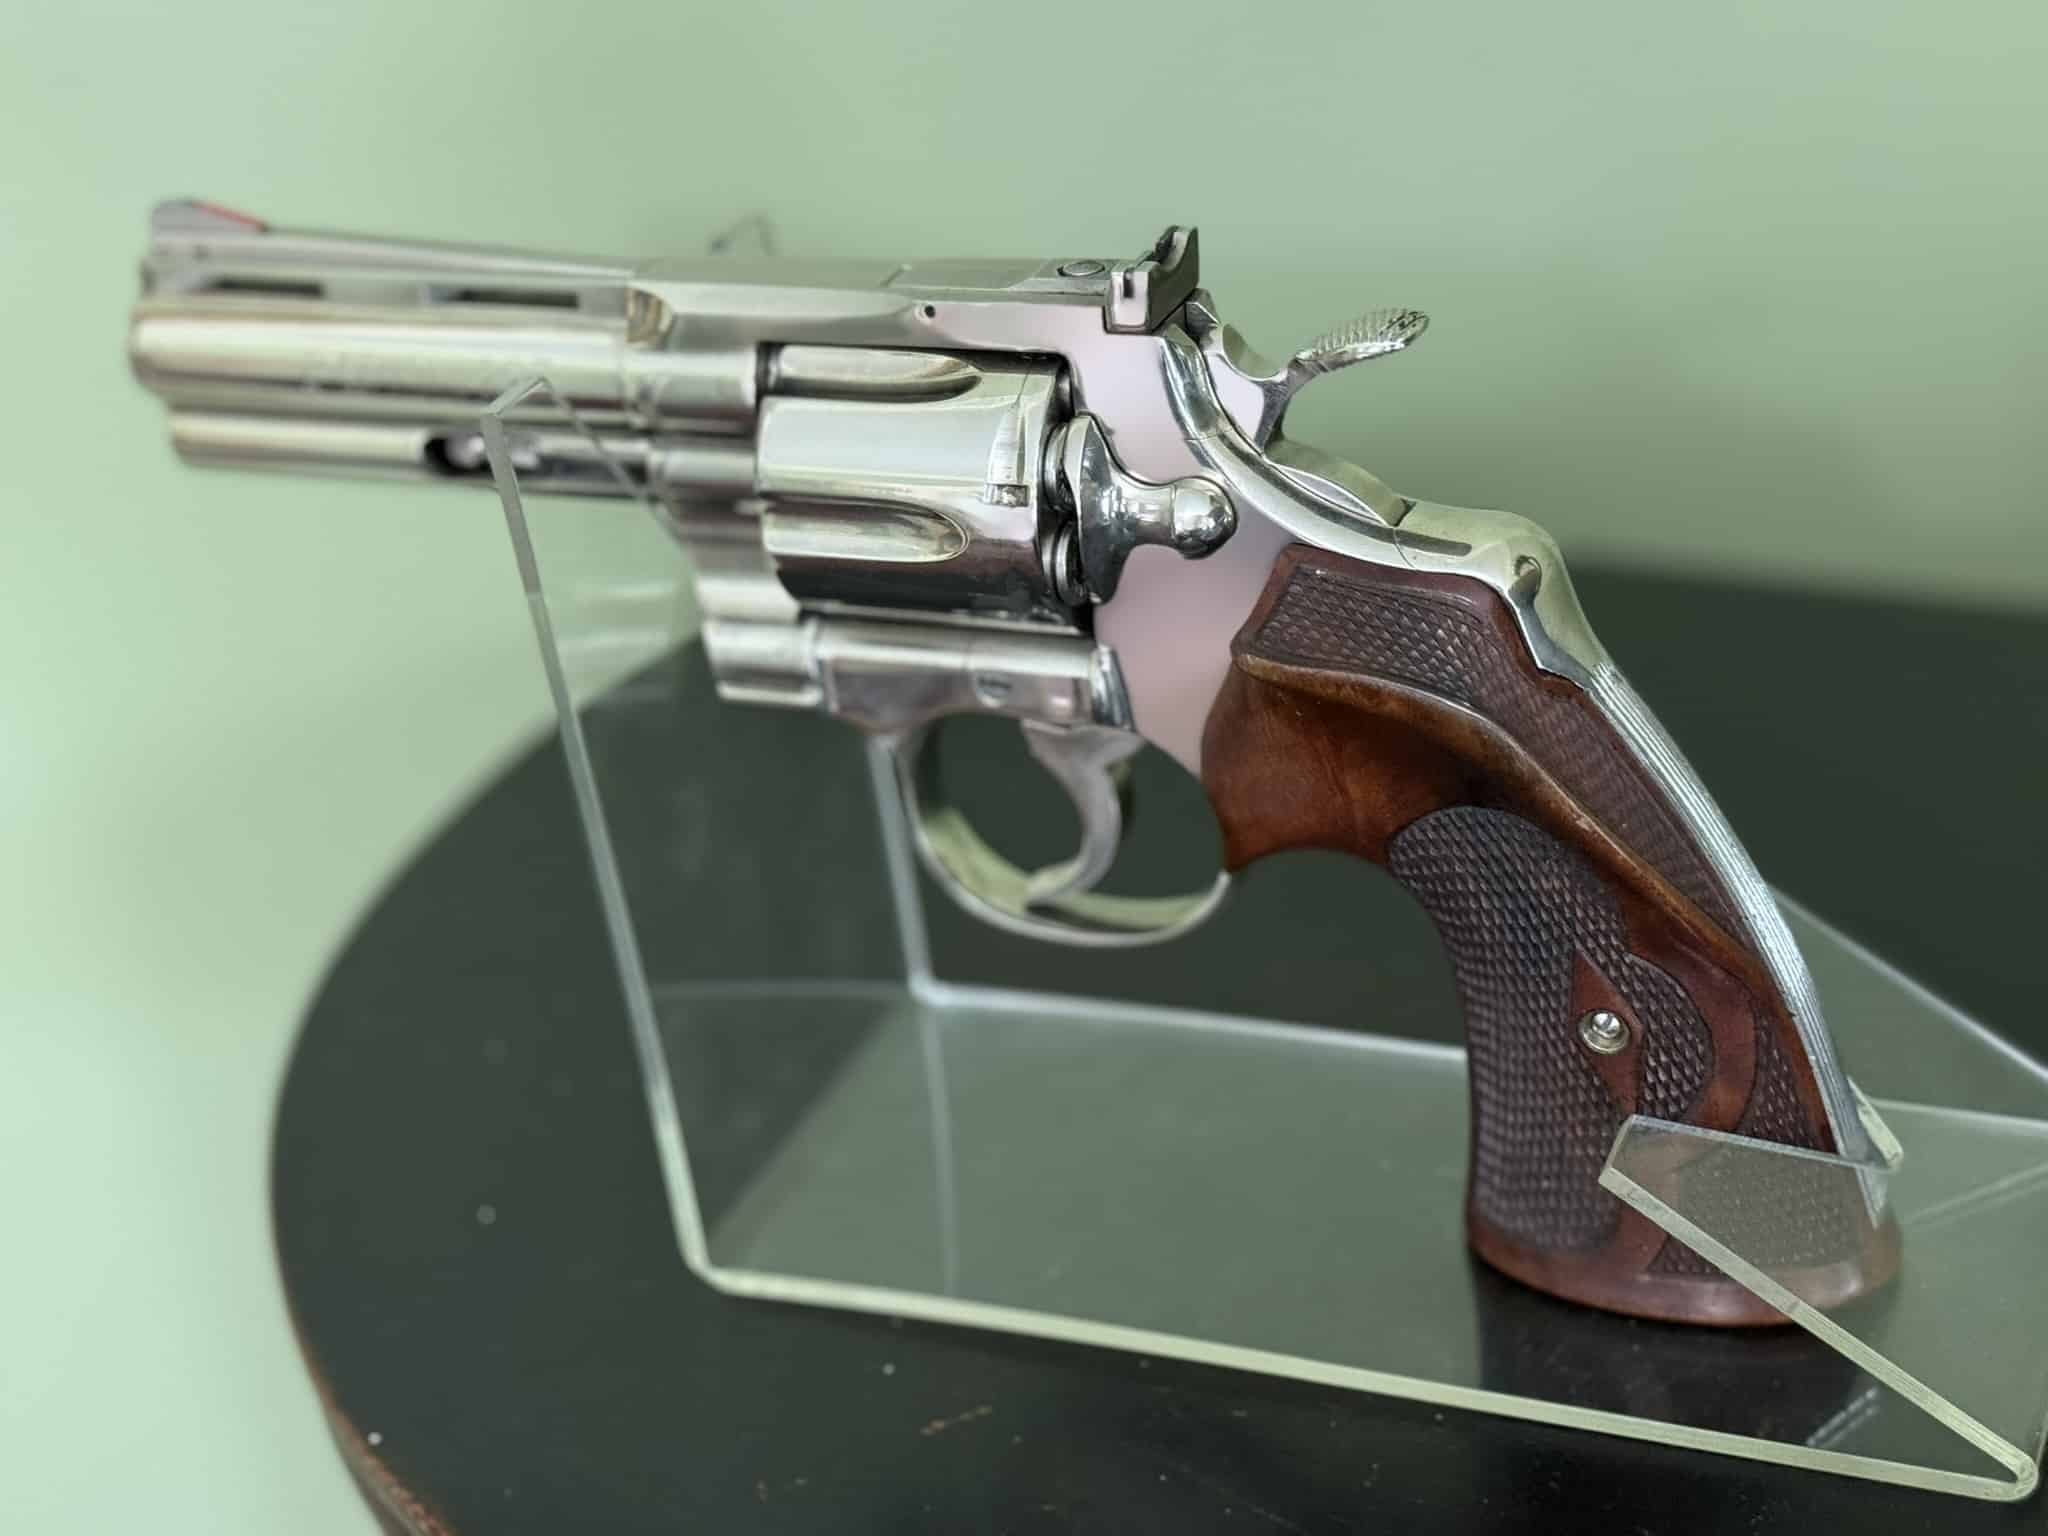
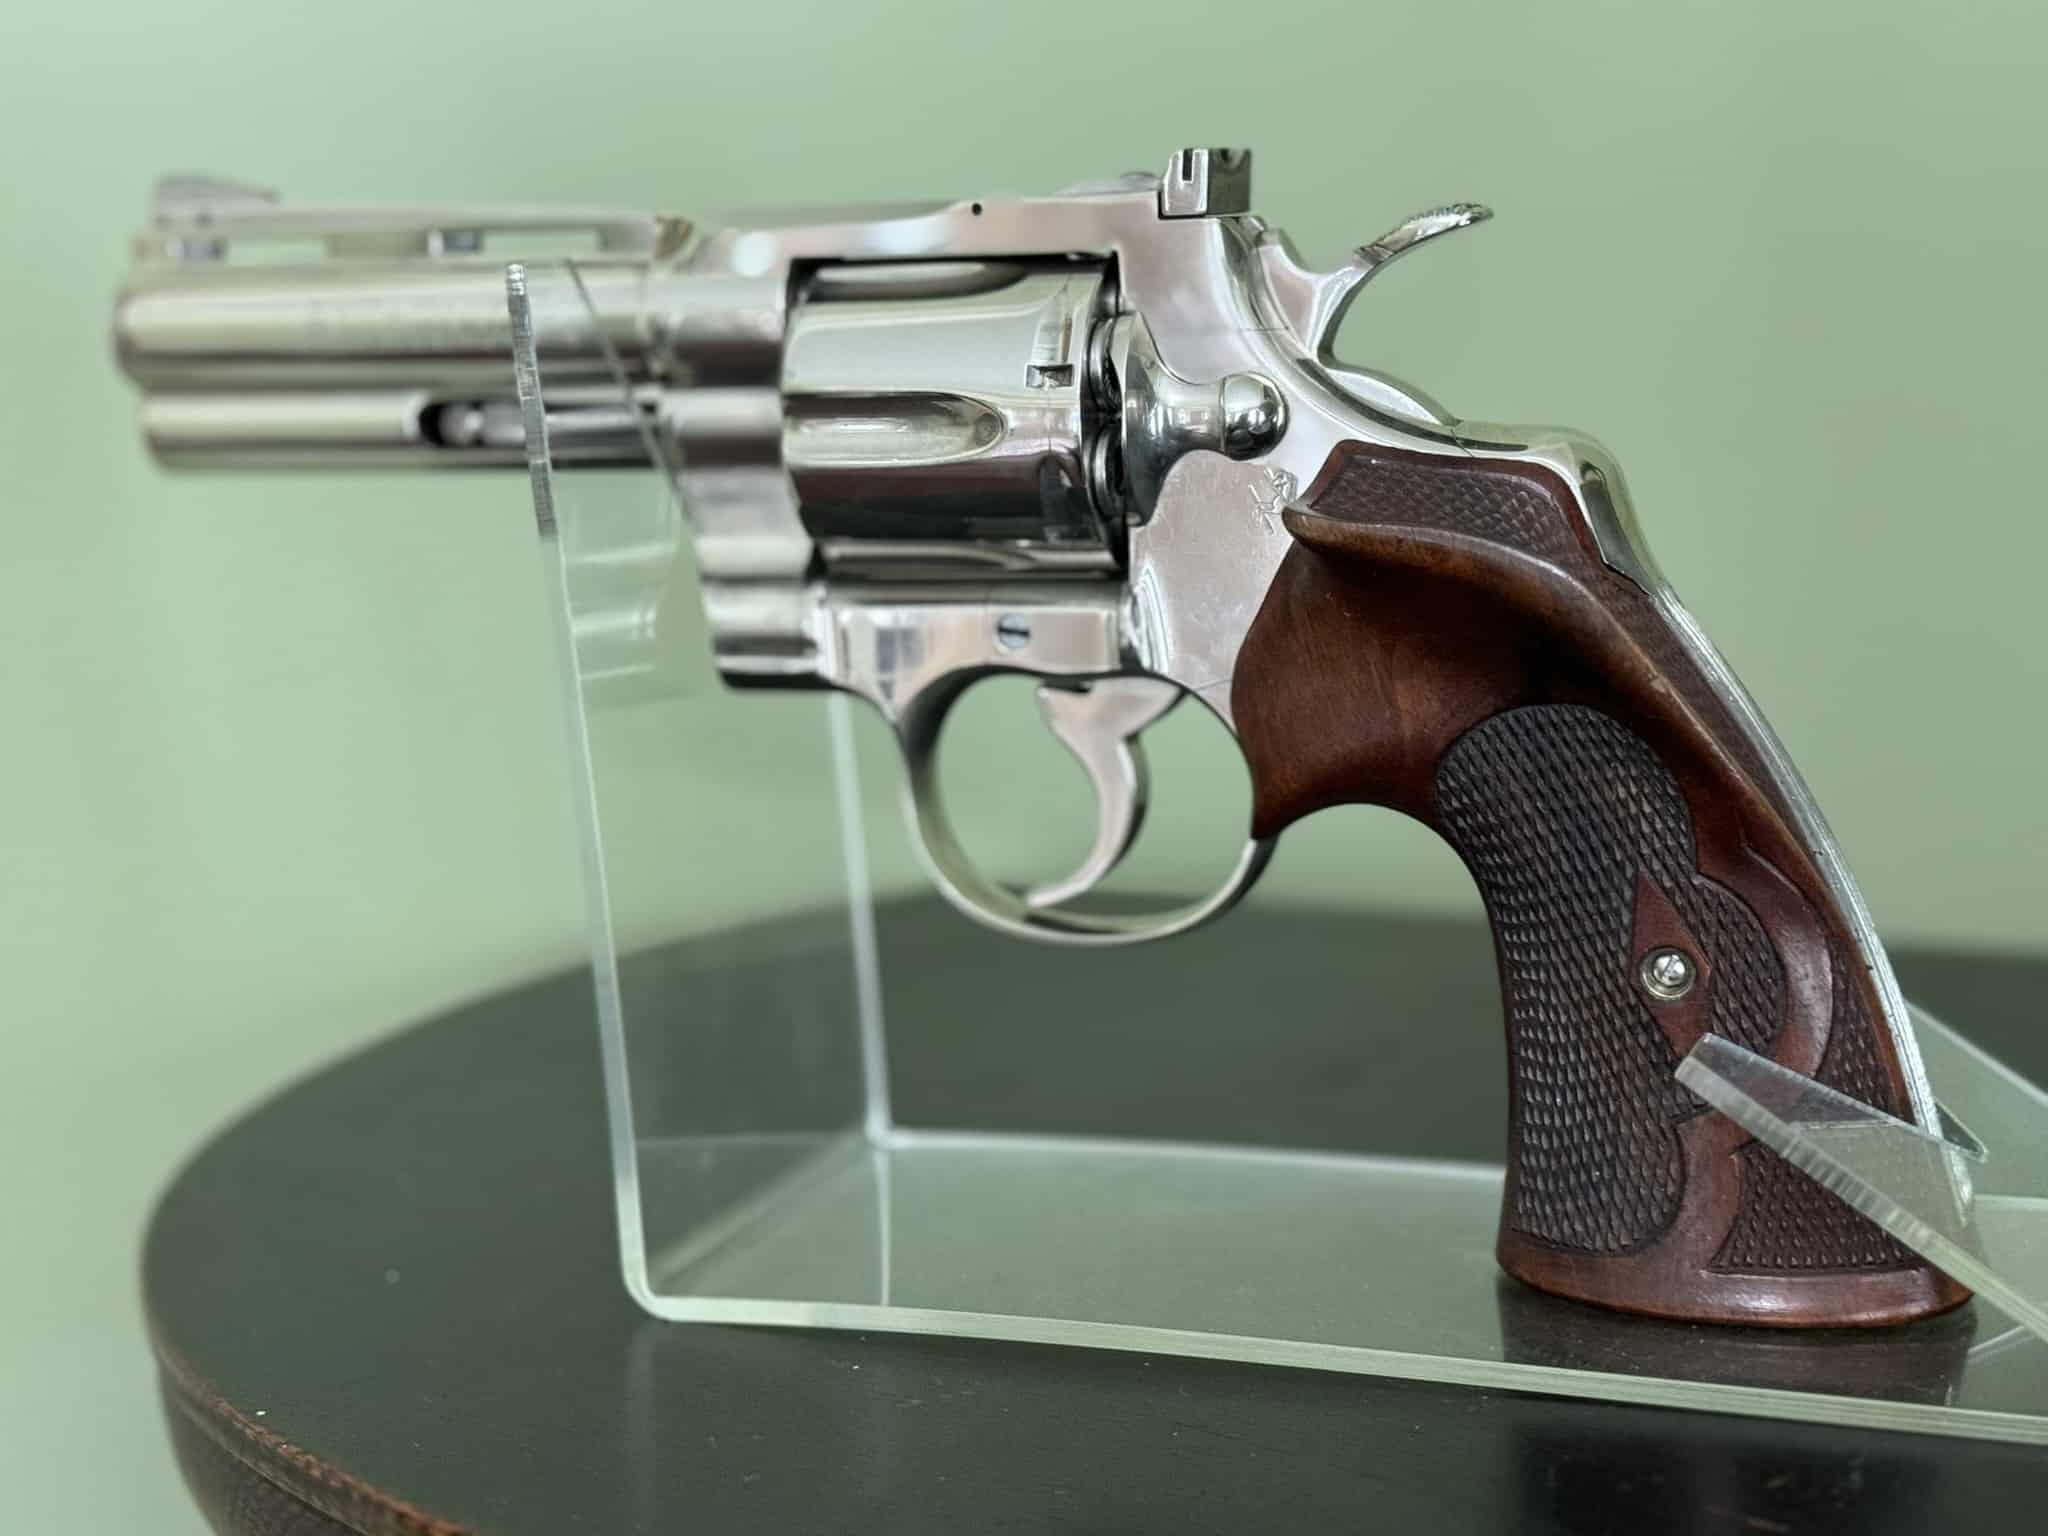
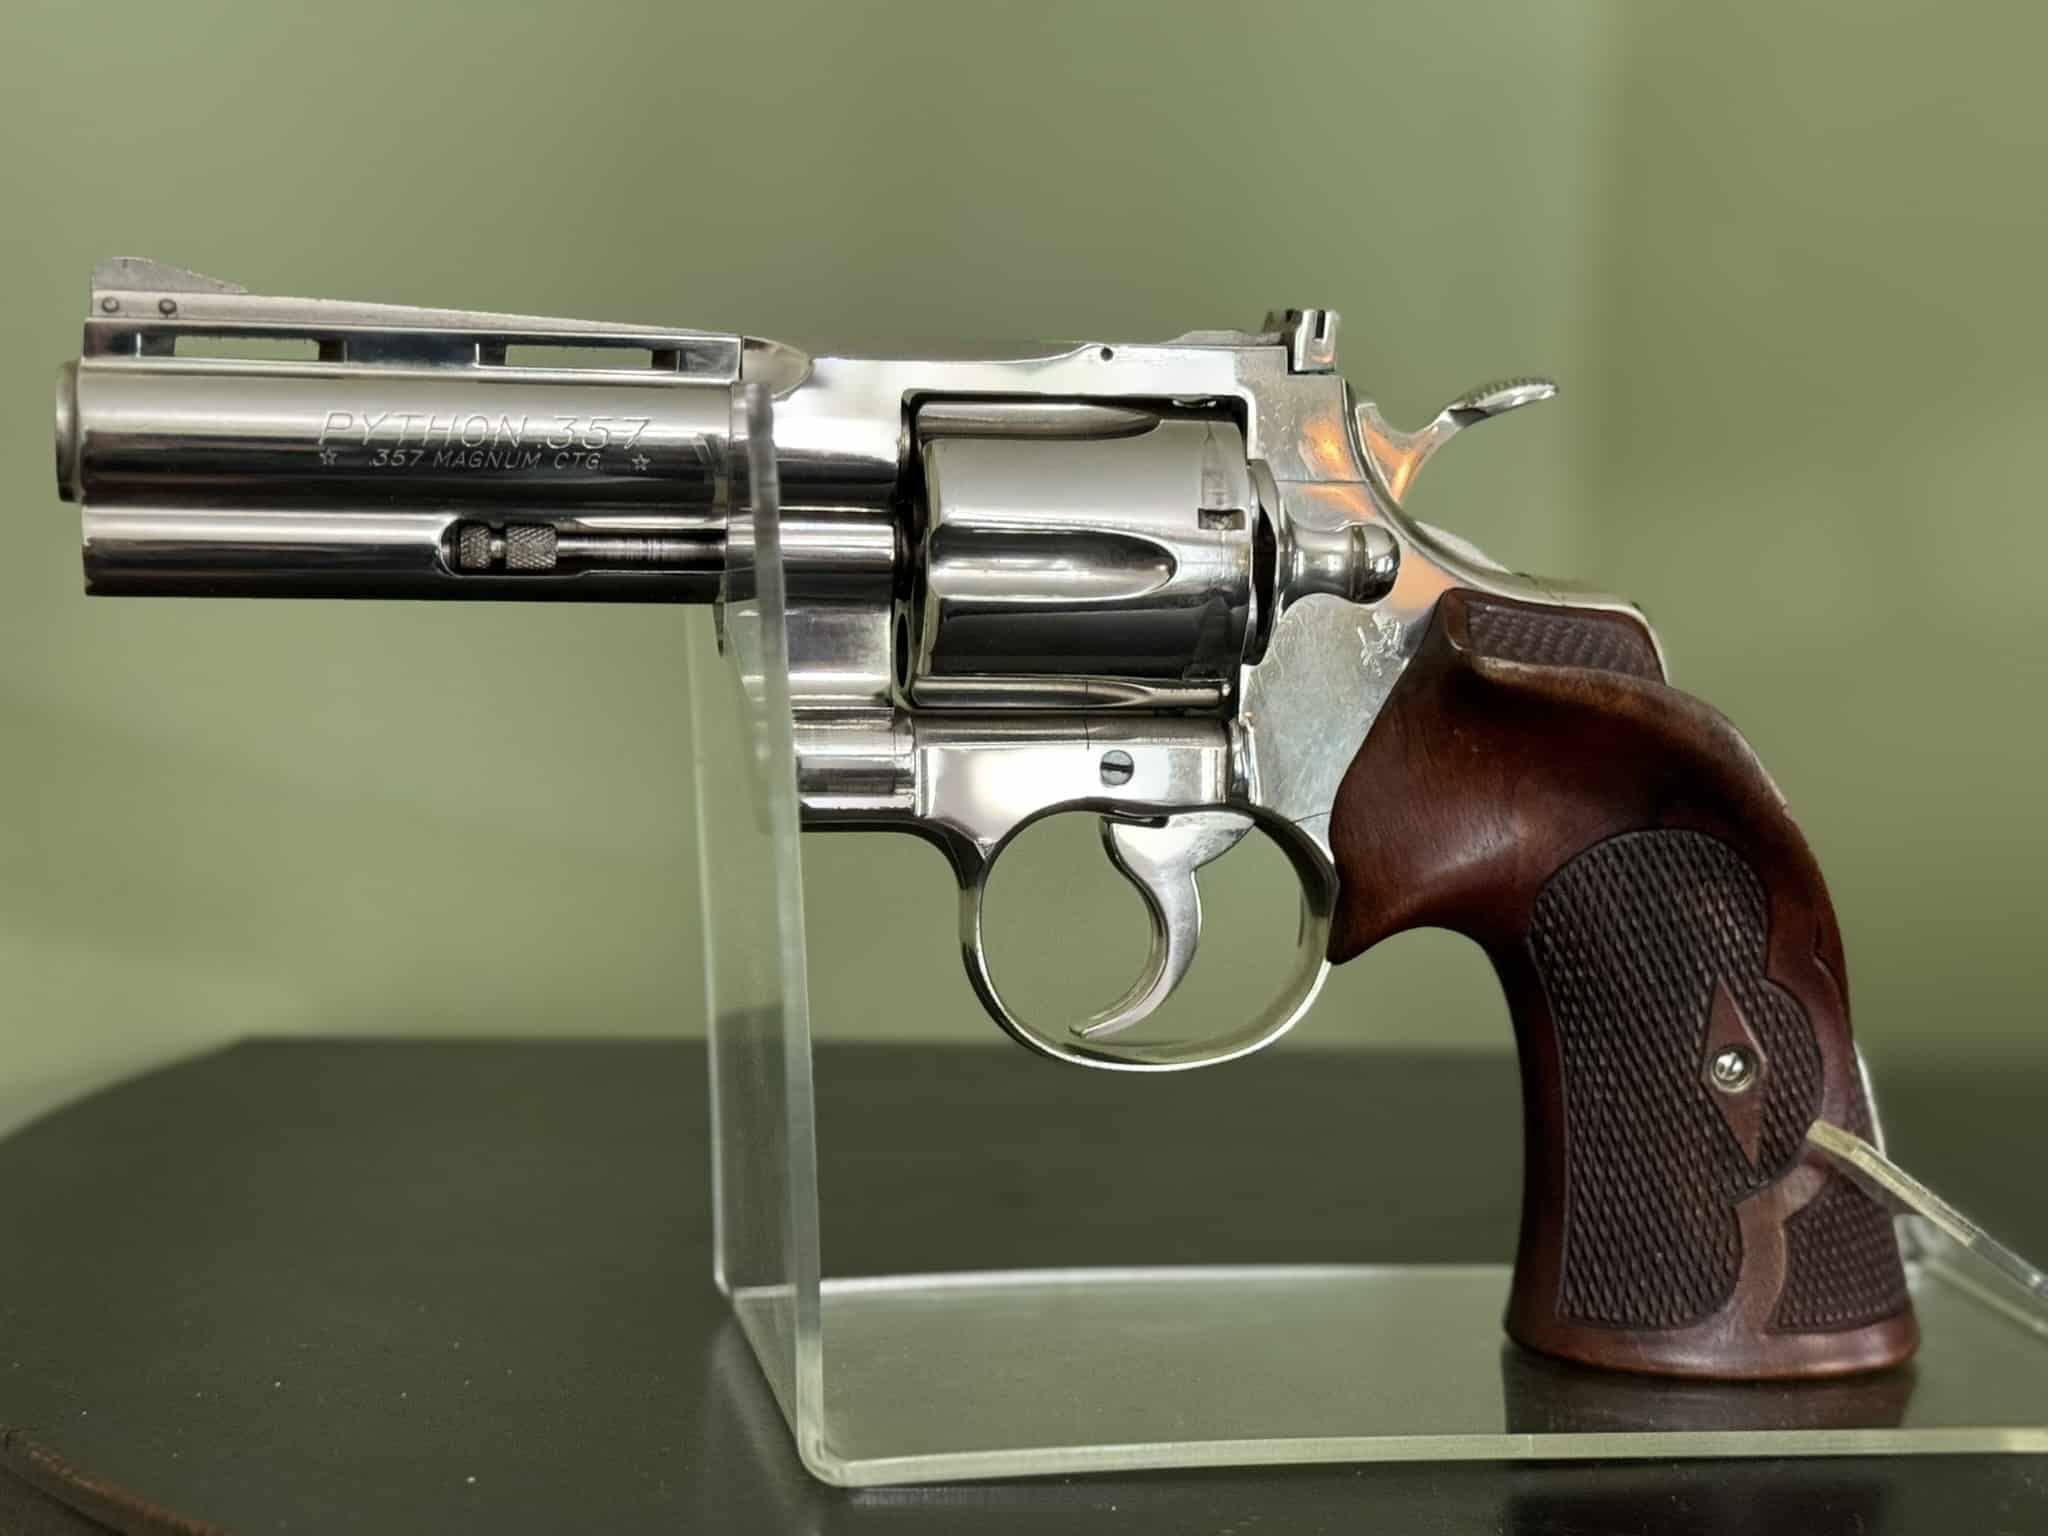
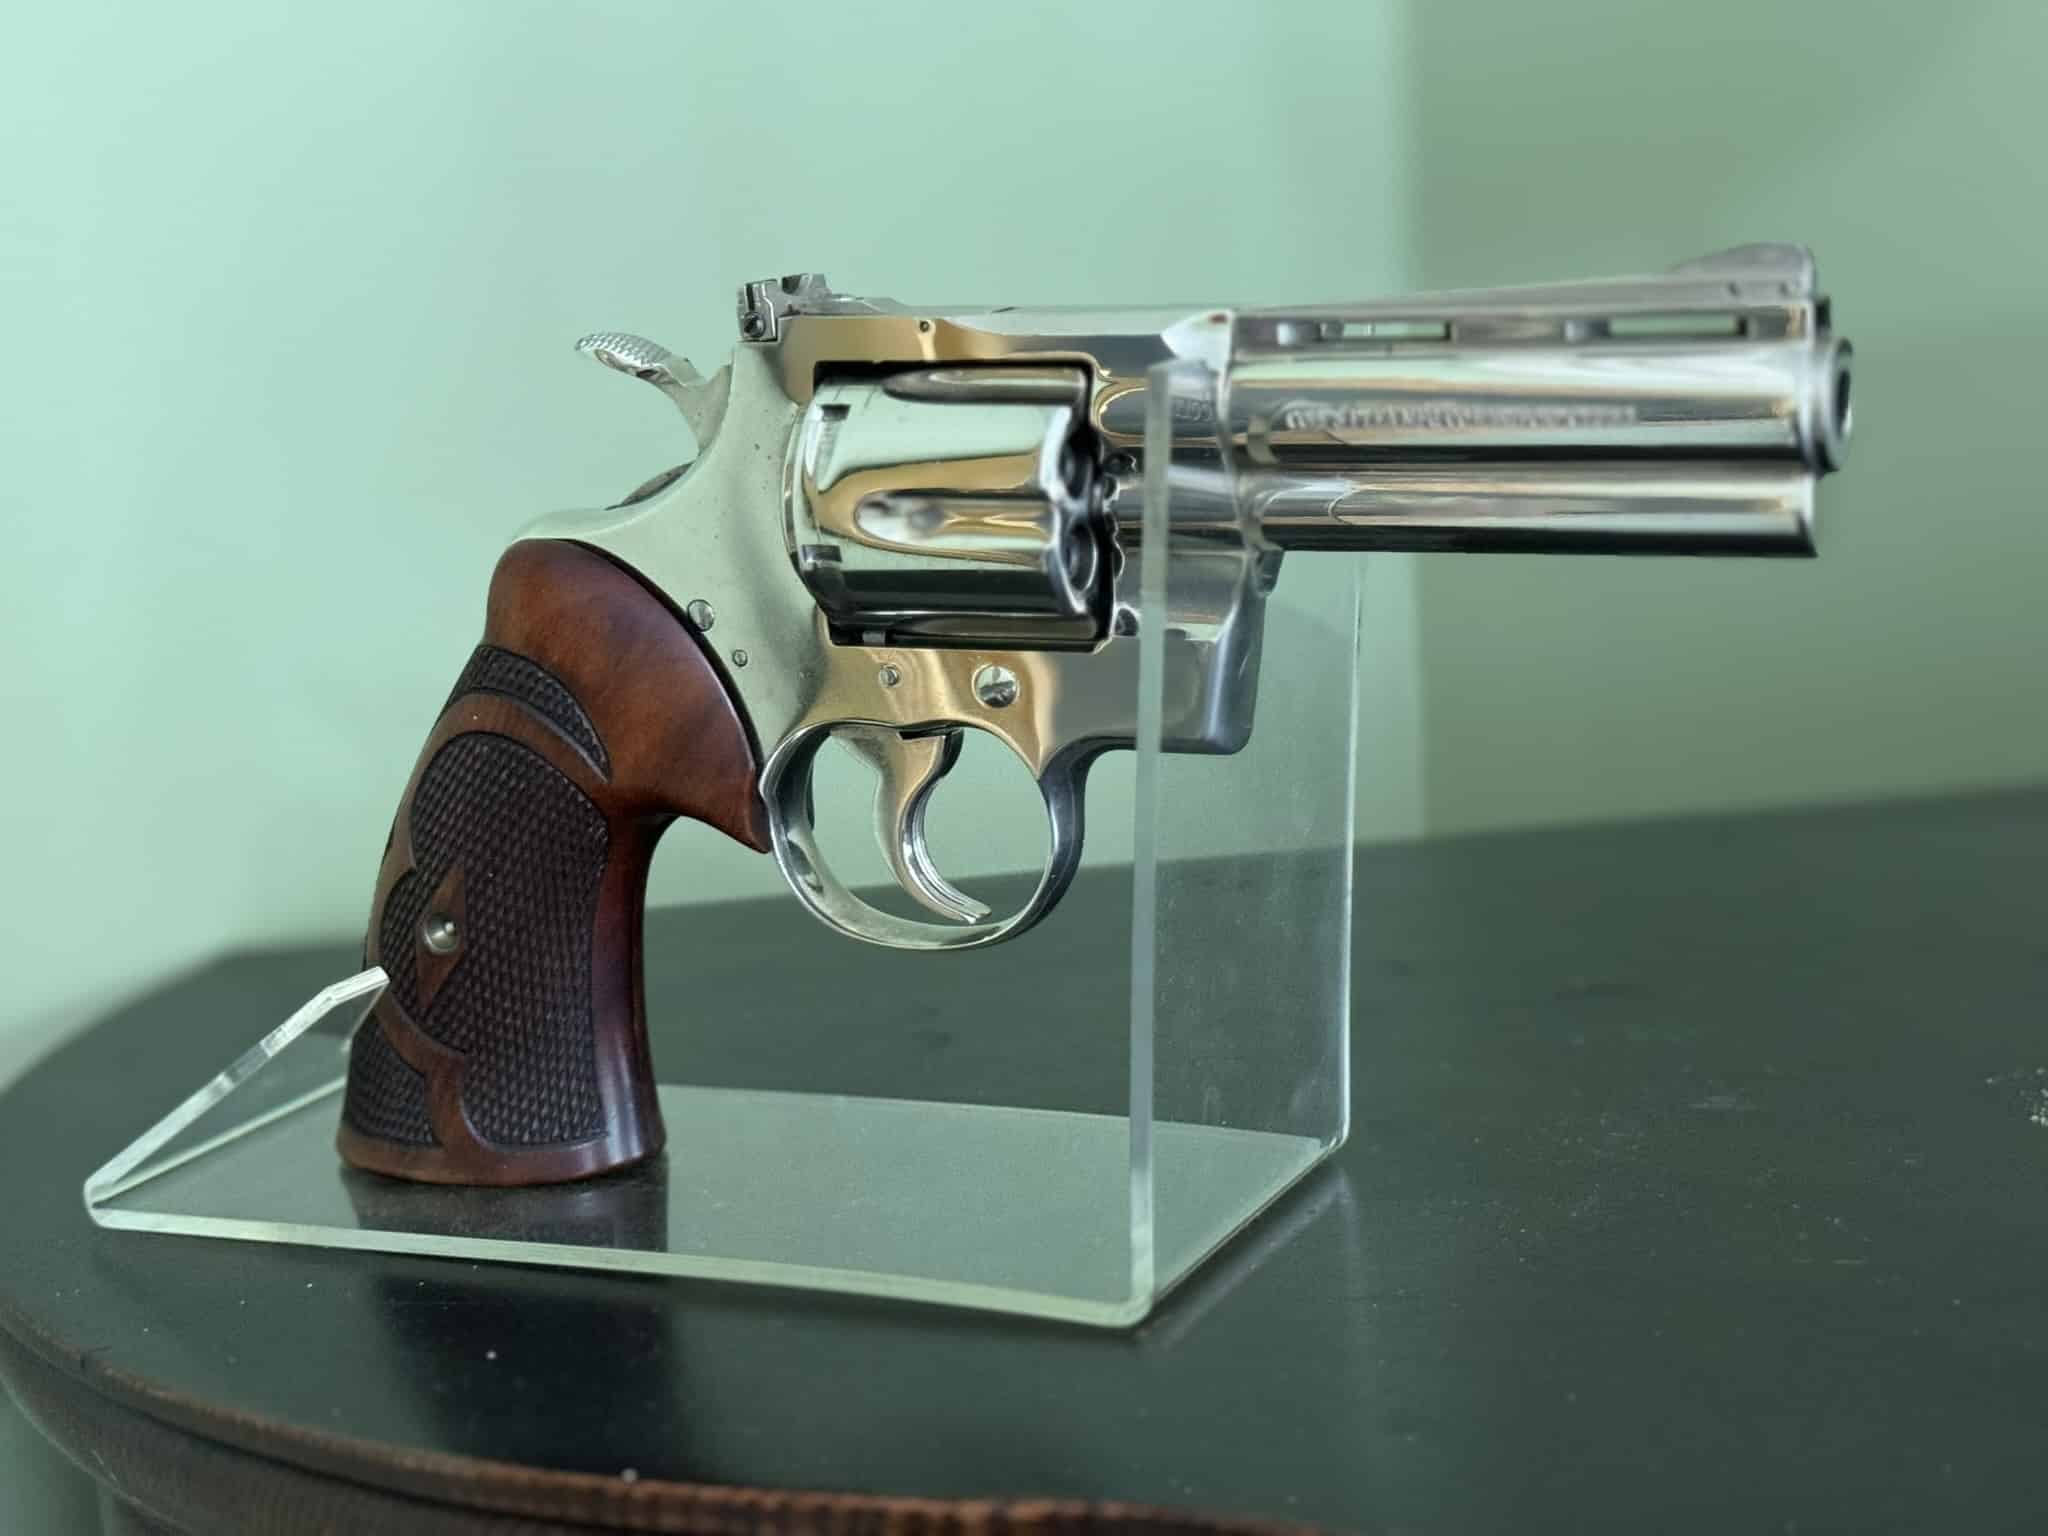
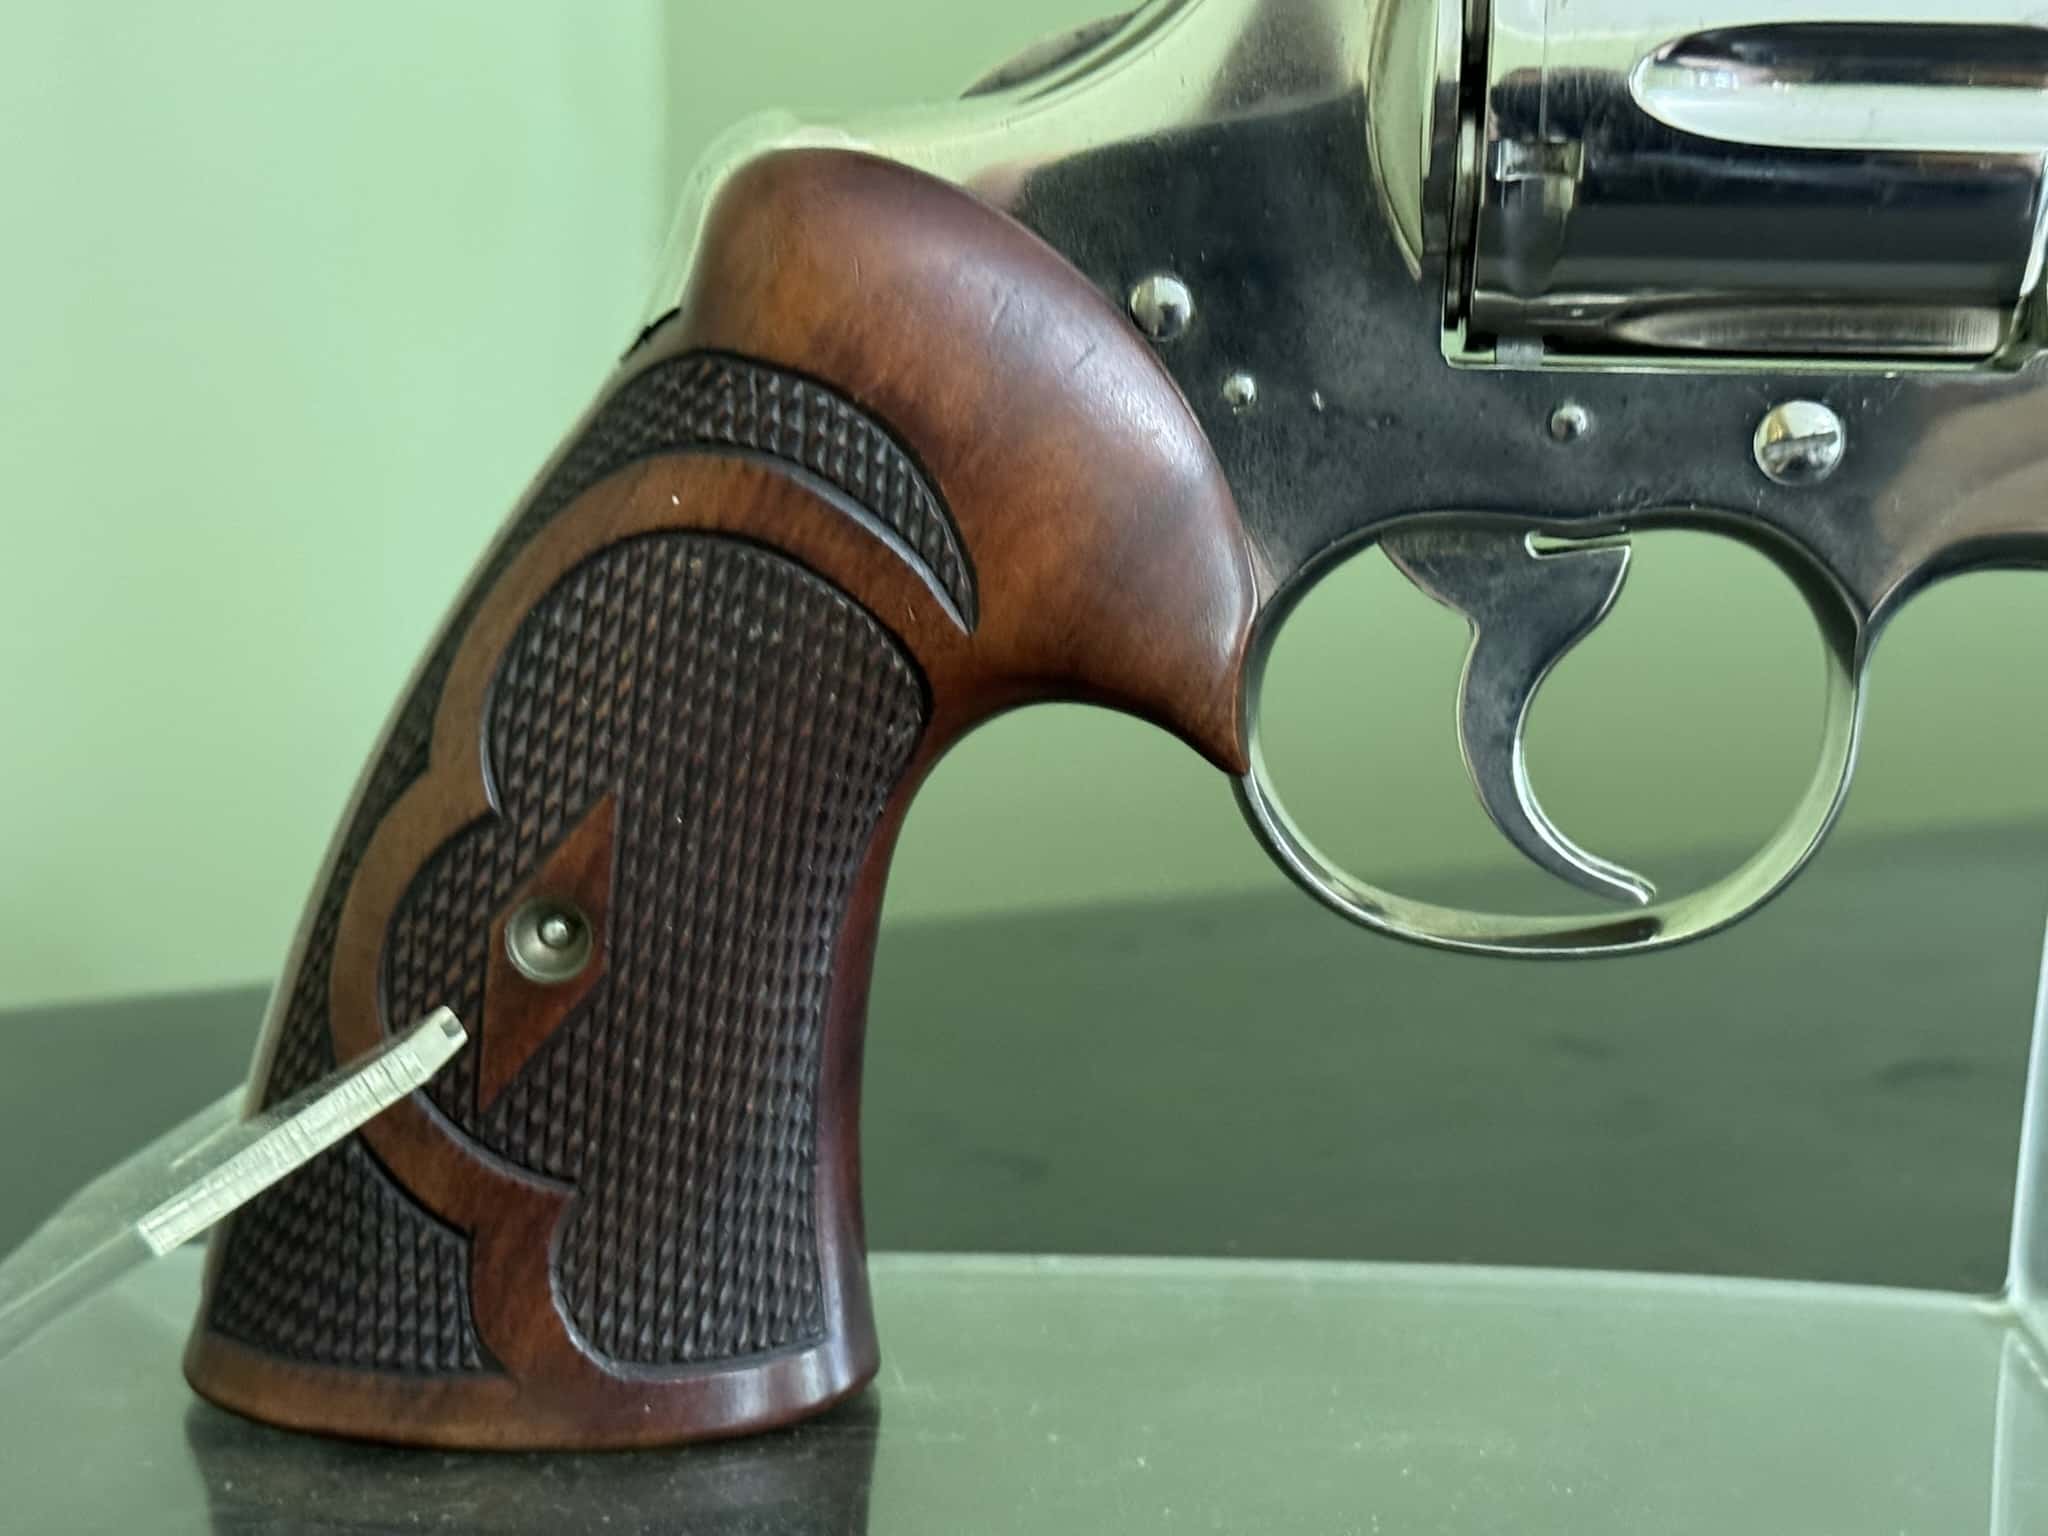
Jig holes matter because they are hard-to-see construction evidence, but the outside still has to look right. A believable Roper grip has sculptural flow. The checkering is not just a texture; it is part of a ribbon-like pattern that organizes the side panel, screw diamond, palm swell, and lower flare.
| Feature | Collector Inspection Point | Why It Matters |
|---|---|---|
| Thumb rest | A raised shelf that places the thumb consistently for deliberate target work. | One of the most recognizable Roper design elements, especially on right-hand target stocks. |
| Palm swell | A hand-filling swell that may be asymmetric depending on intended hand and use. | Shows the stock was shaped around hand position, not merely copied as a flat panel. |
| Finger grooves and filler | Front contouring and relief below the trigger guard for the middle finger. | Roper theory emphasized support and repeatable grip placement under the frame. |
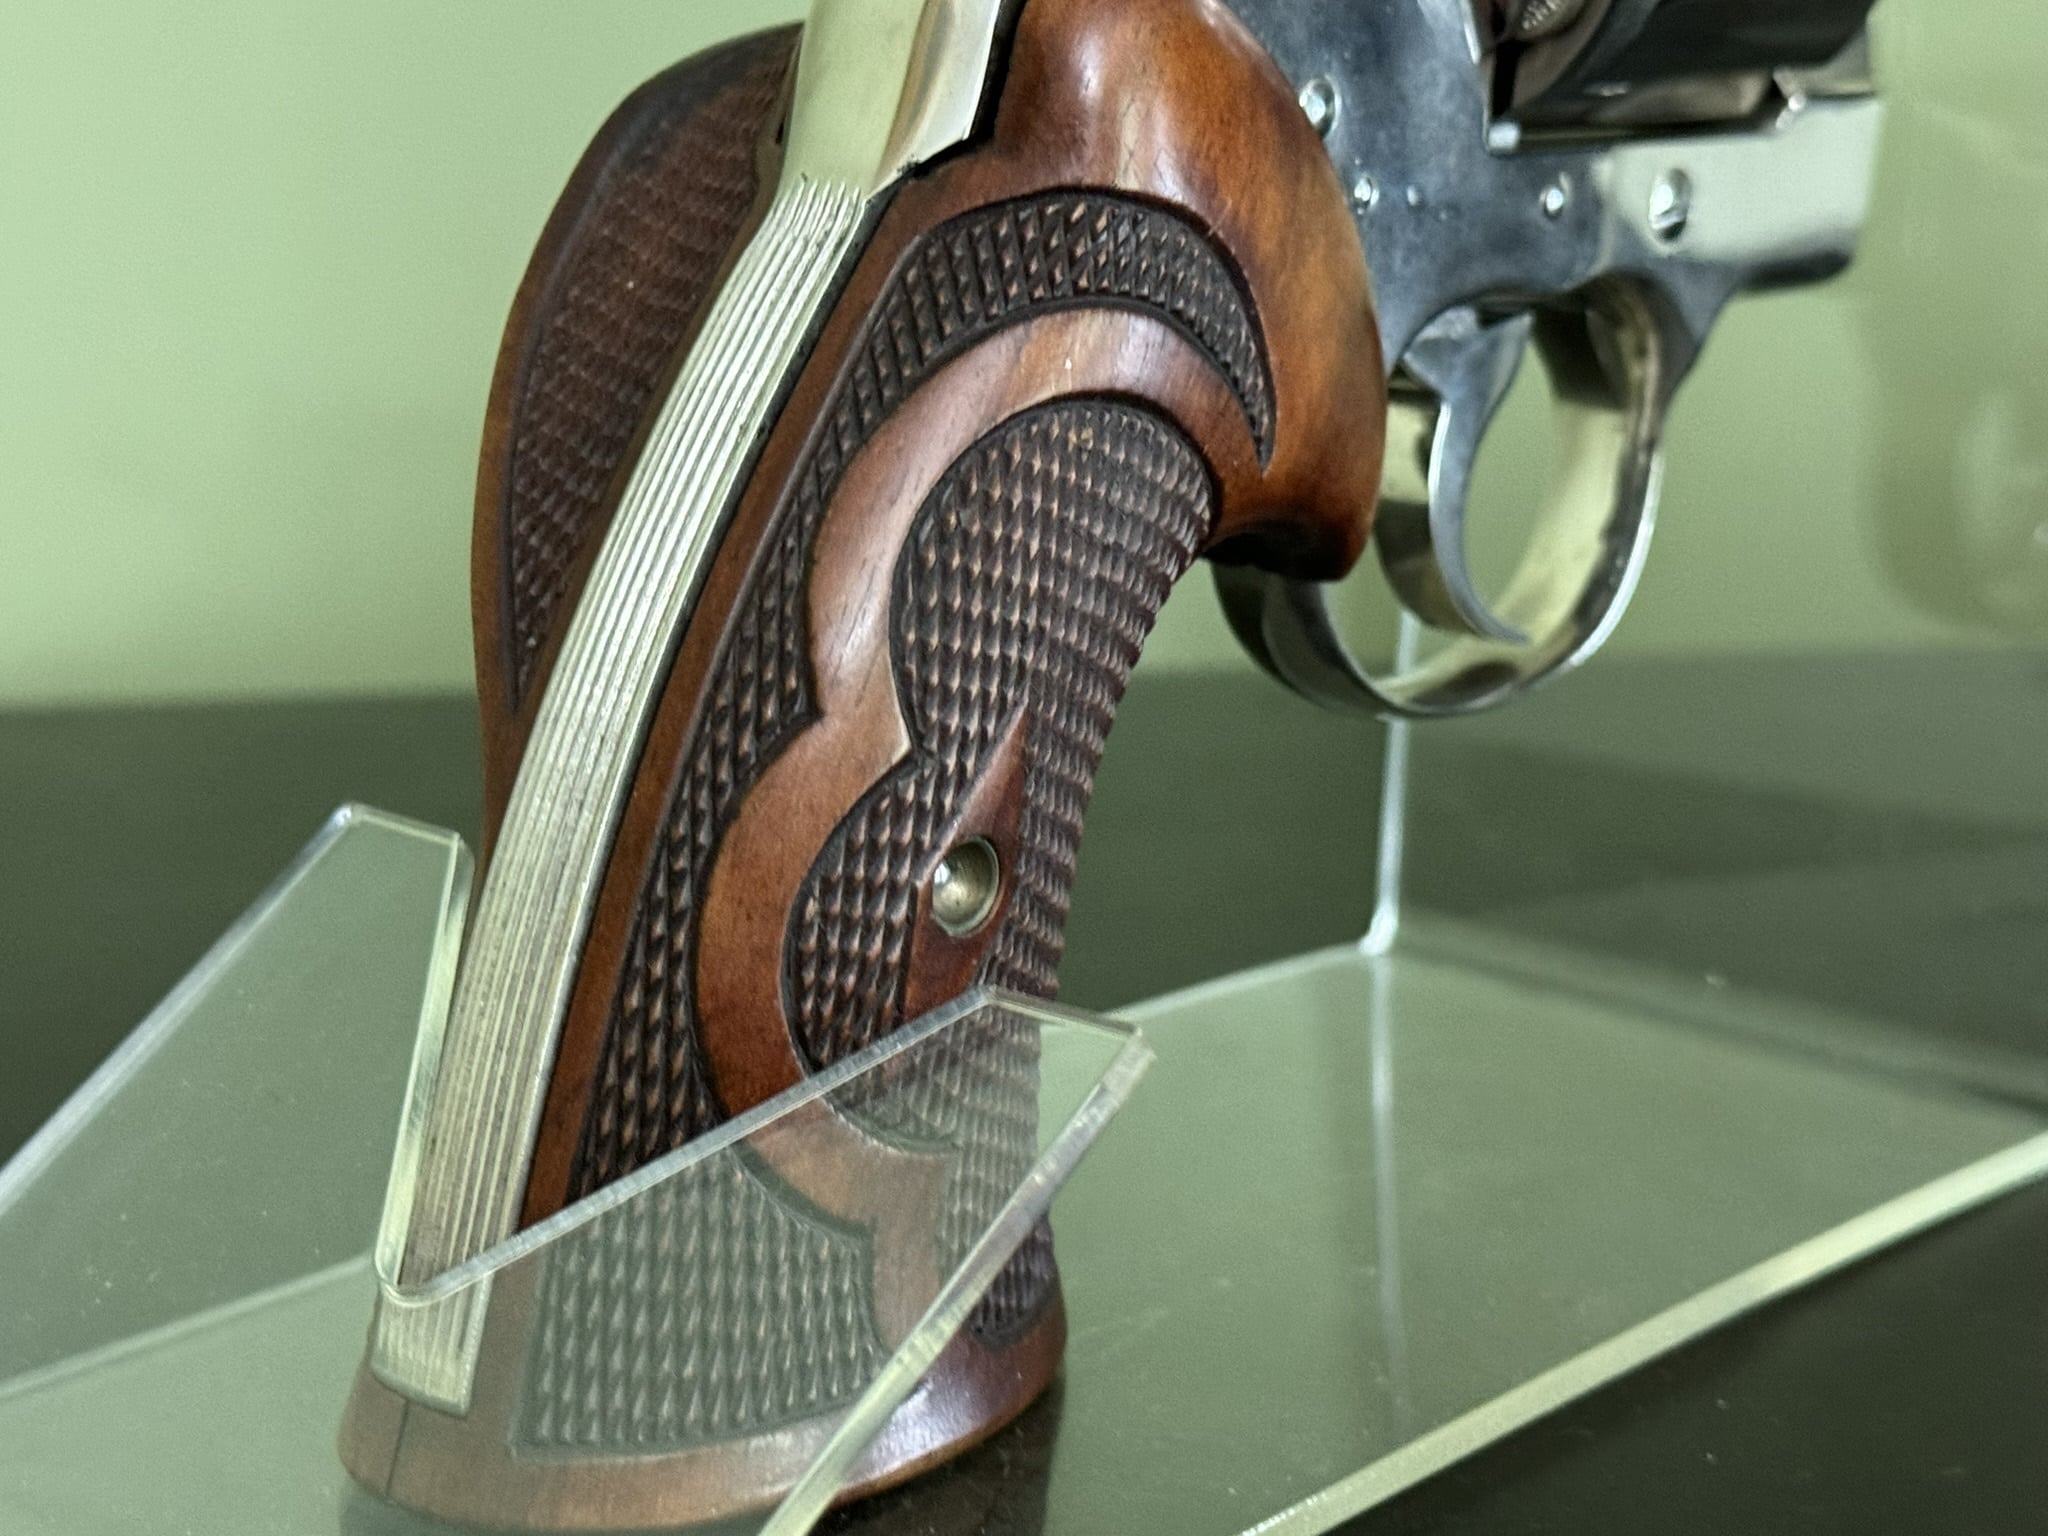
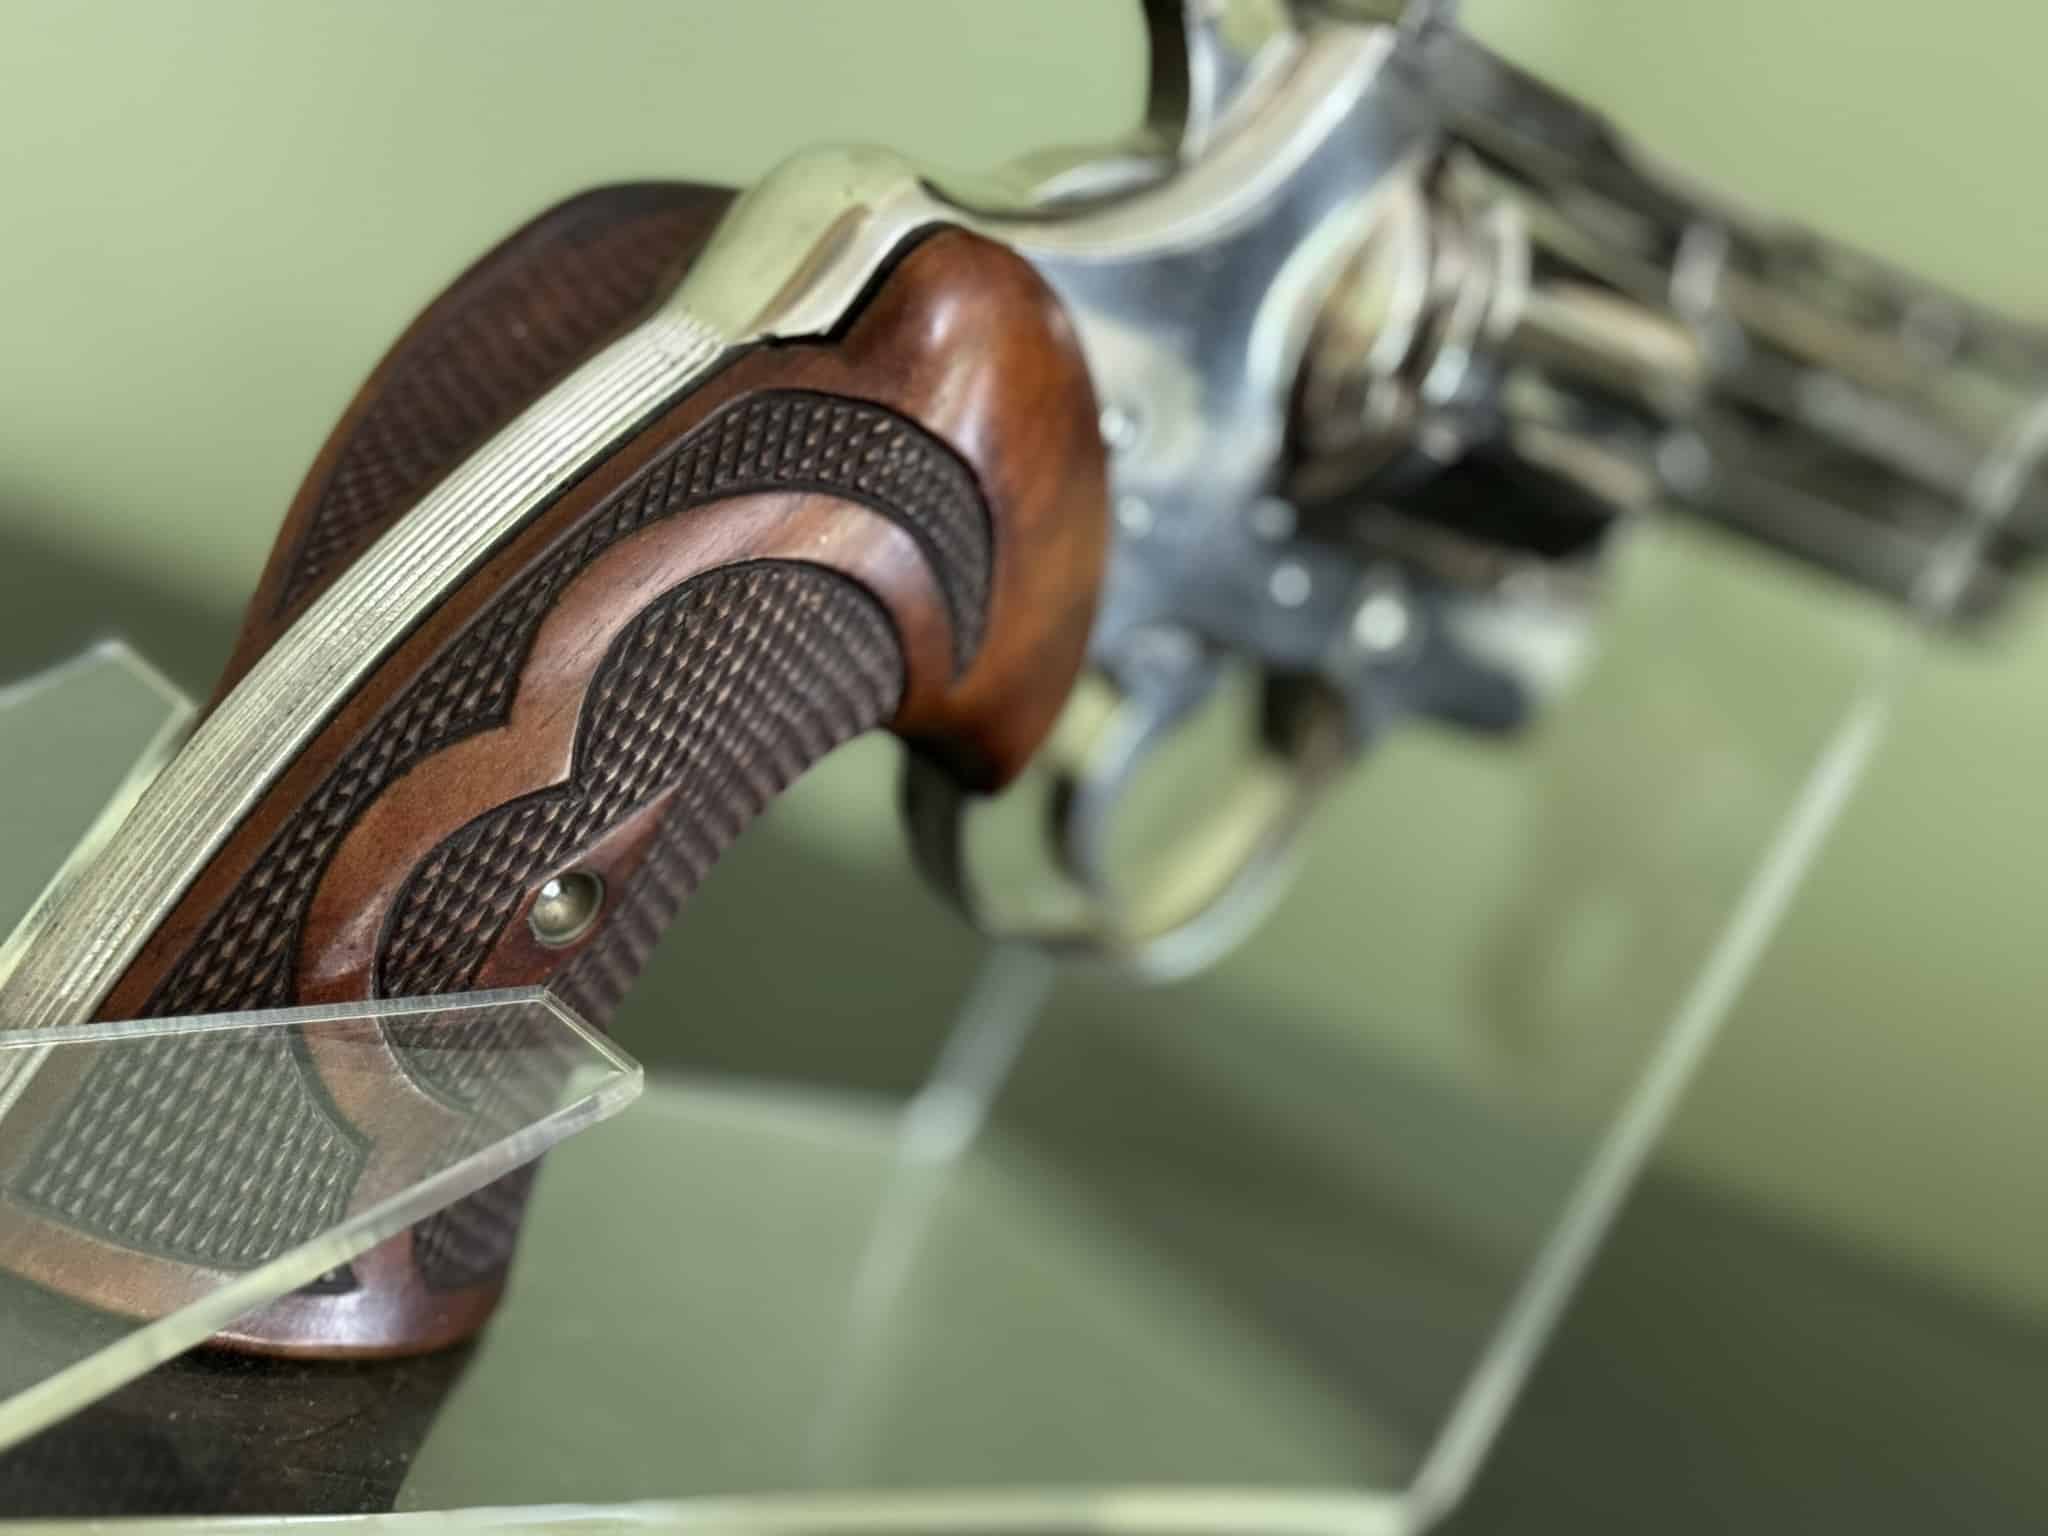
| Ribbon checkering | Flowing checkered fields bordered by smooth wood, often around a diamond screw escutcheon. | A common visual signature, though later Roper-style makers also copied the pattern. |
| Butt flare and wrap | Wood that covers and extends around the frame, often with a fuller base. | Helps distinguish serious target stocks from simple replacement panels. |
| Wood and finish | Walnut is common; grain, finish, wear, oil staining, cracks, and repairs need close inspection. | Condition and originality affect collector confidence and value. |
Frame Fit: Colt, Smith & Wesson, and Other Handguns
Roper-style stocks appear on several handguns, including Smith & Wesson and Colt revolvers. The name on the gun does not authenticate the grips. These stocks were shaped for specific frames and, in many cases, specific hands. That makes frame fit one of the most important parts of the inspection.
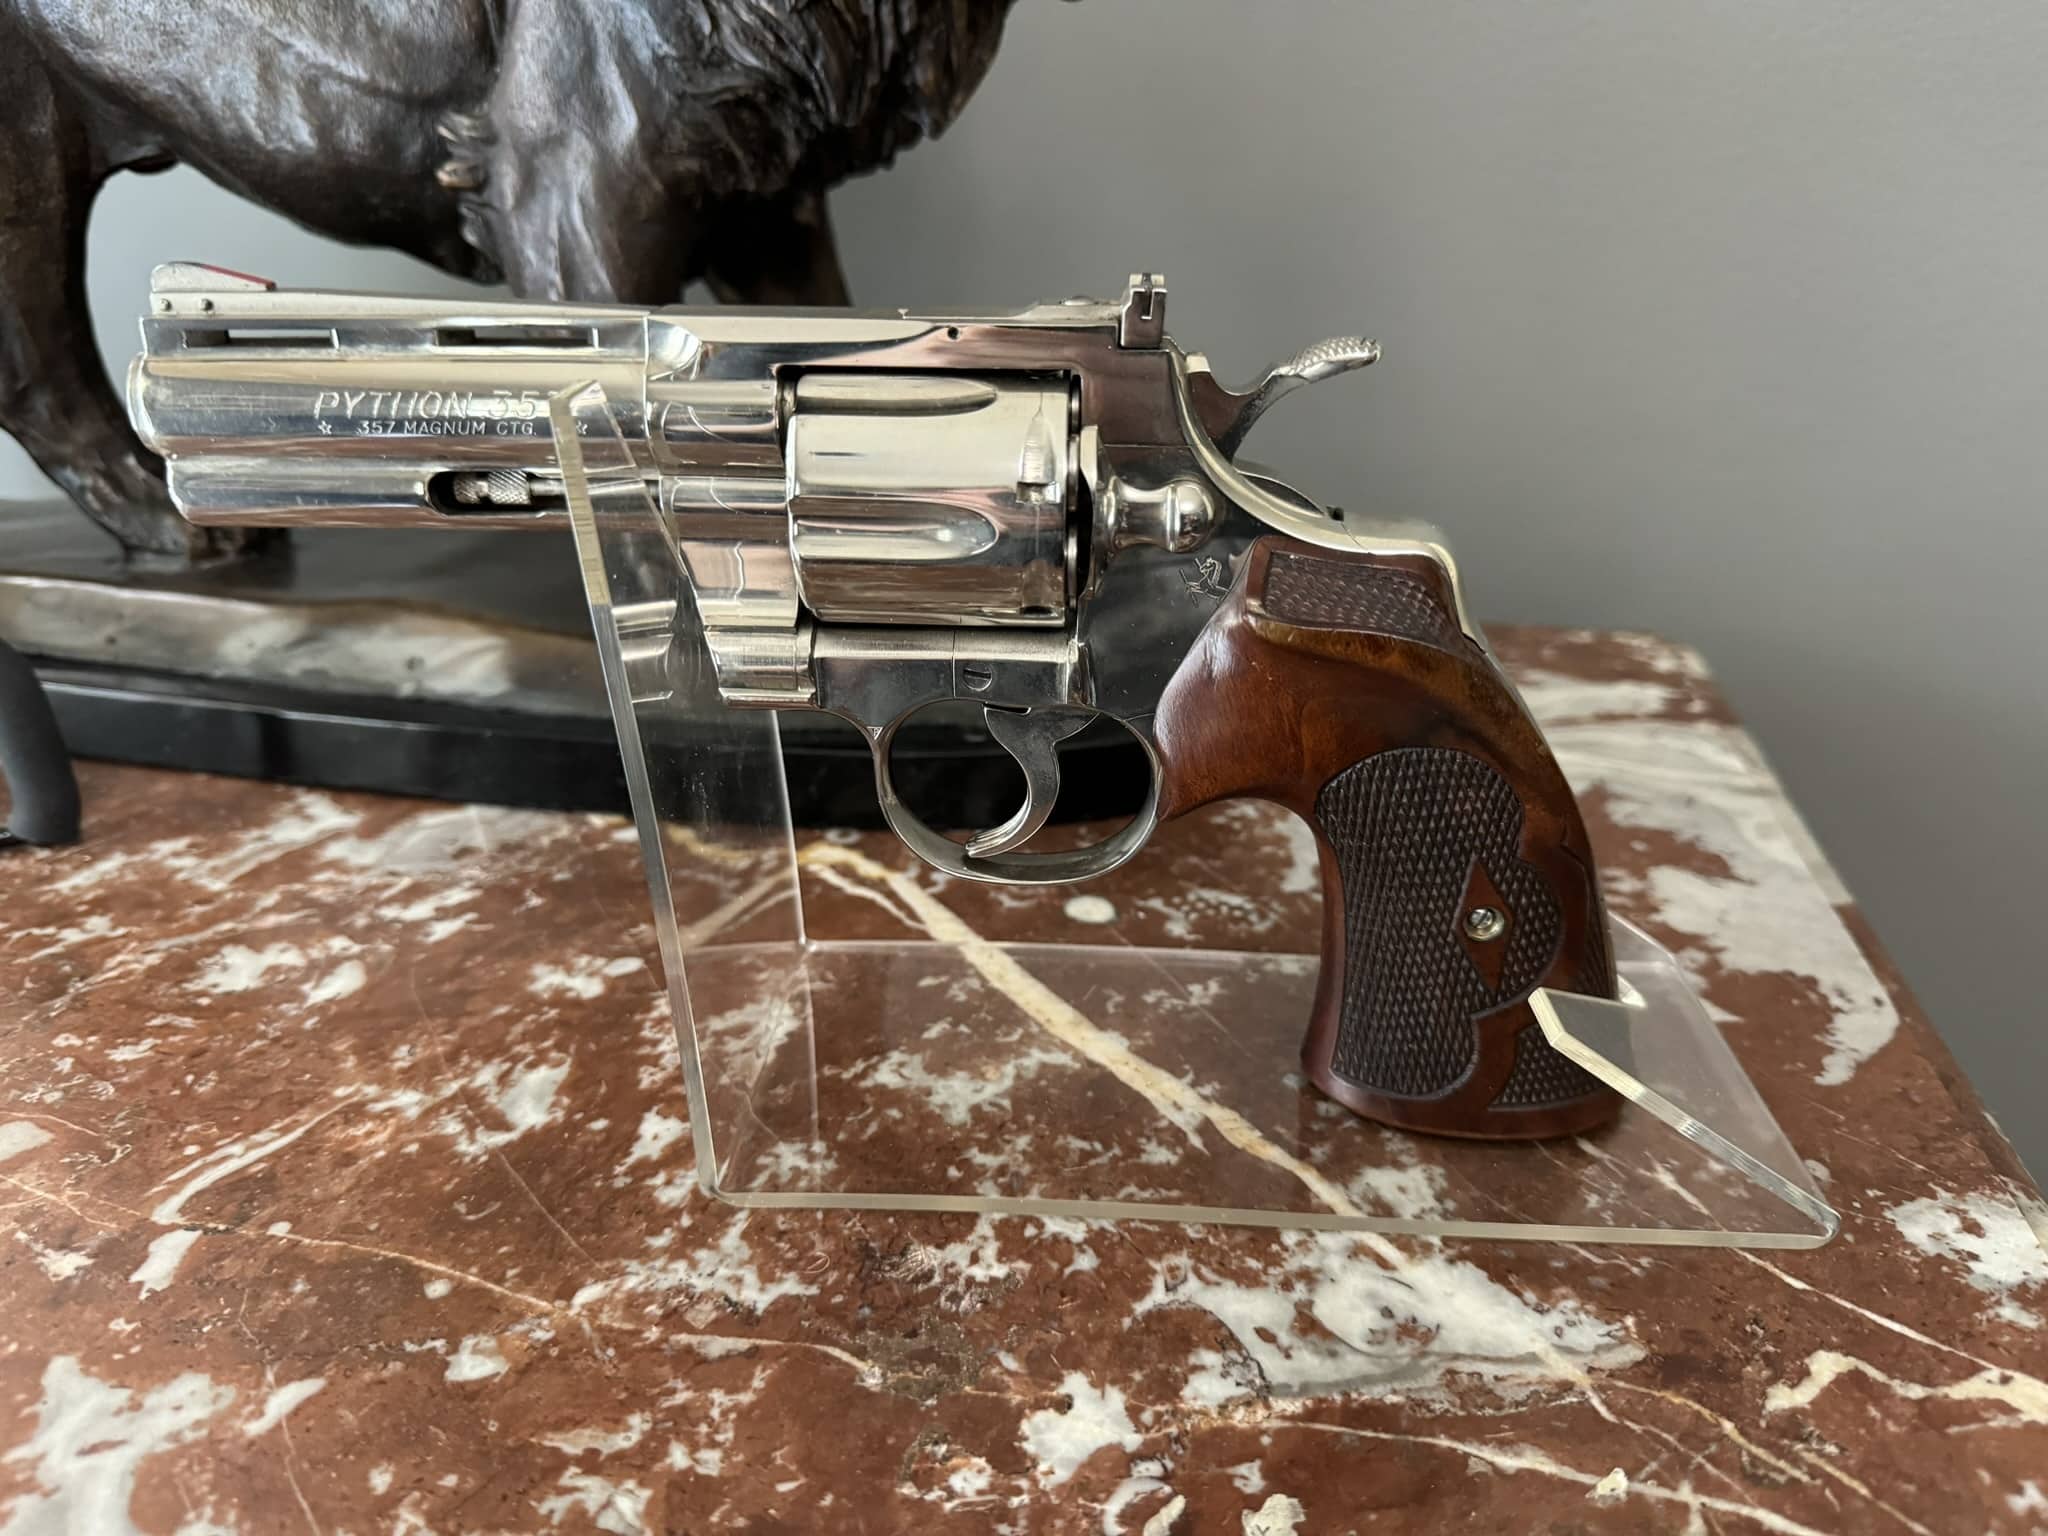
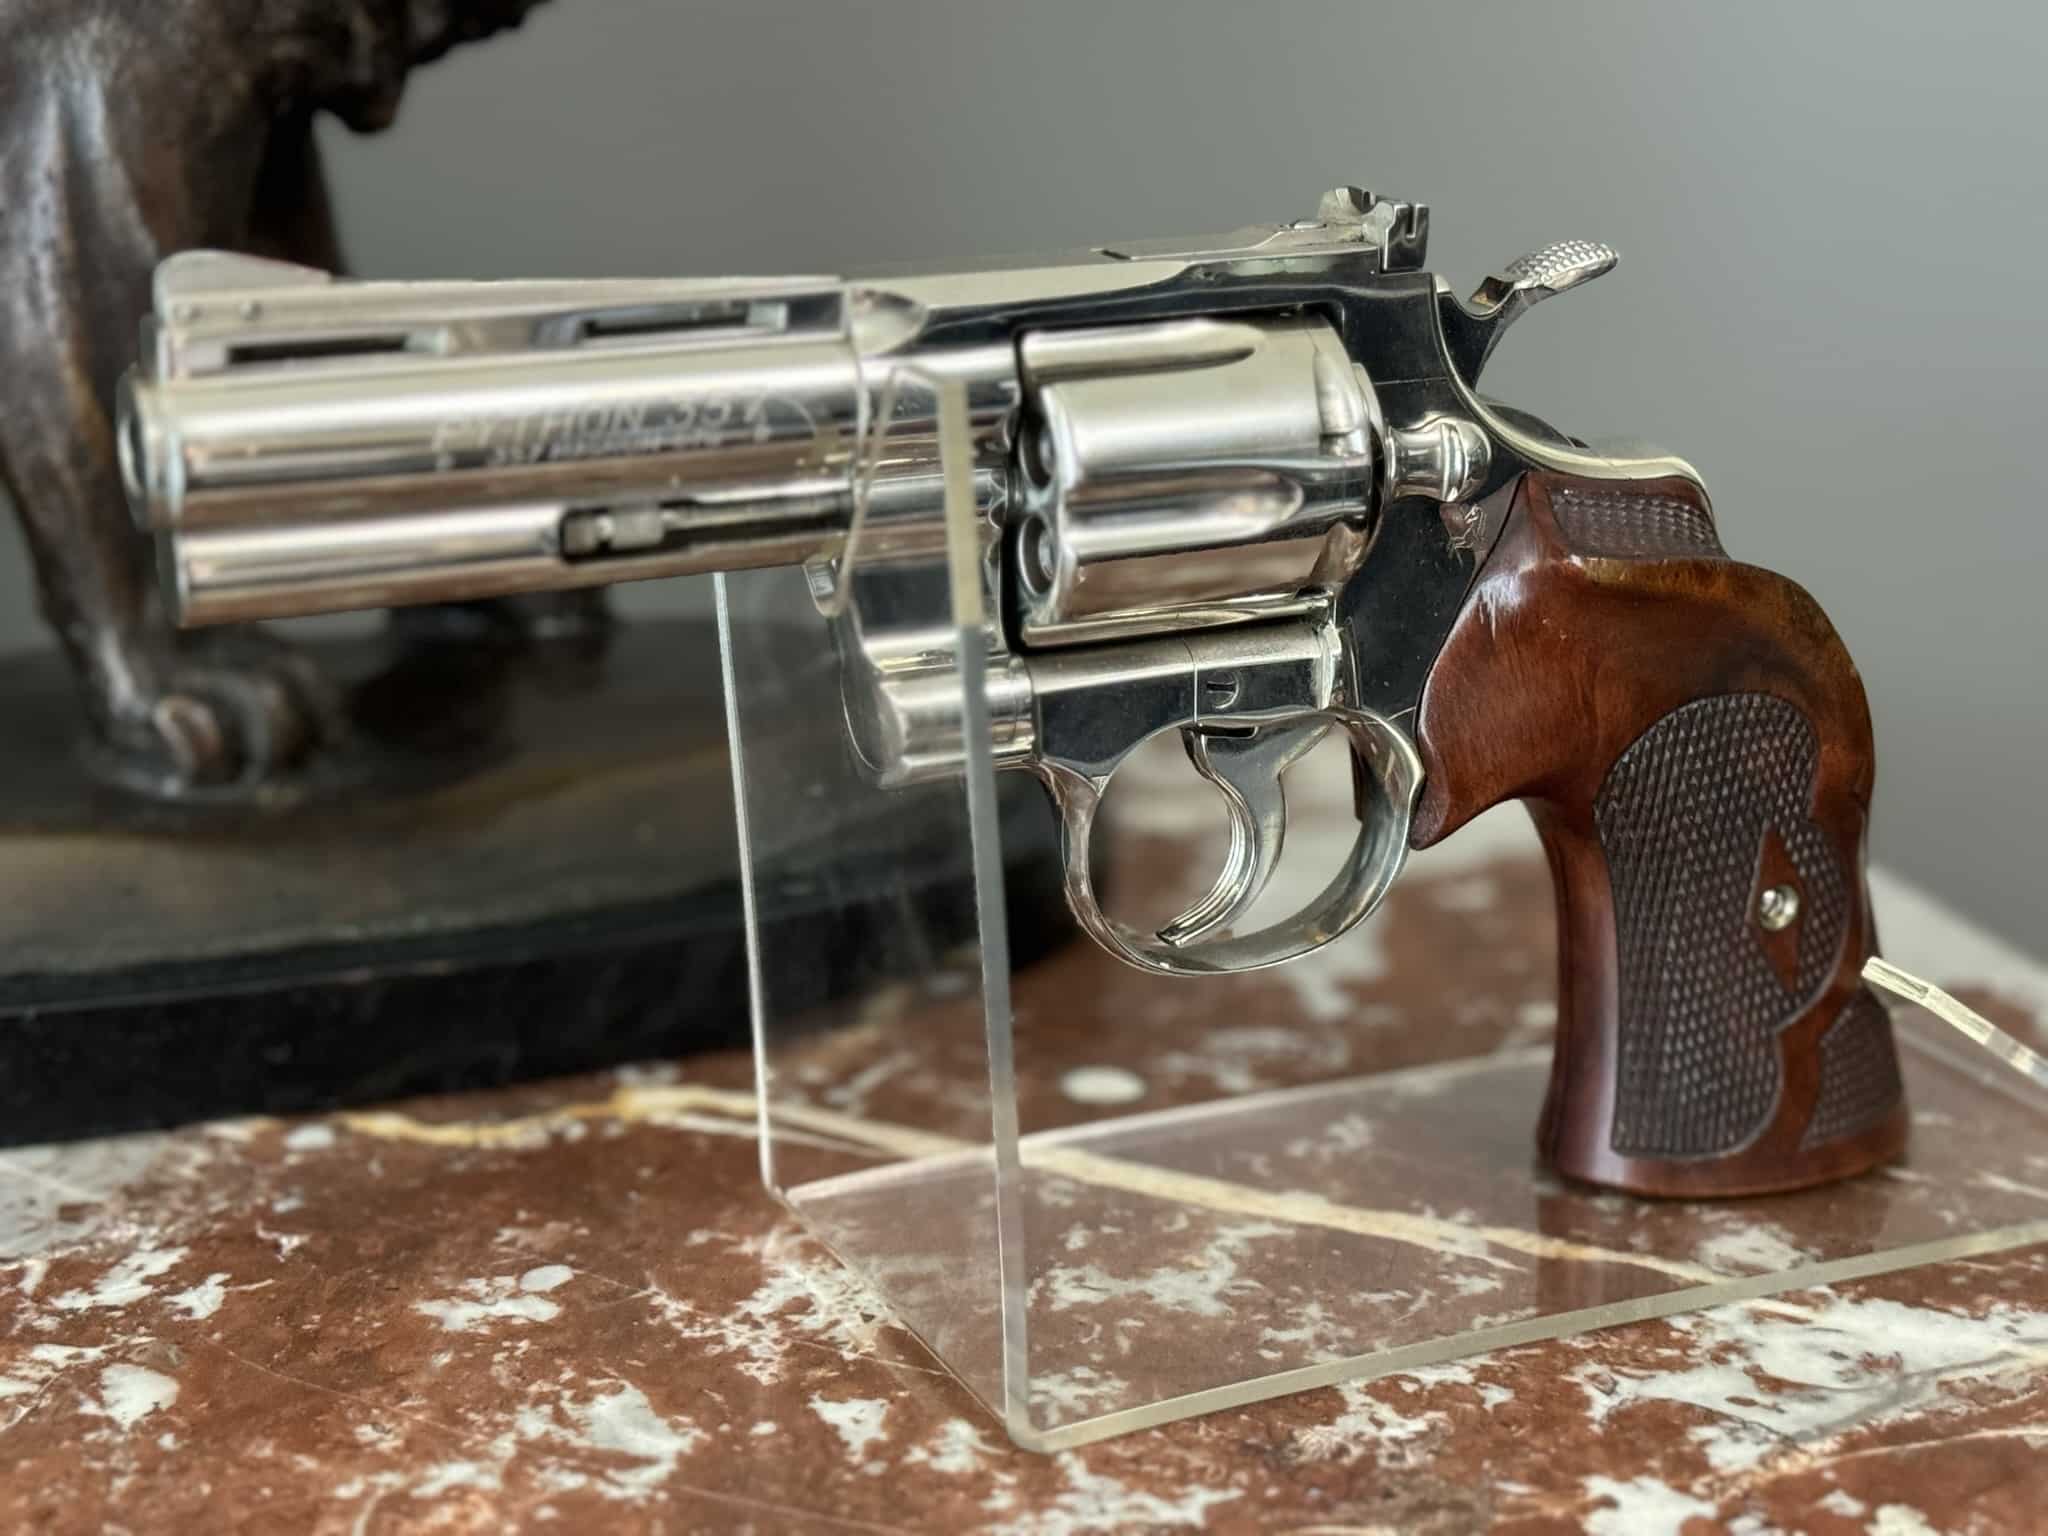
On Colt Python and related Colt double-action applications, study the screw alignment, backstrap contact, butt coverage, trigger-guard relief, and the way the top of the grip flows into the frame. A grip can look attractive in profile while still showing a later alteration on the reverse side.
Collector Authentication Workflow
Capture both exterior and reverse-side views before handling changes the evidence.
Identify grip-screw holes, escutcheons, jig holes, inletting, fit marks, repairs, and wood color.
Study thumb rest, checkering ribbon, screw diamond, palm swell, lower flare, and border layout.
Test fit only with care. Avoid forcing old wood onto a frame it was not cut to fit.
“Roper-style” can be honest descriptive language; “original Roper” needs stronger evidence.
Keep old photos, invoices, notes, and seller descriptions with the grips for future collectors.
Mounted Roper Grips Photo Gallery
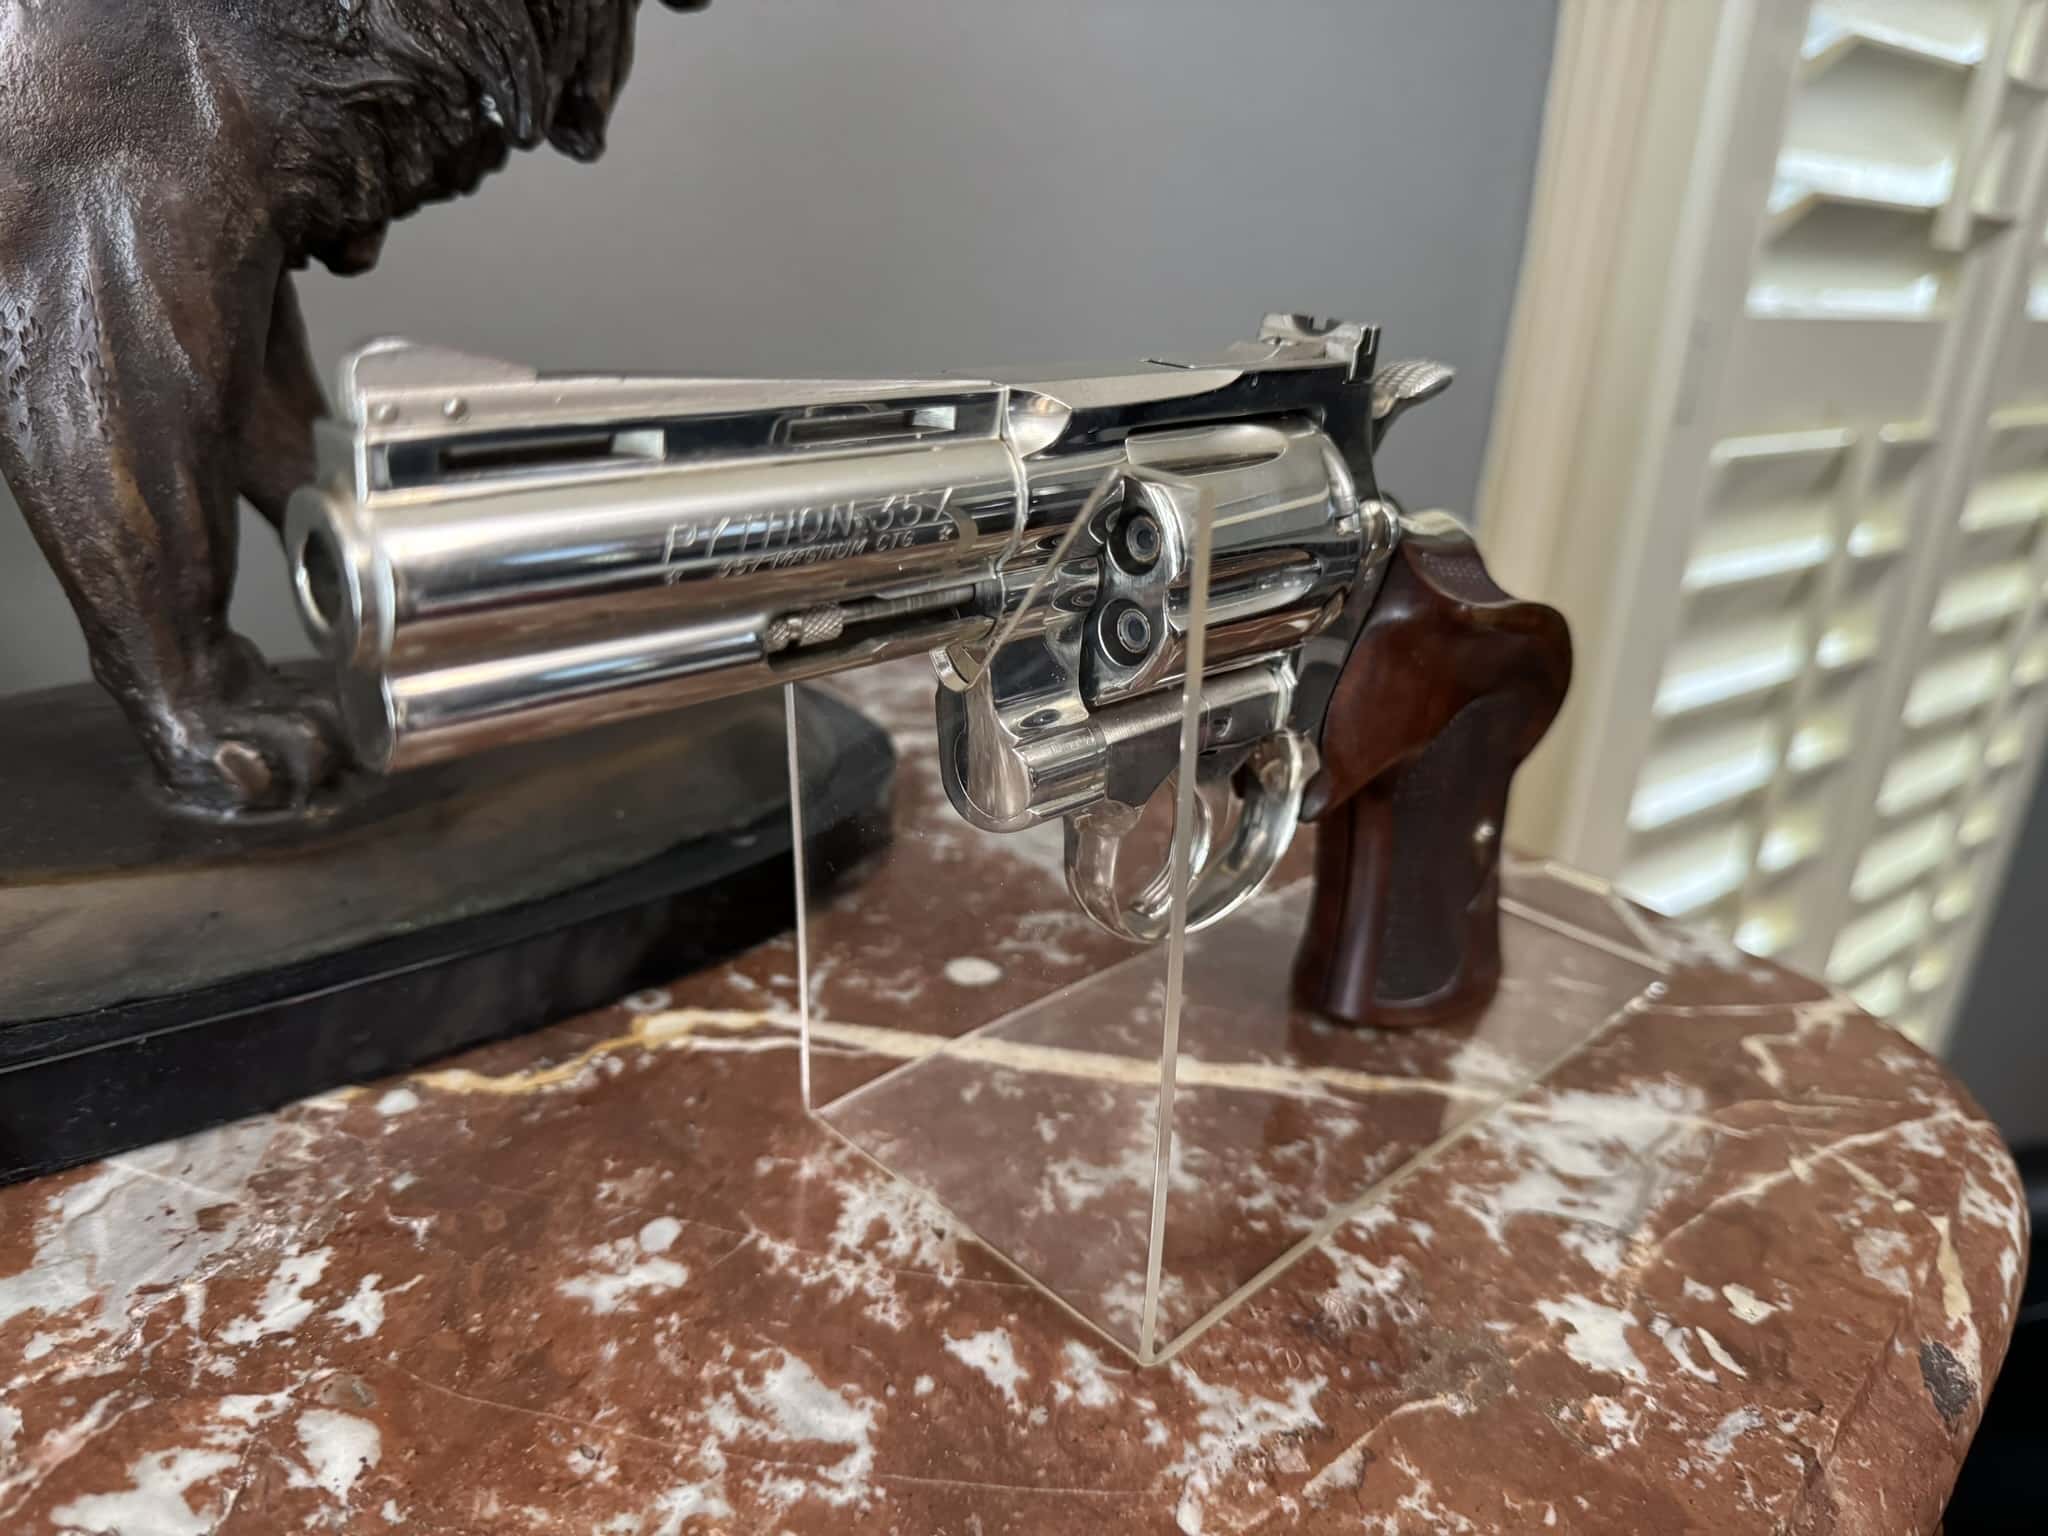
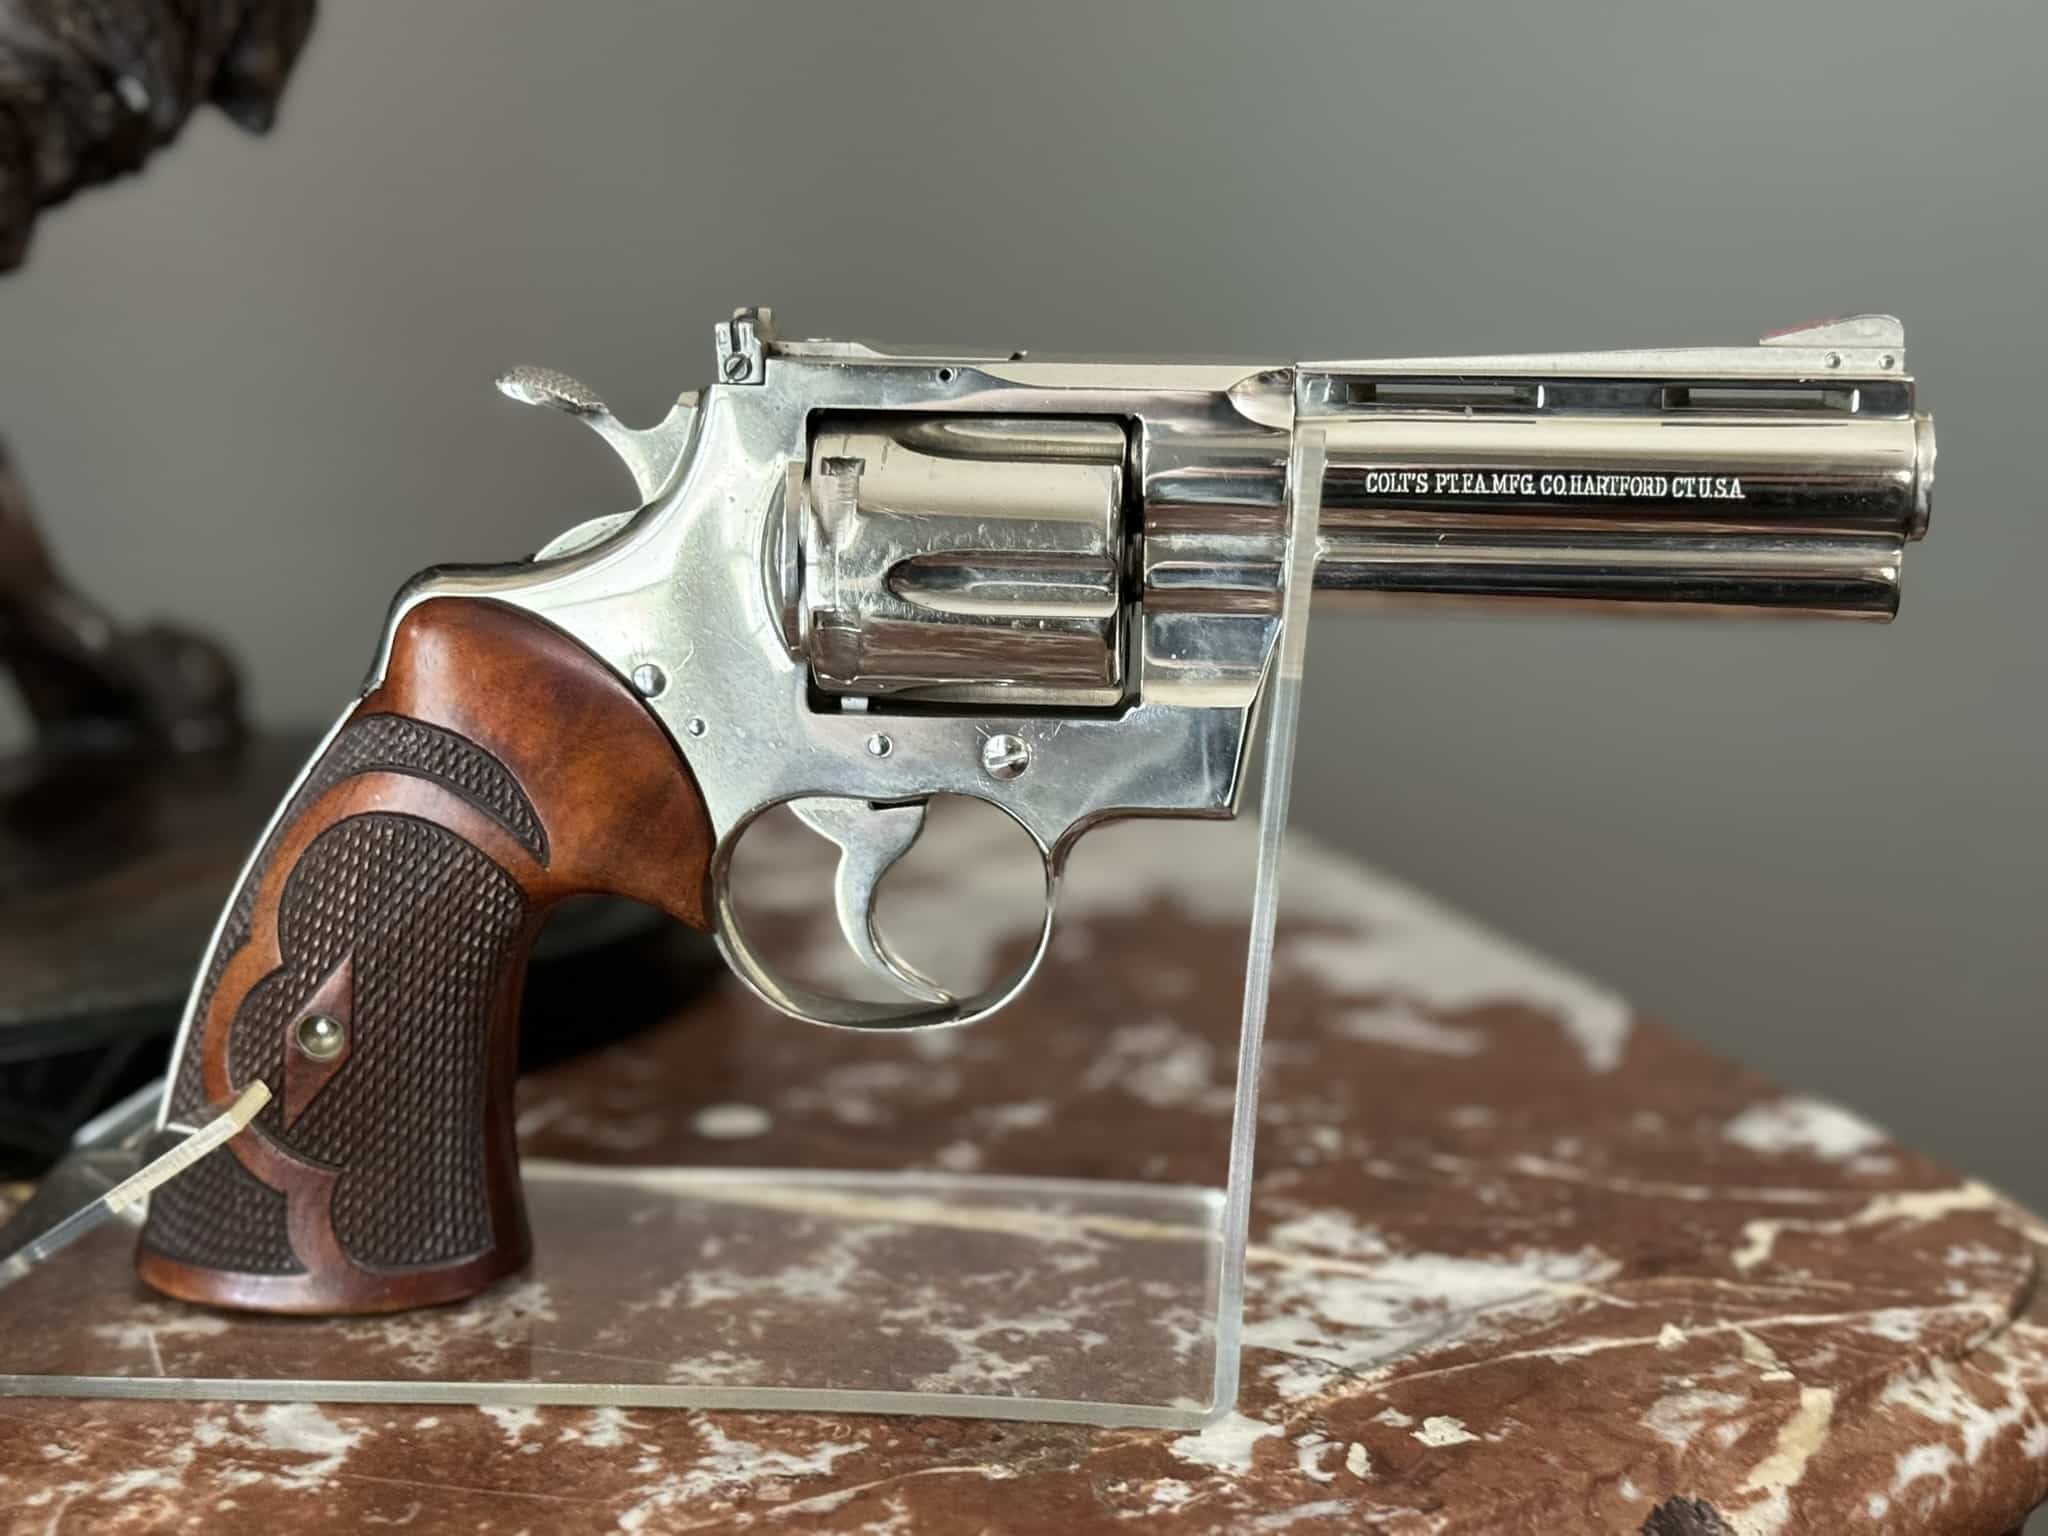
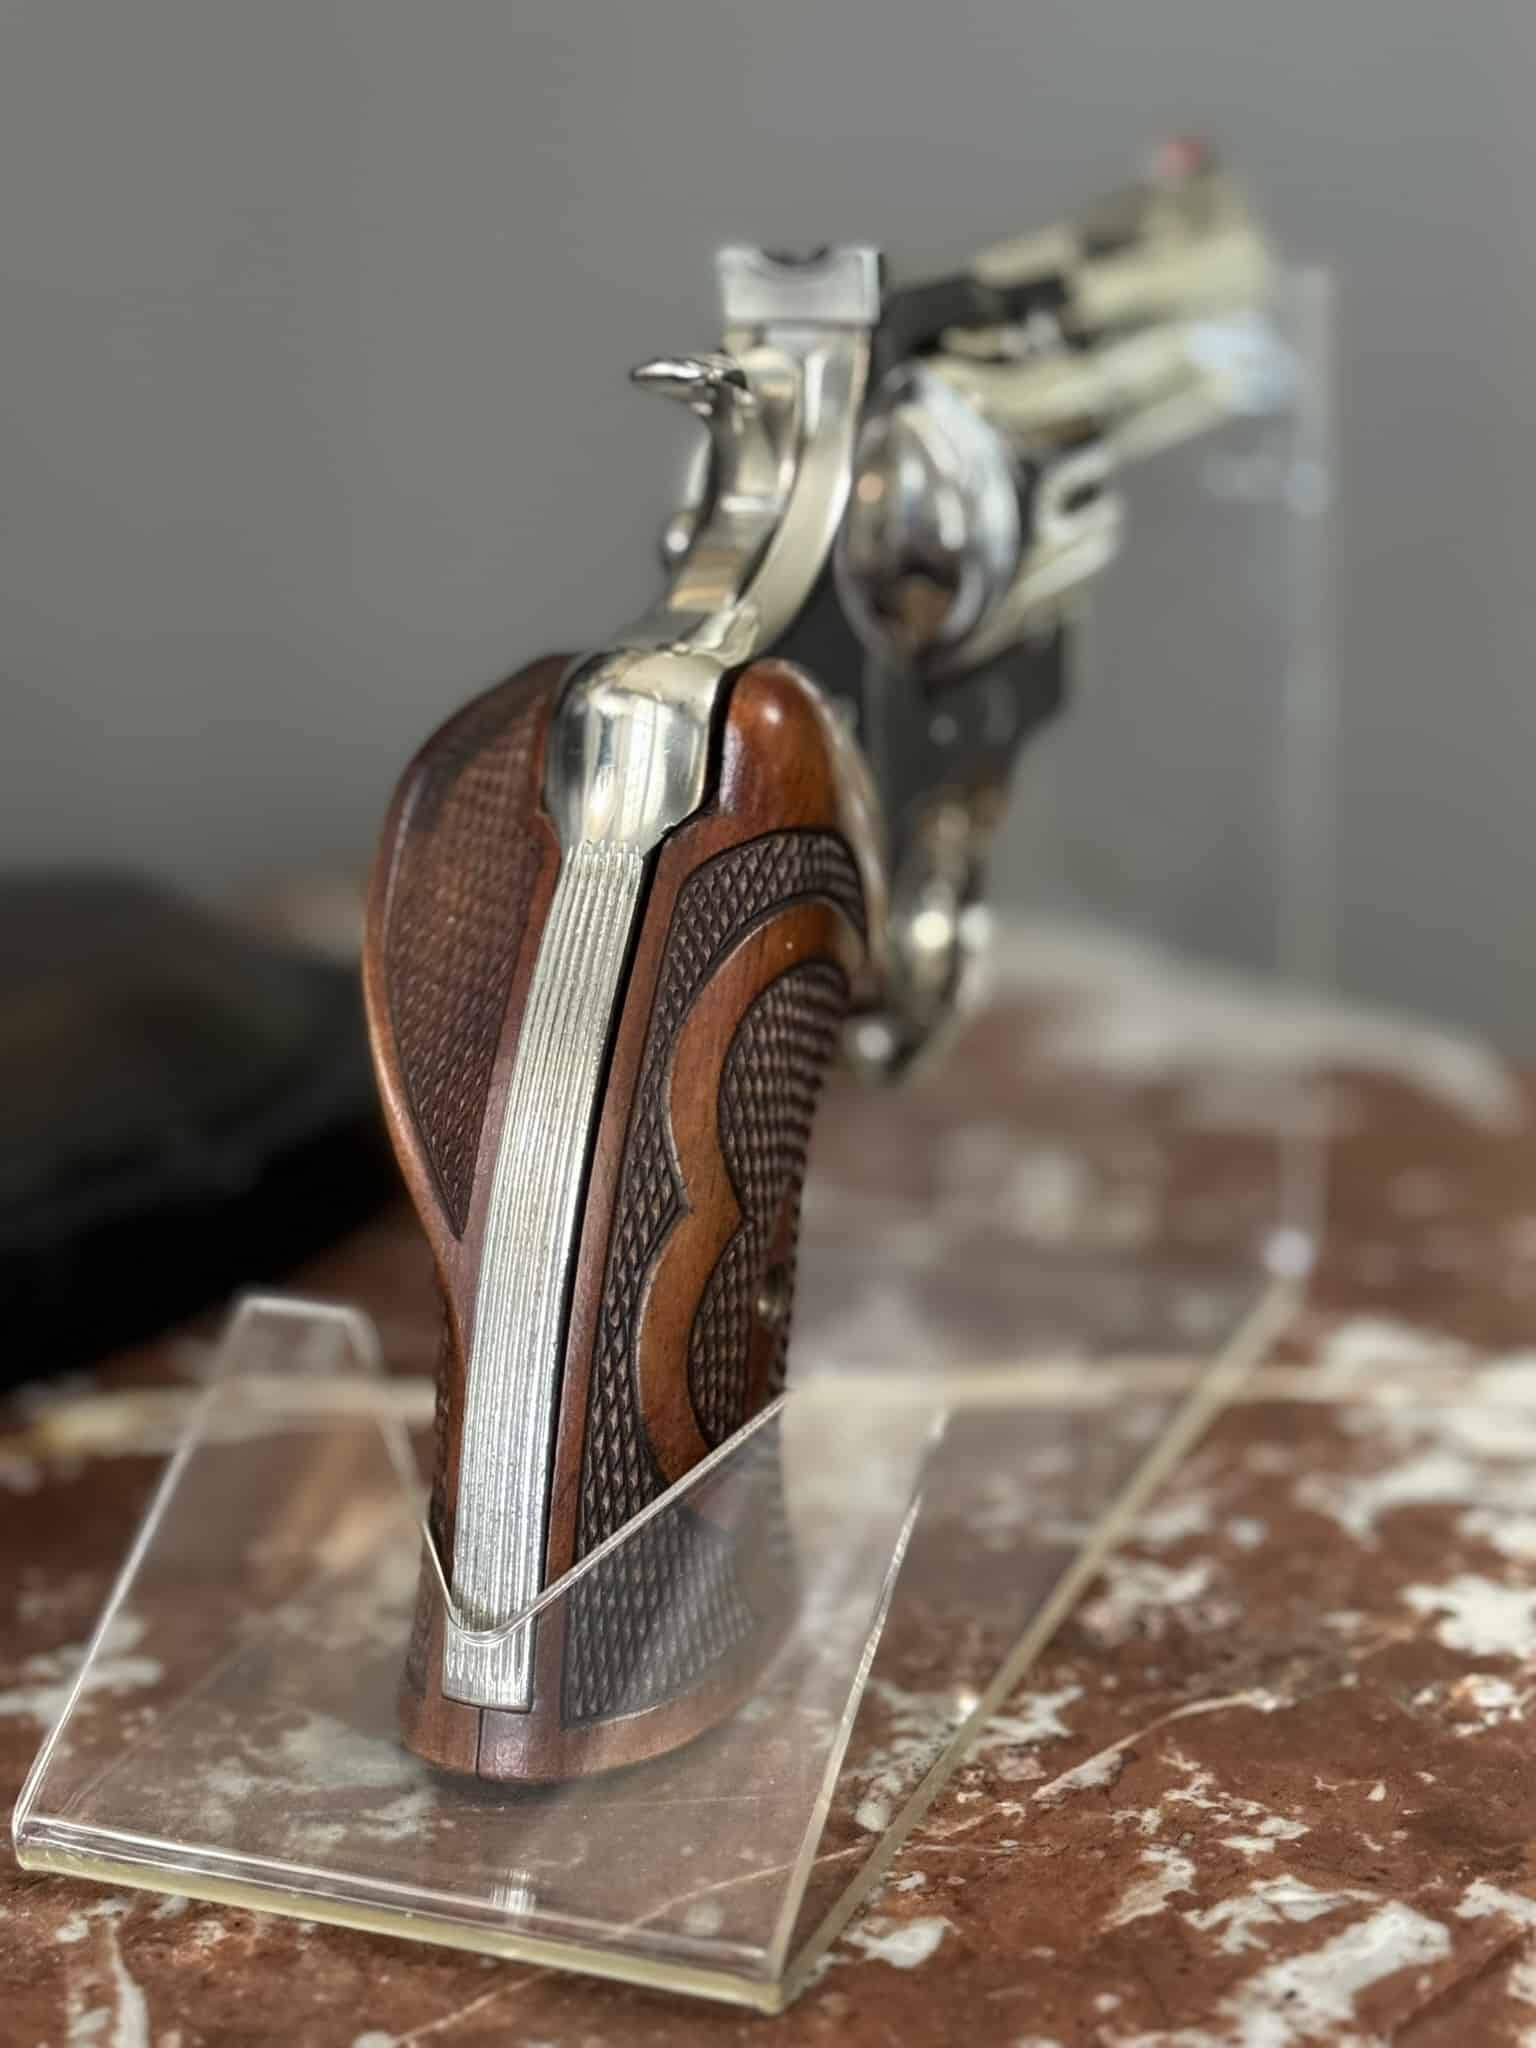
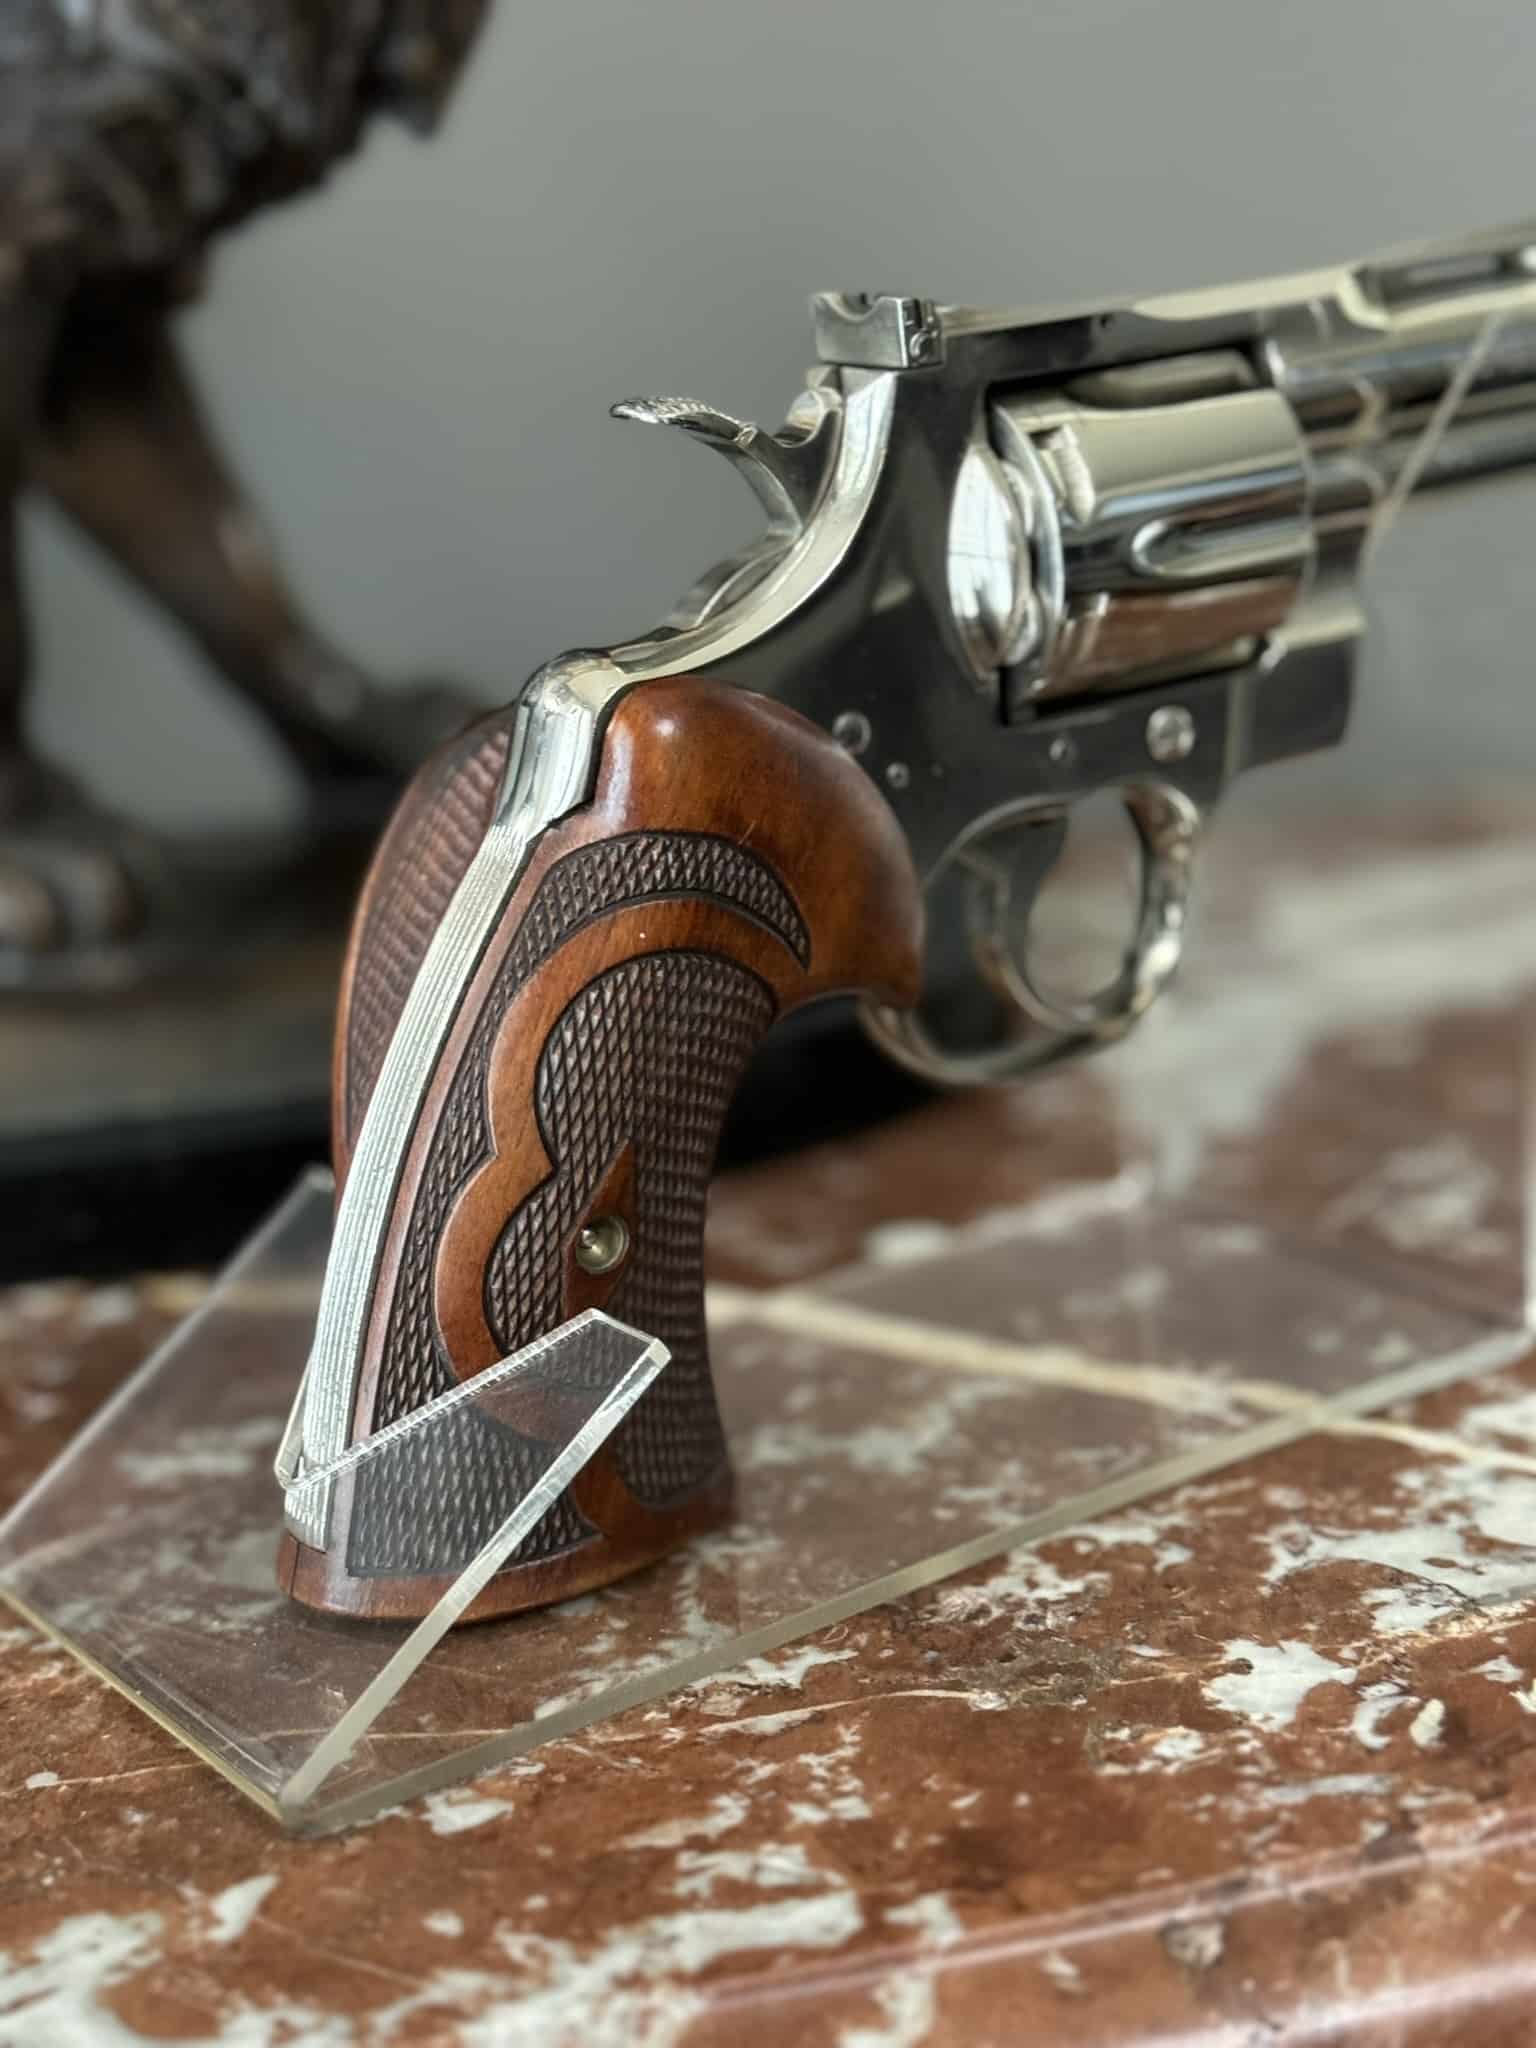
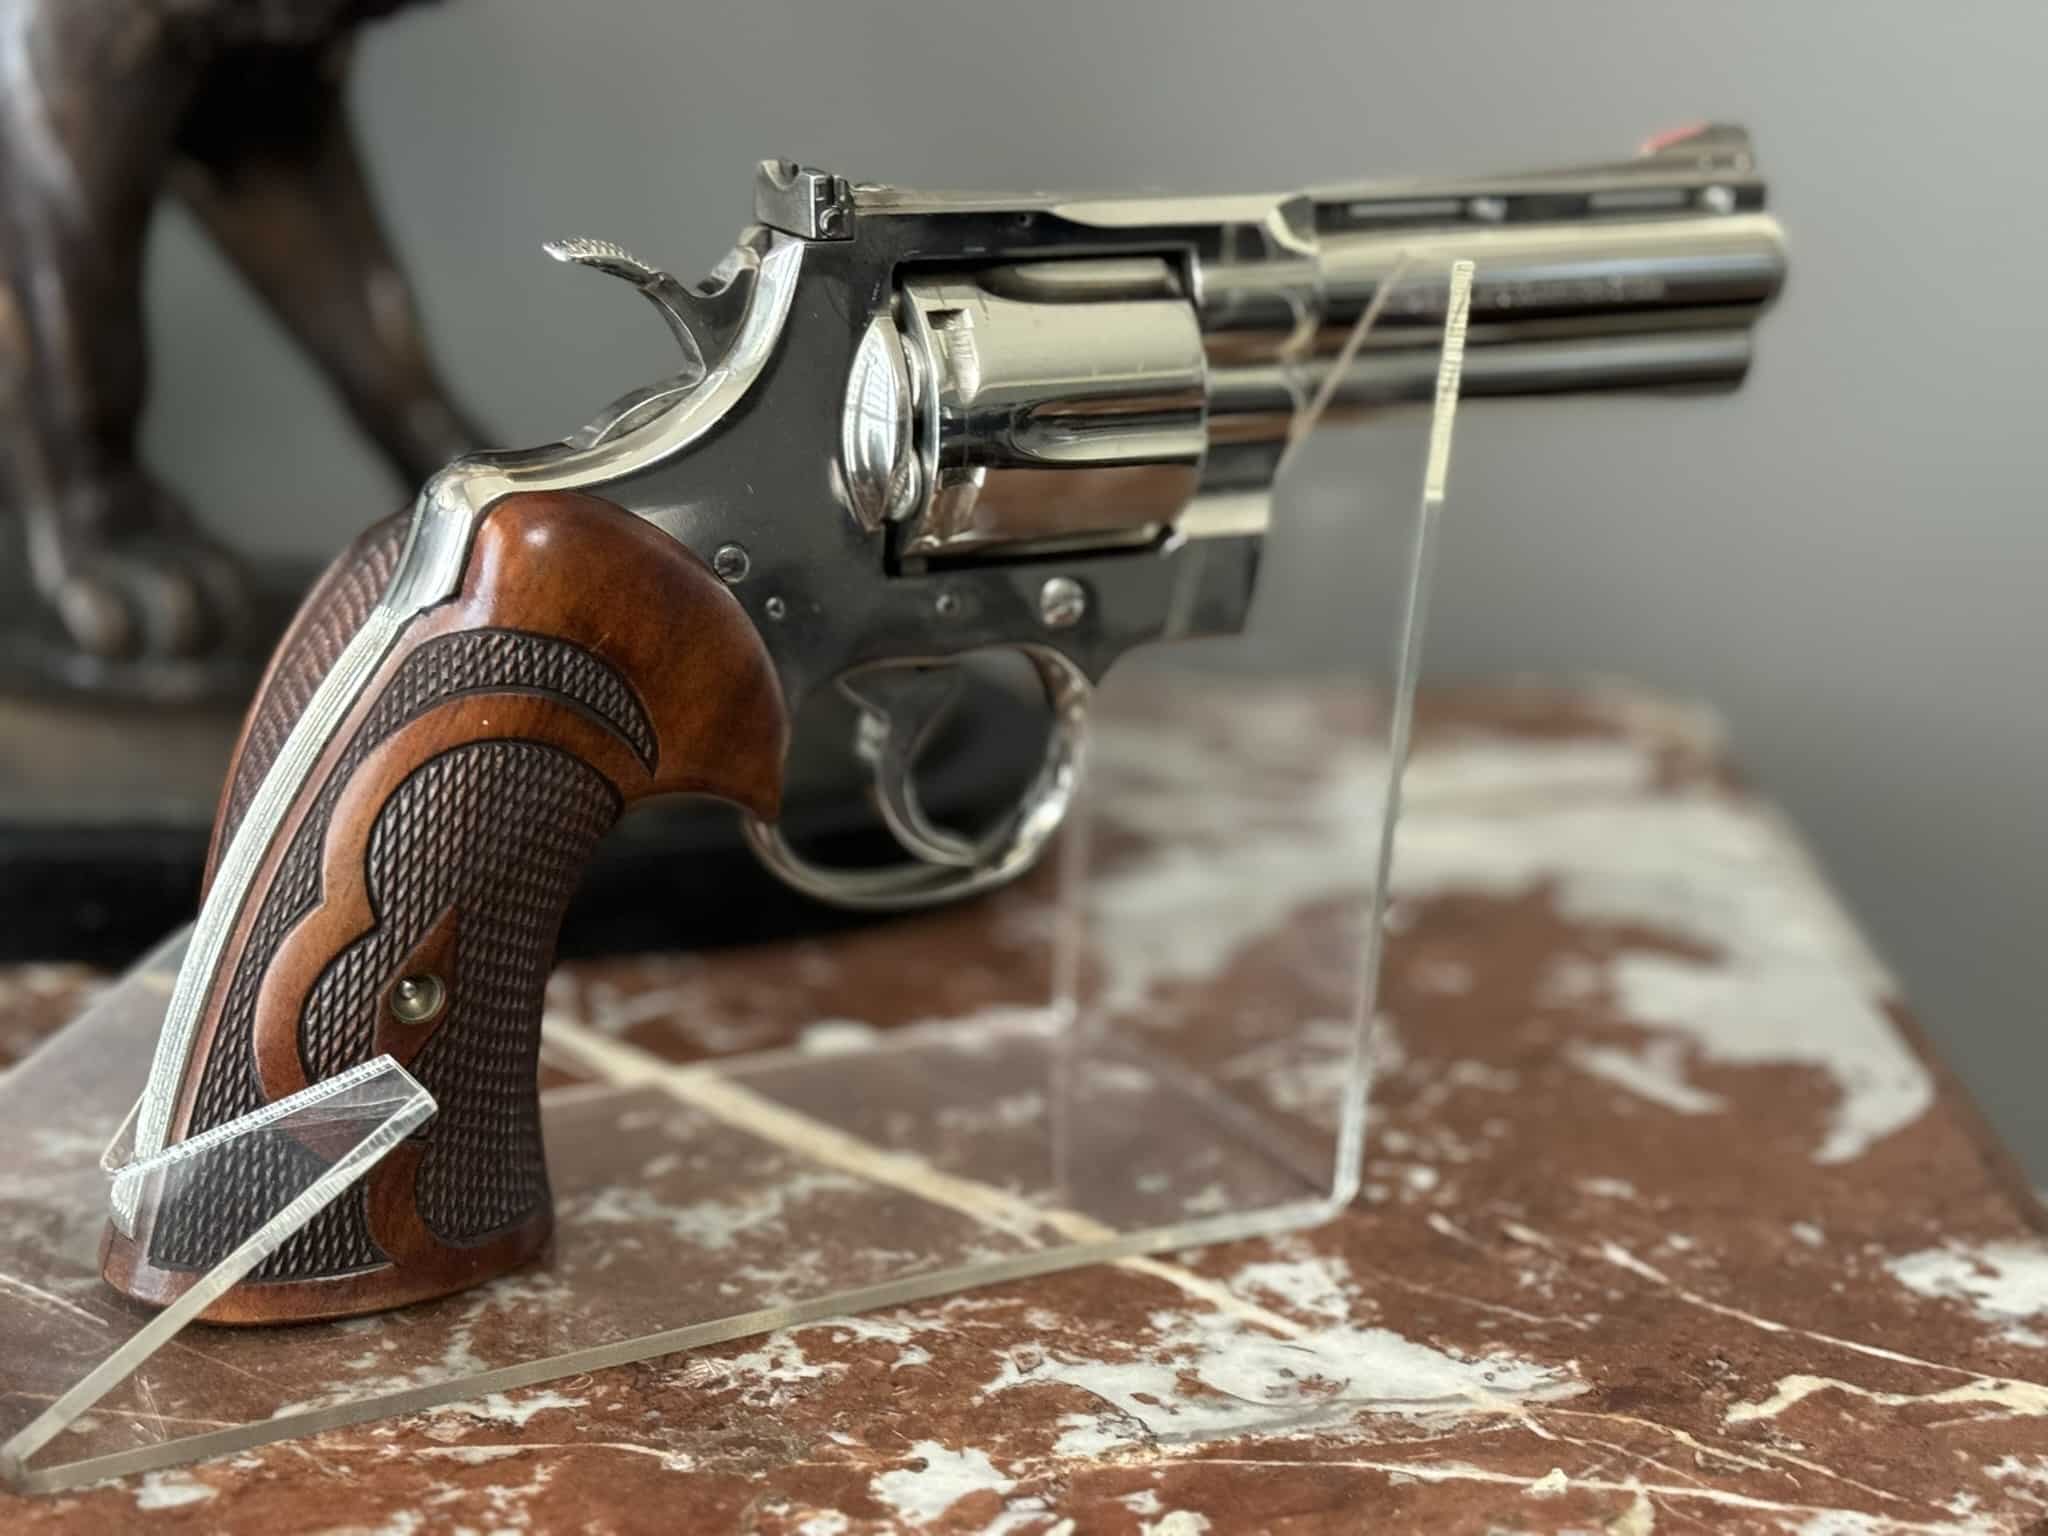
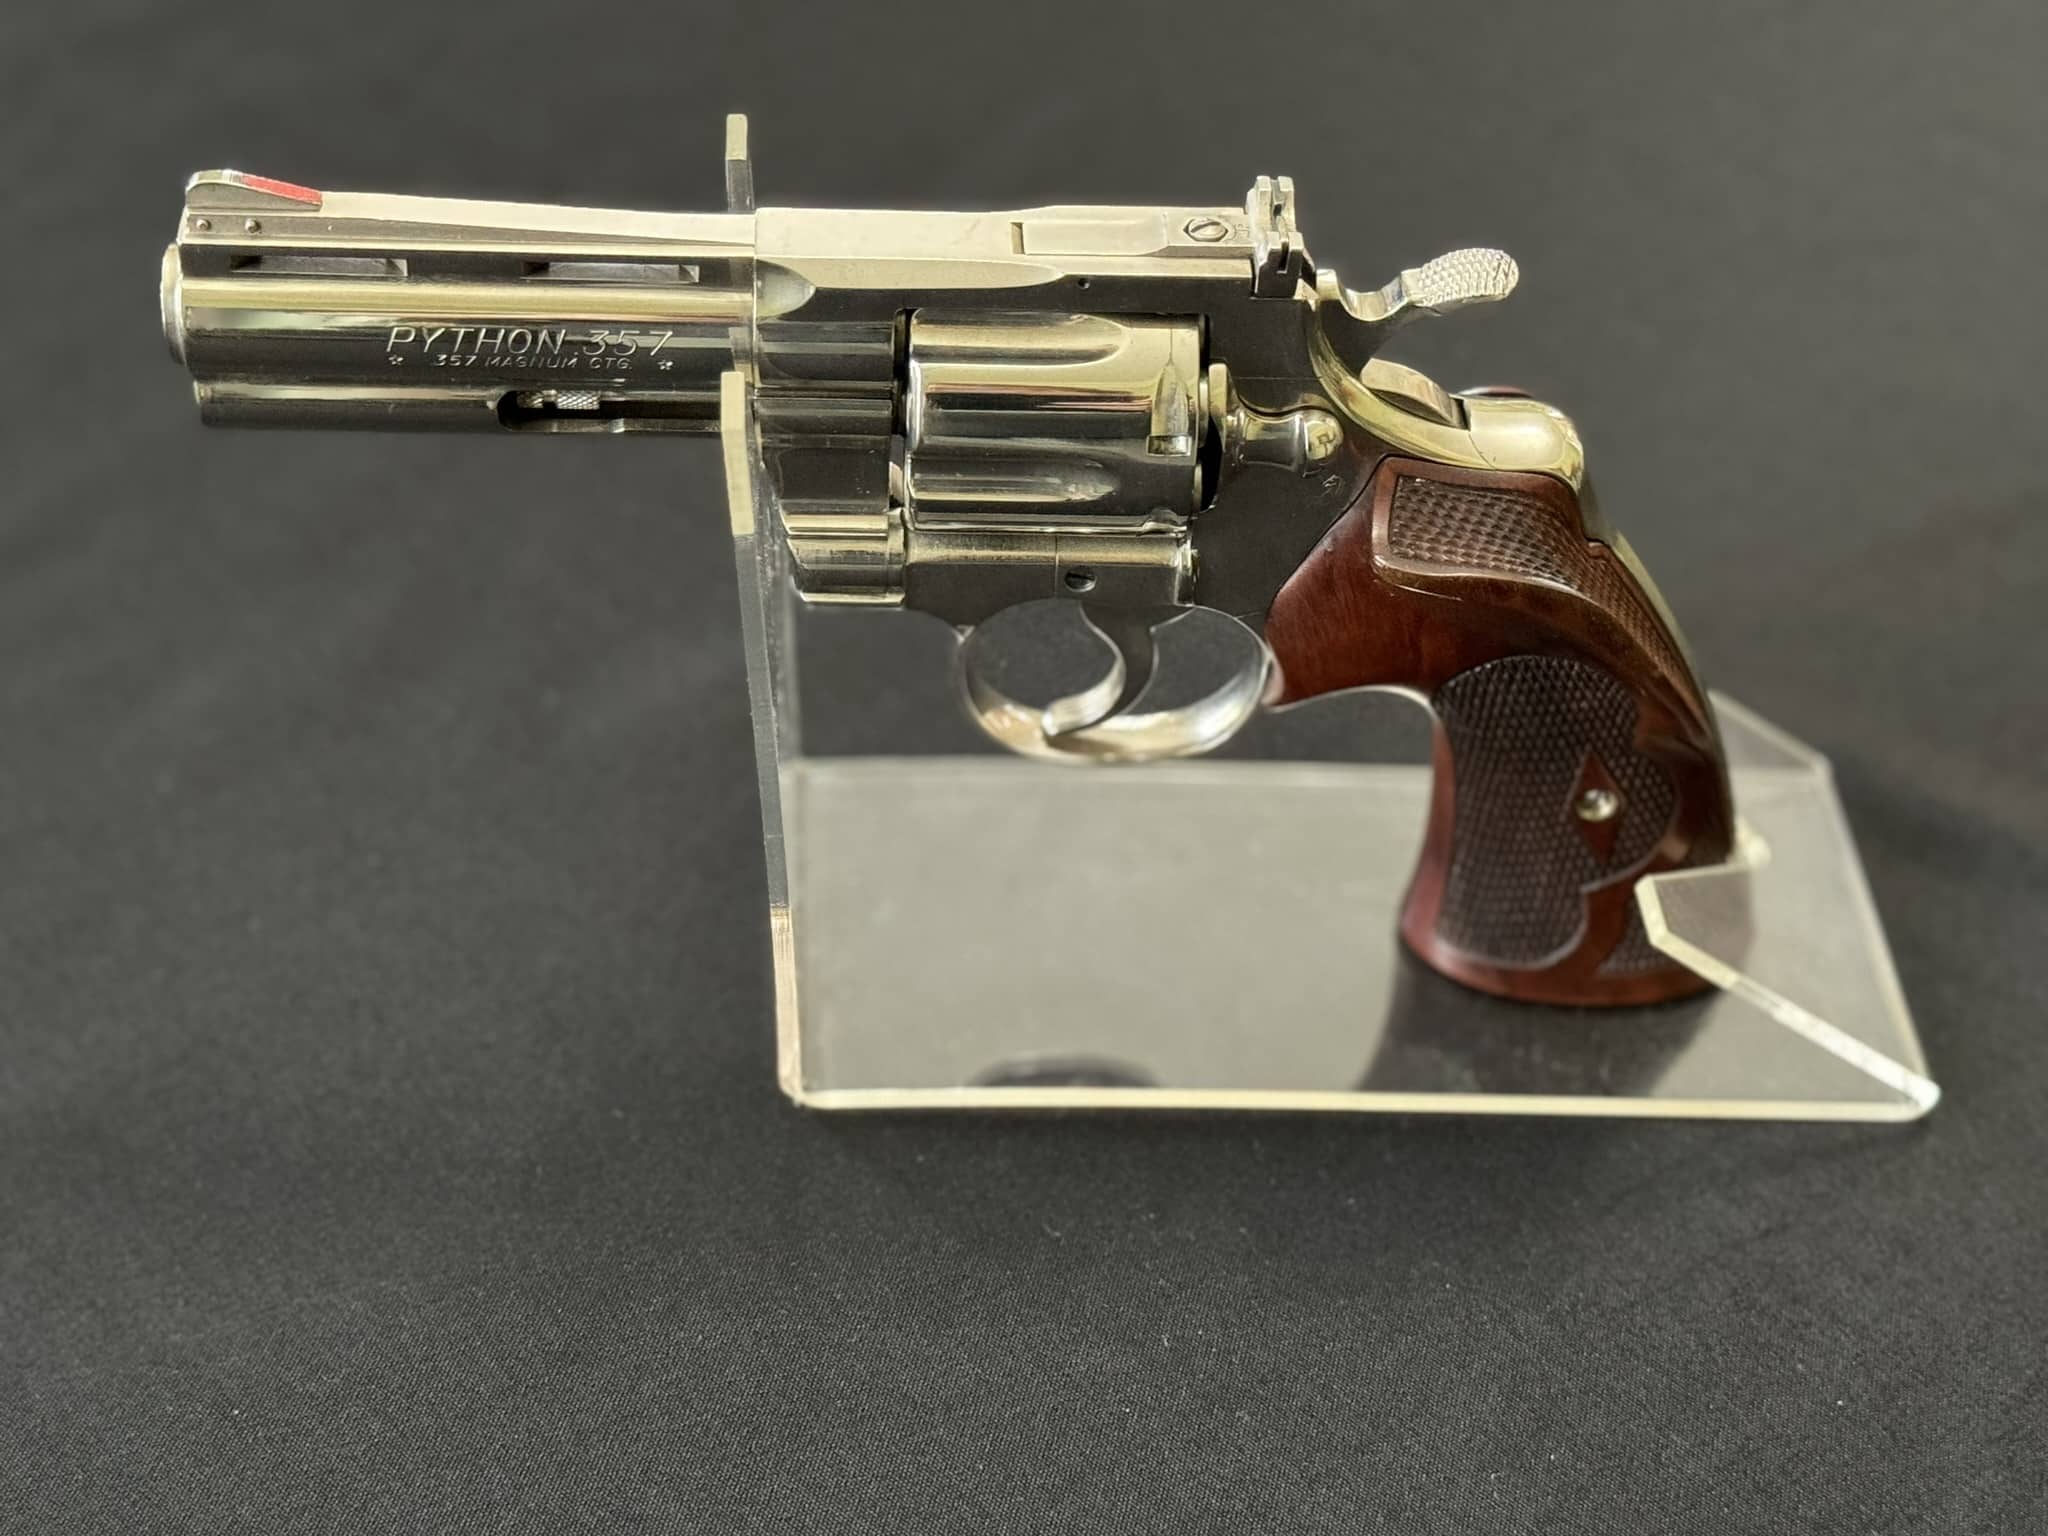
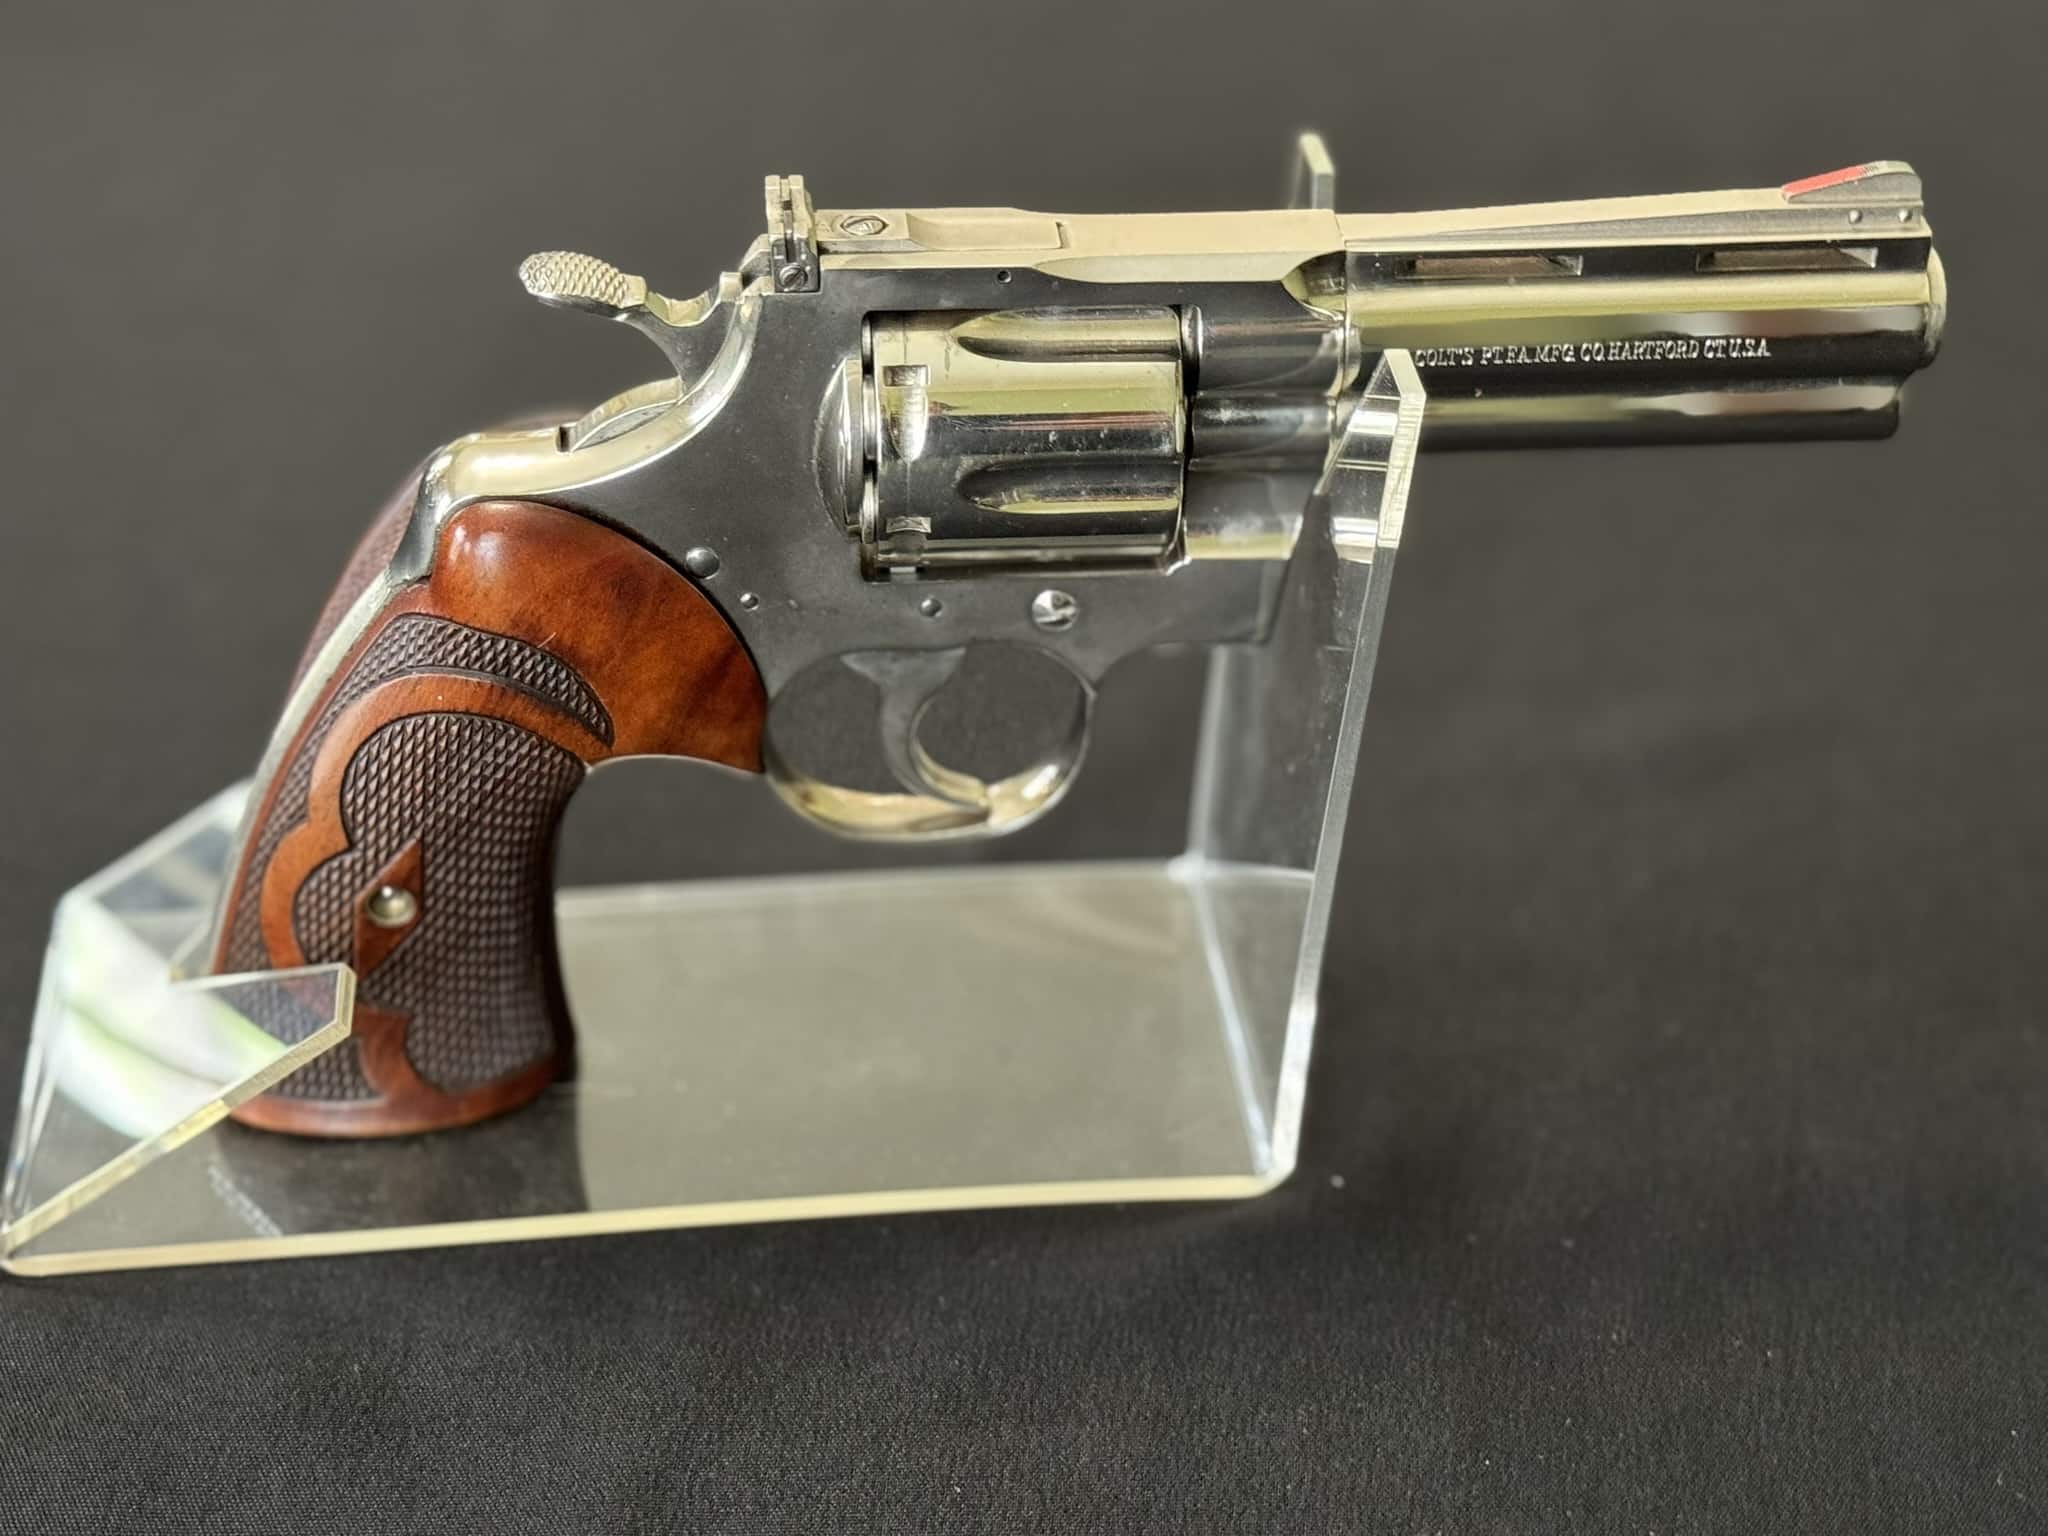
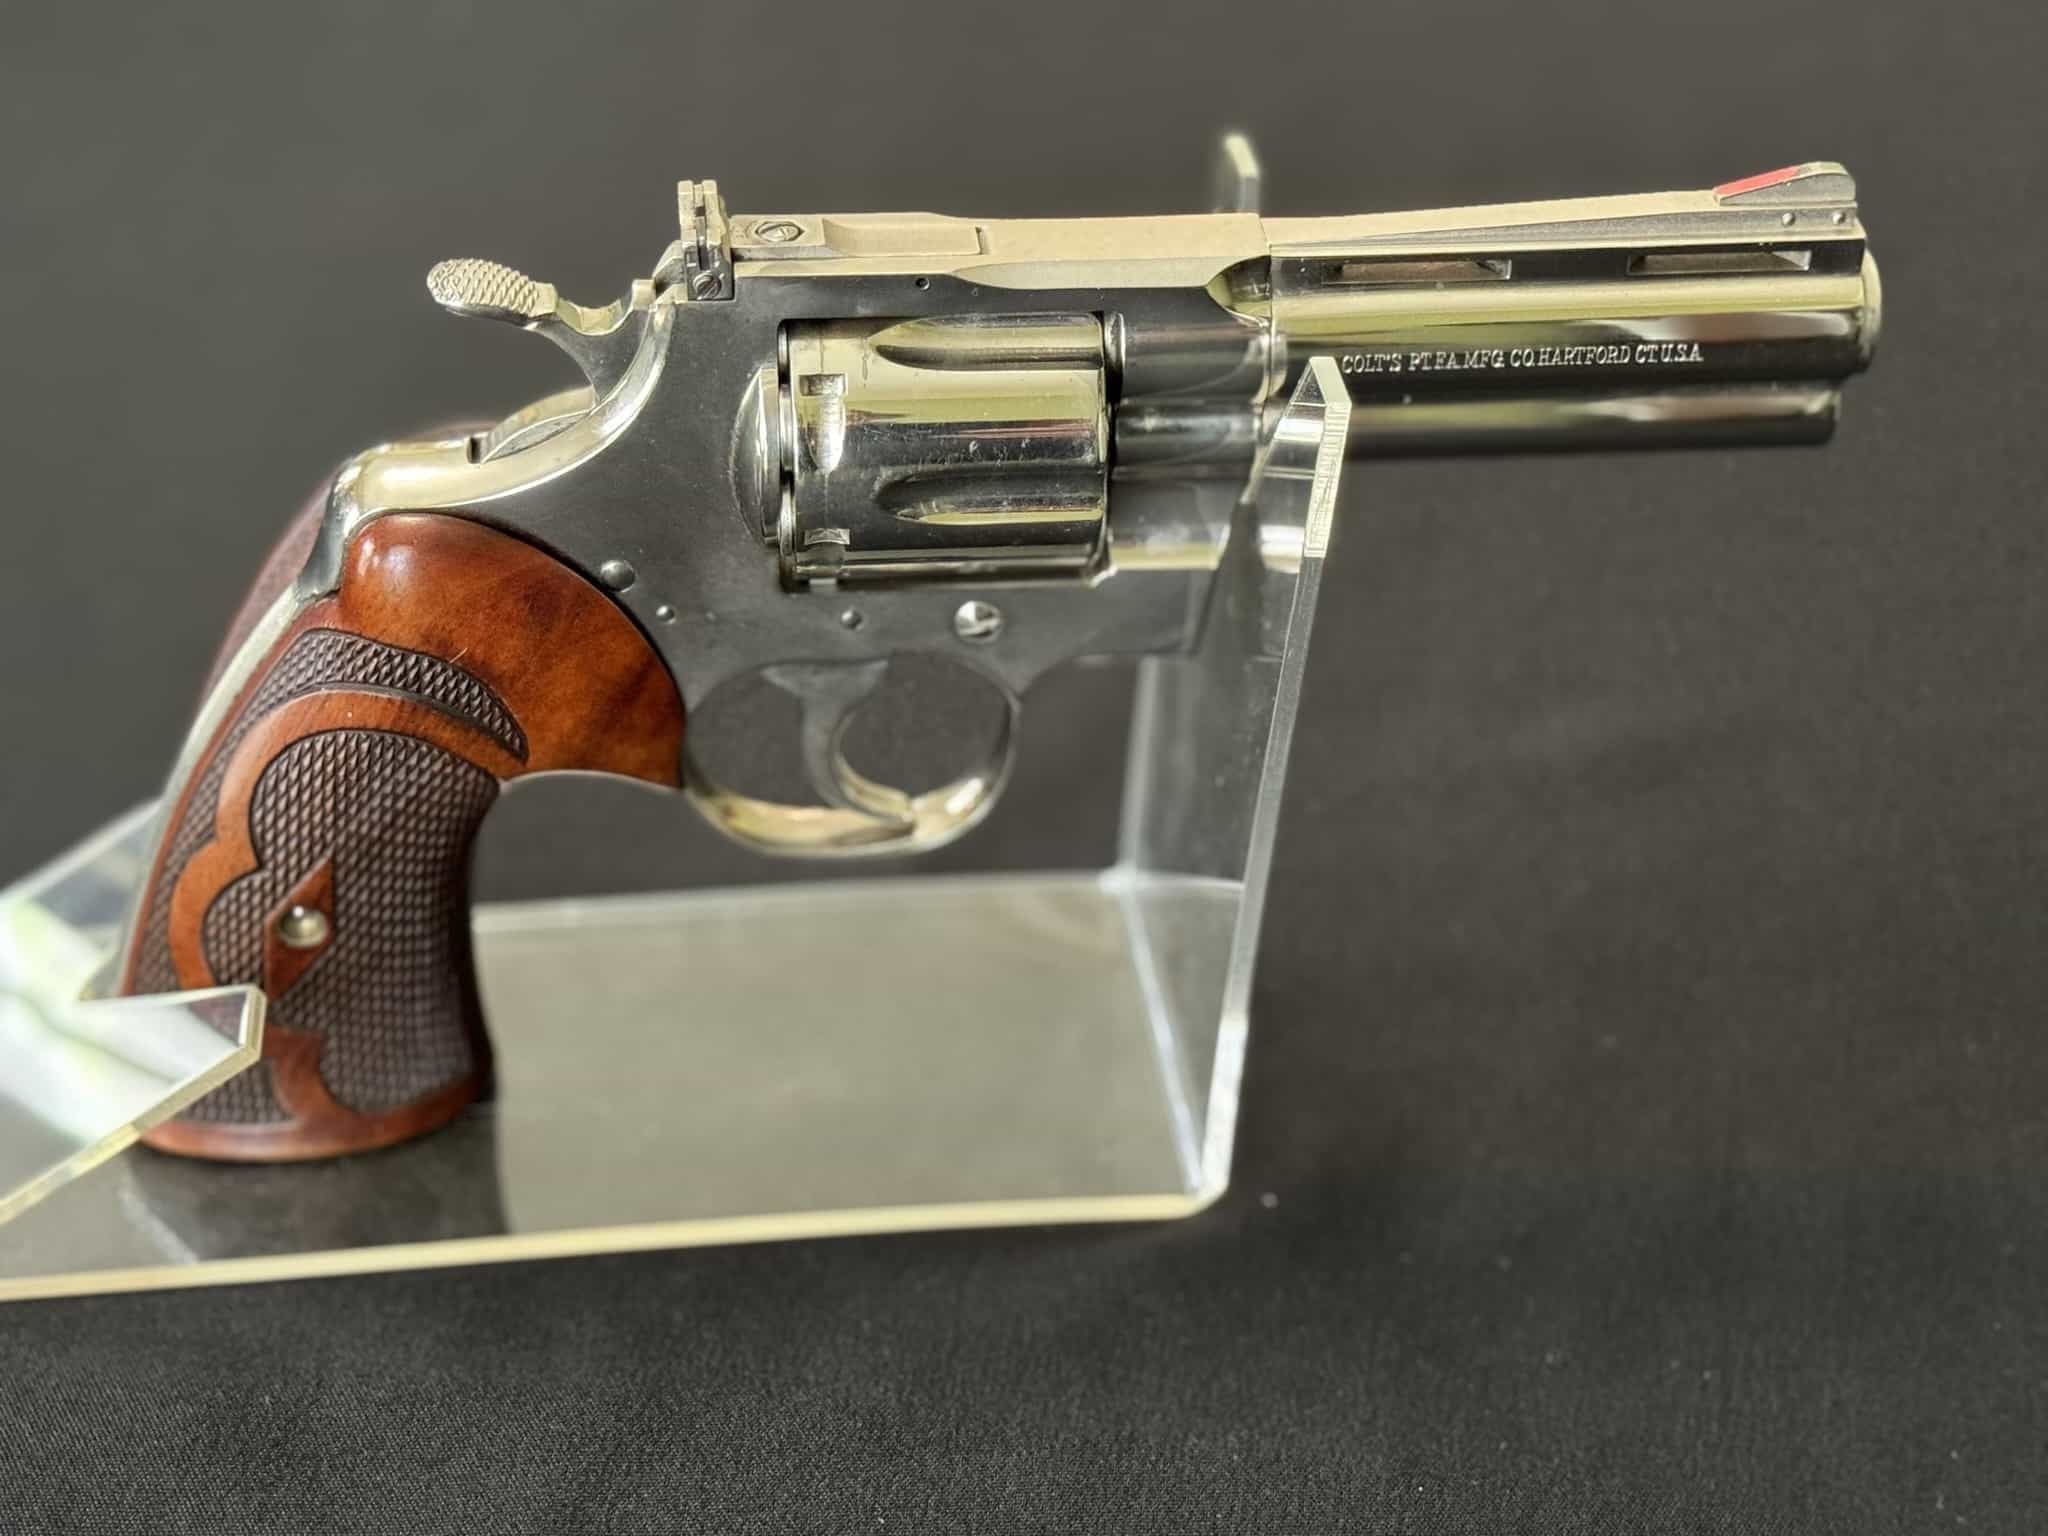
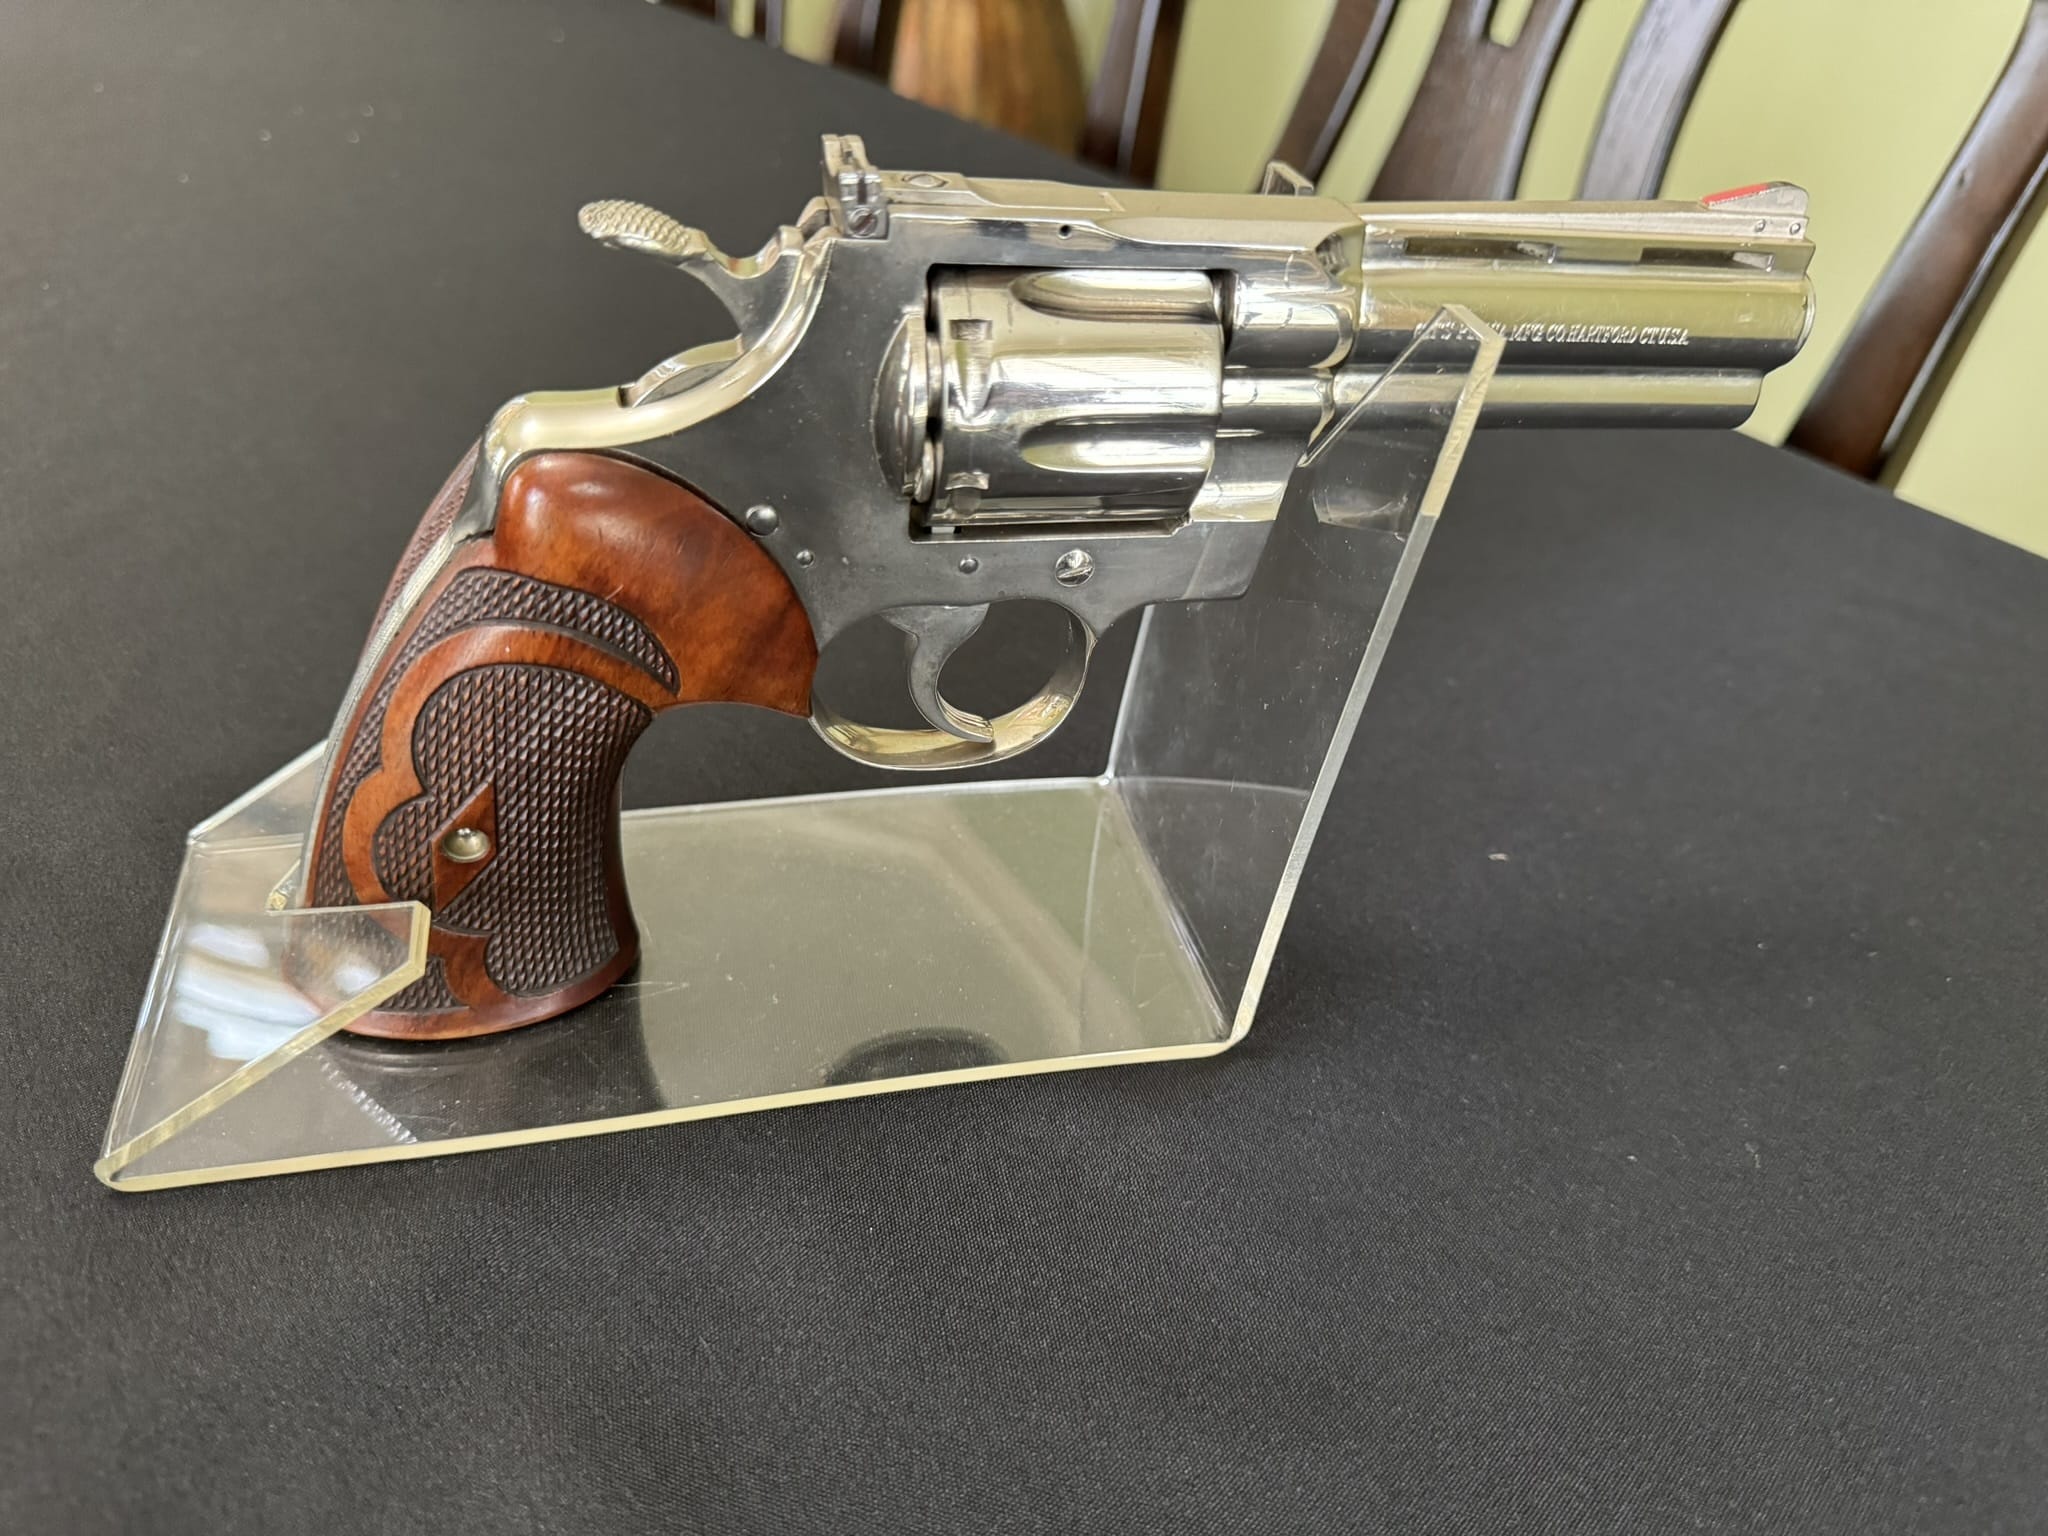
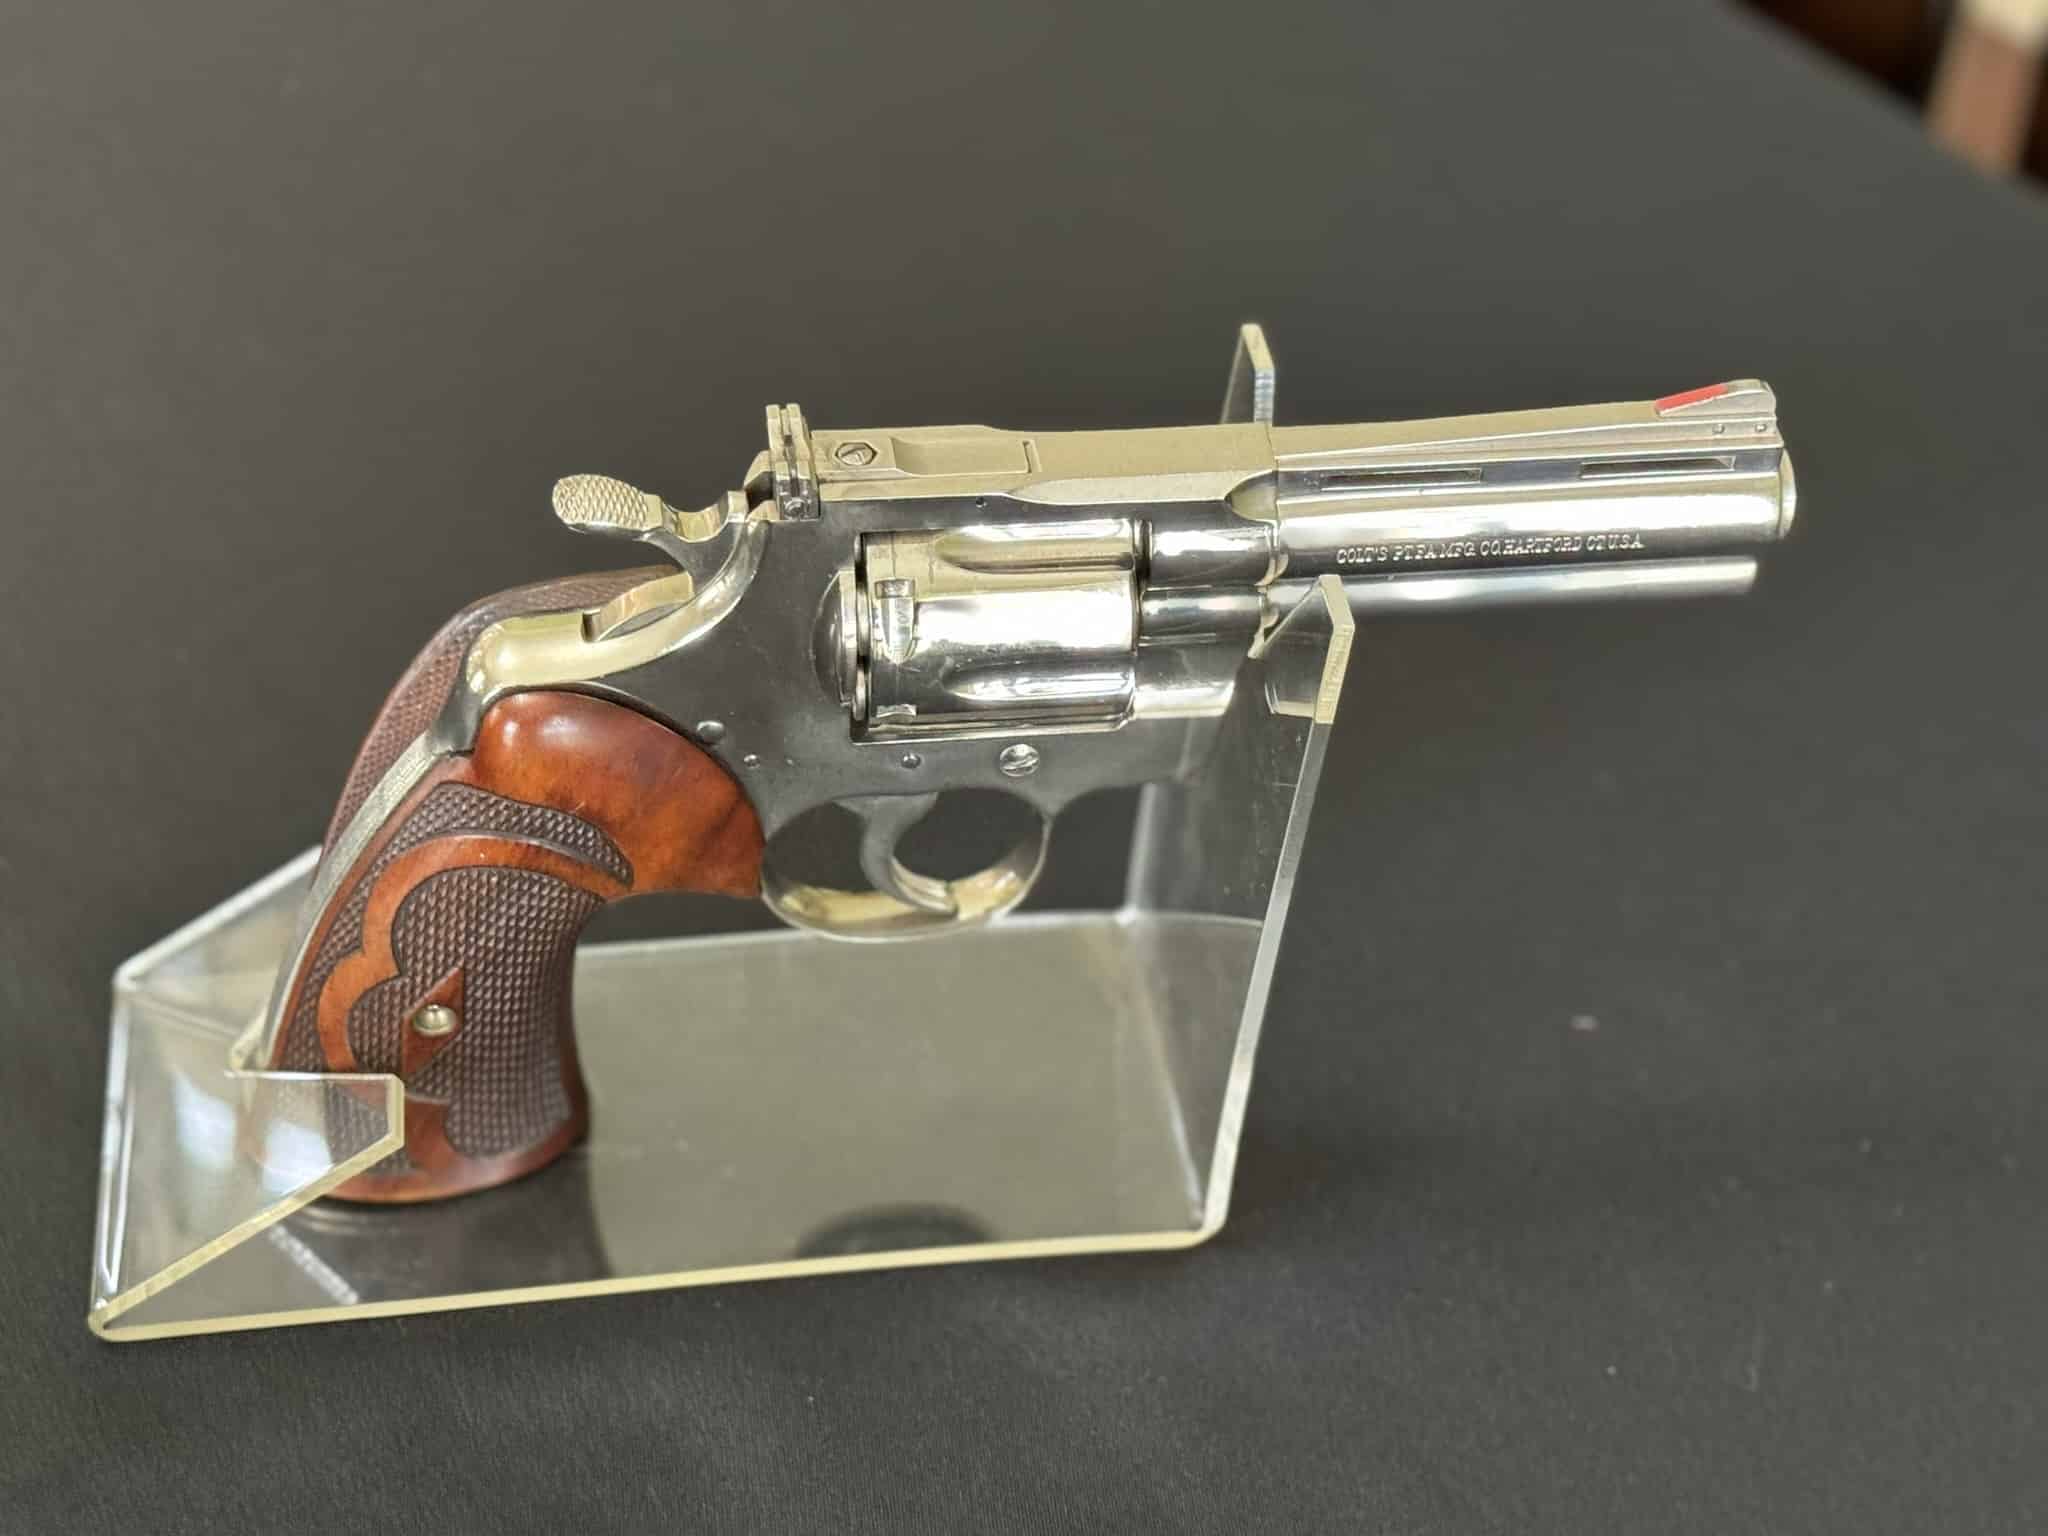
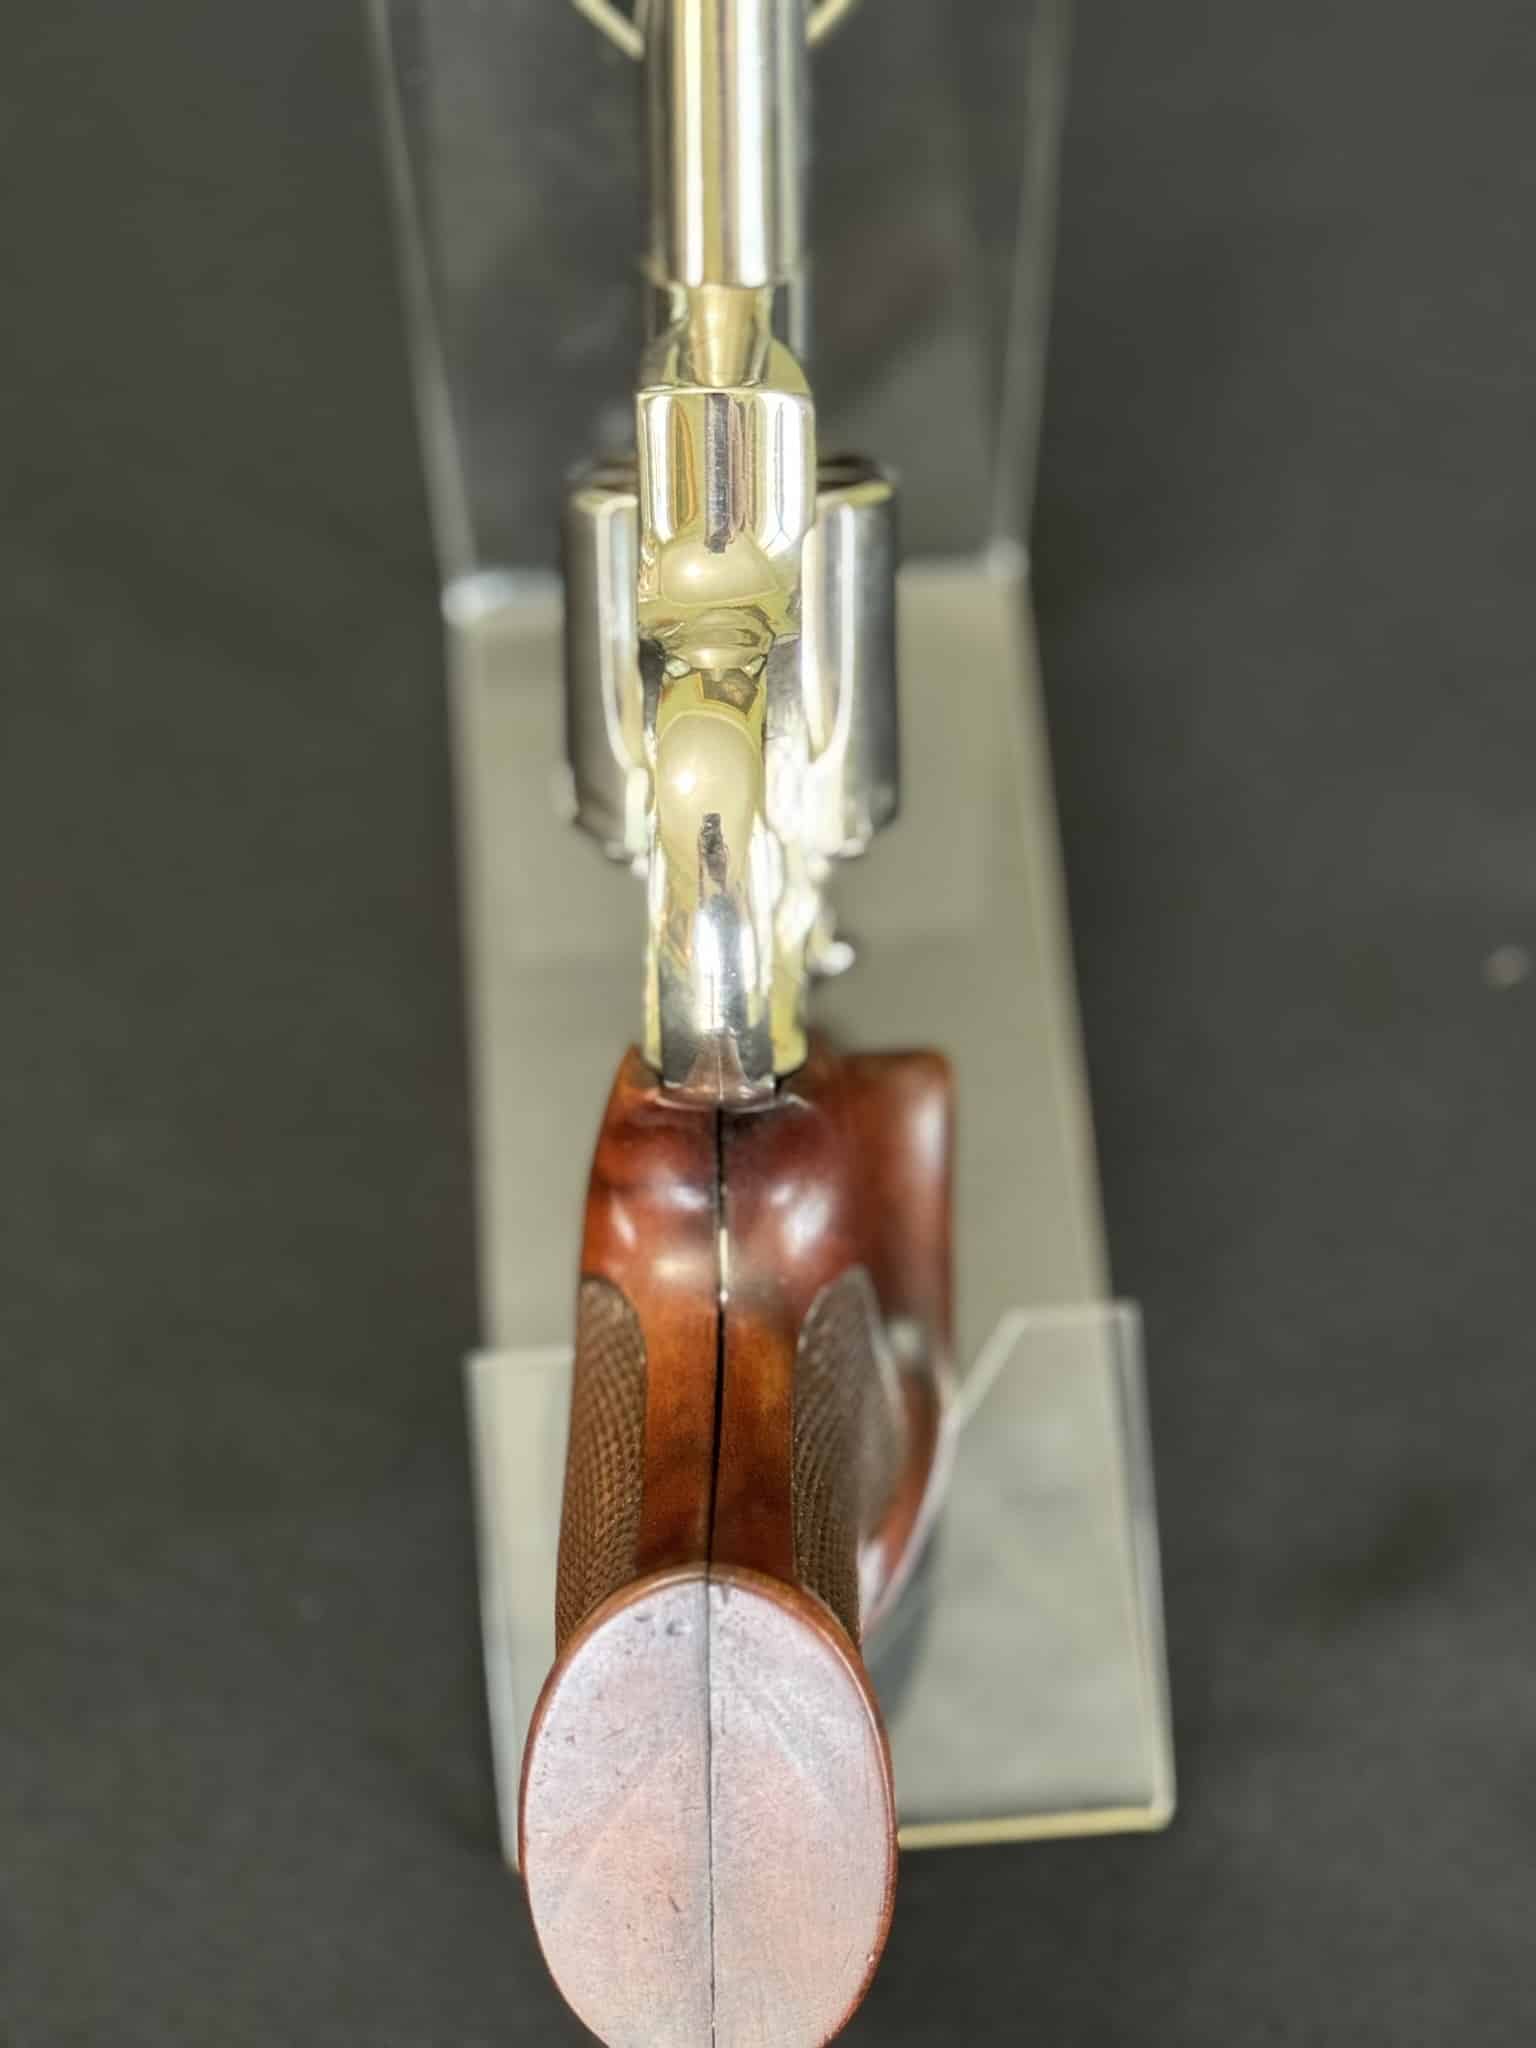
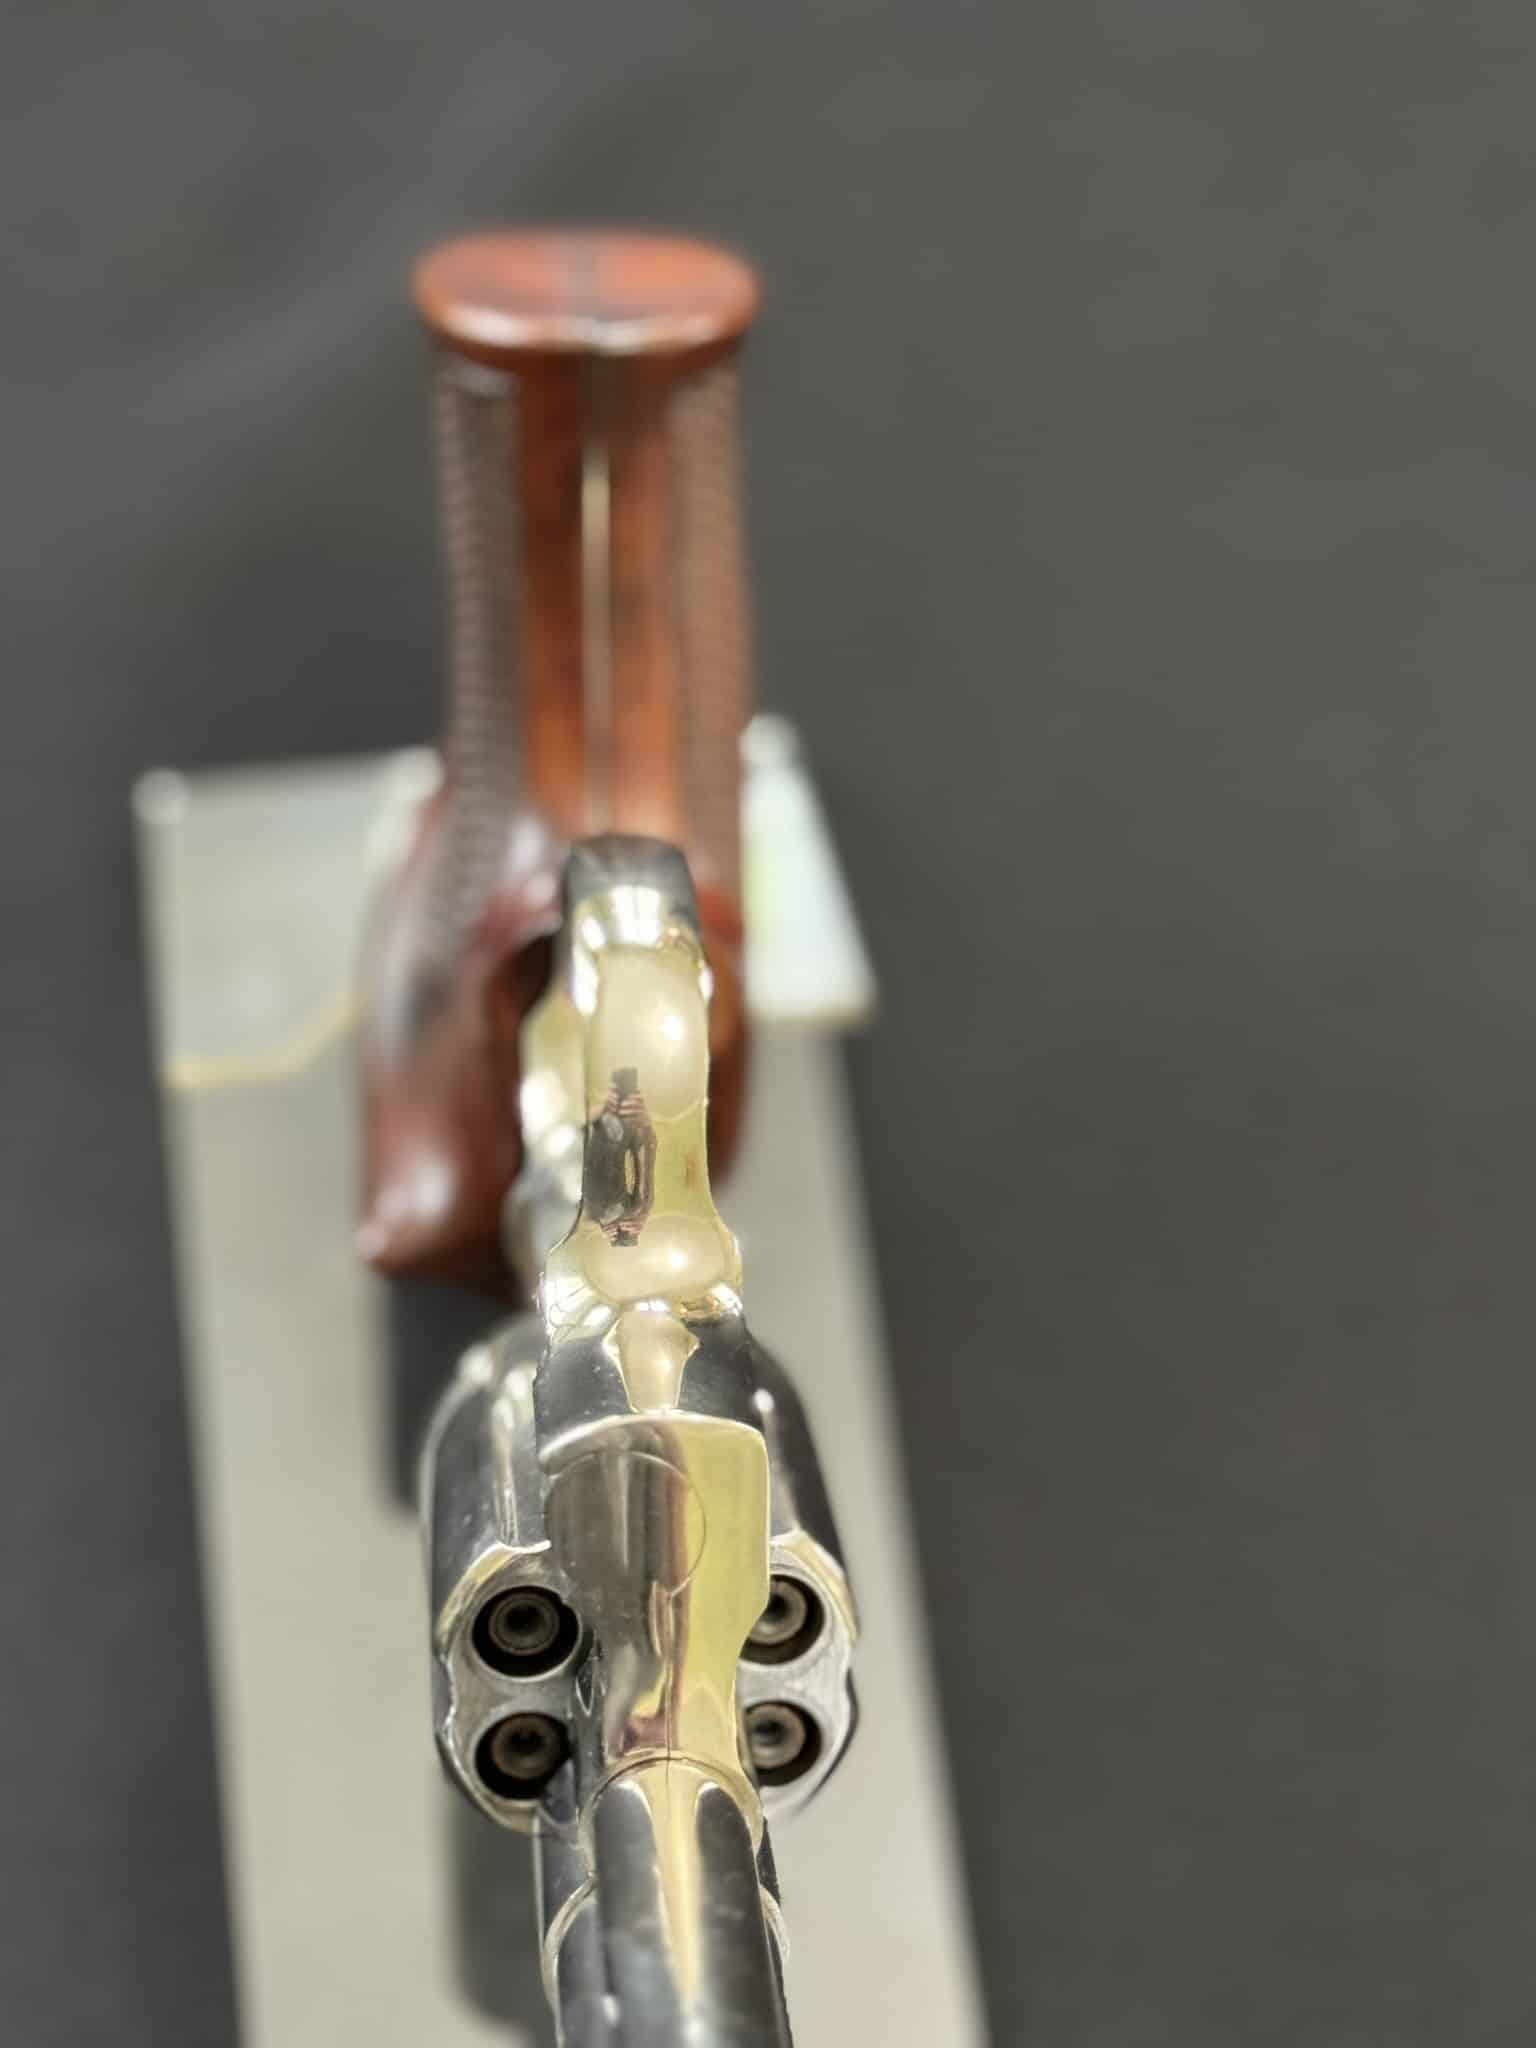
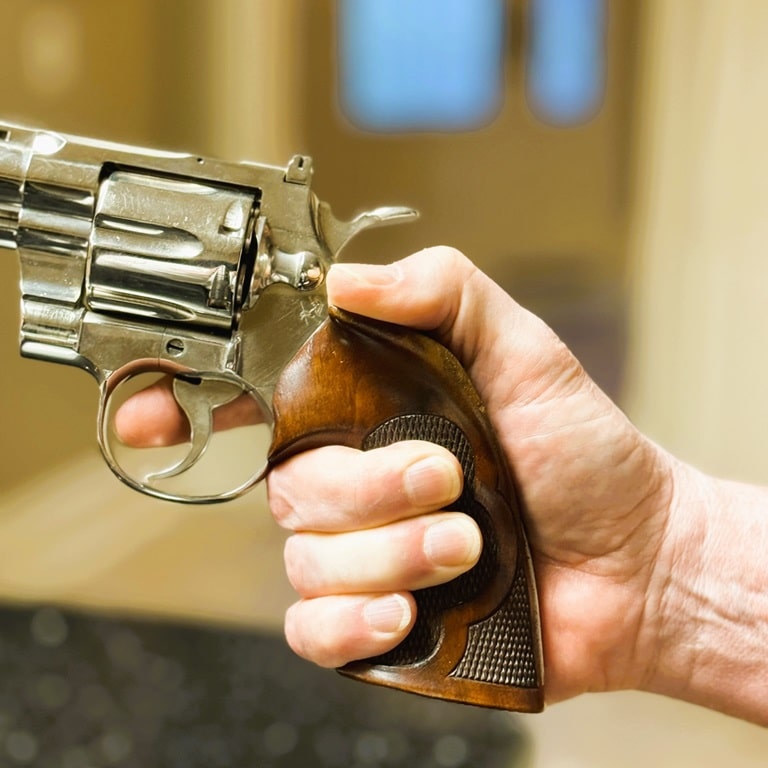
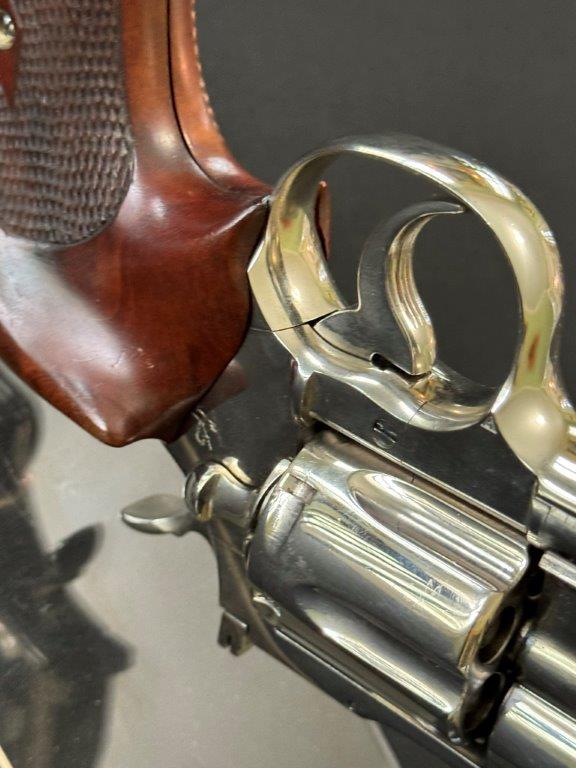
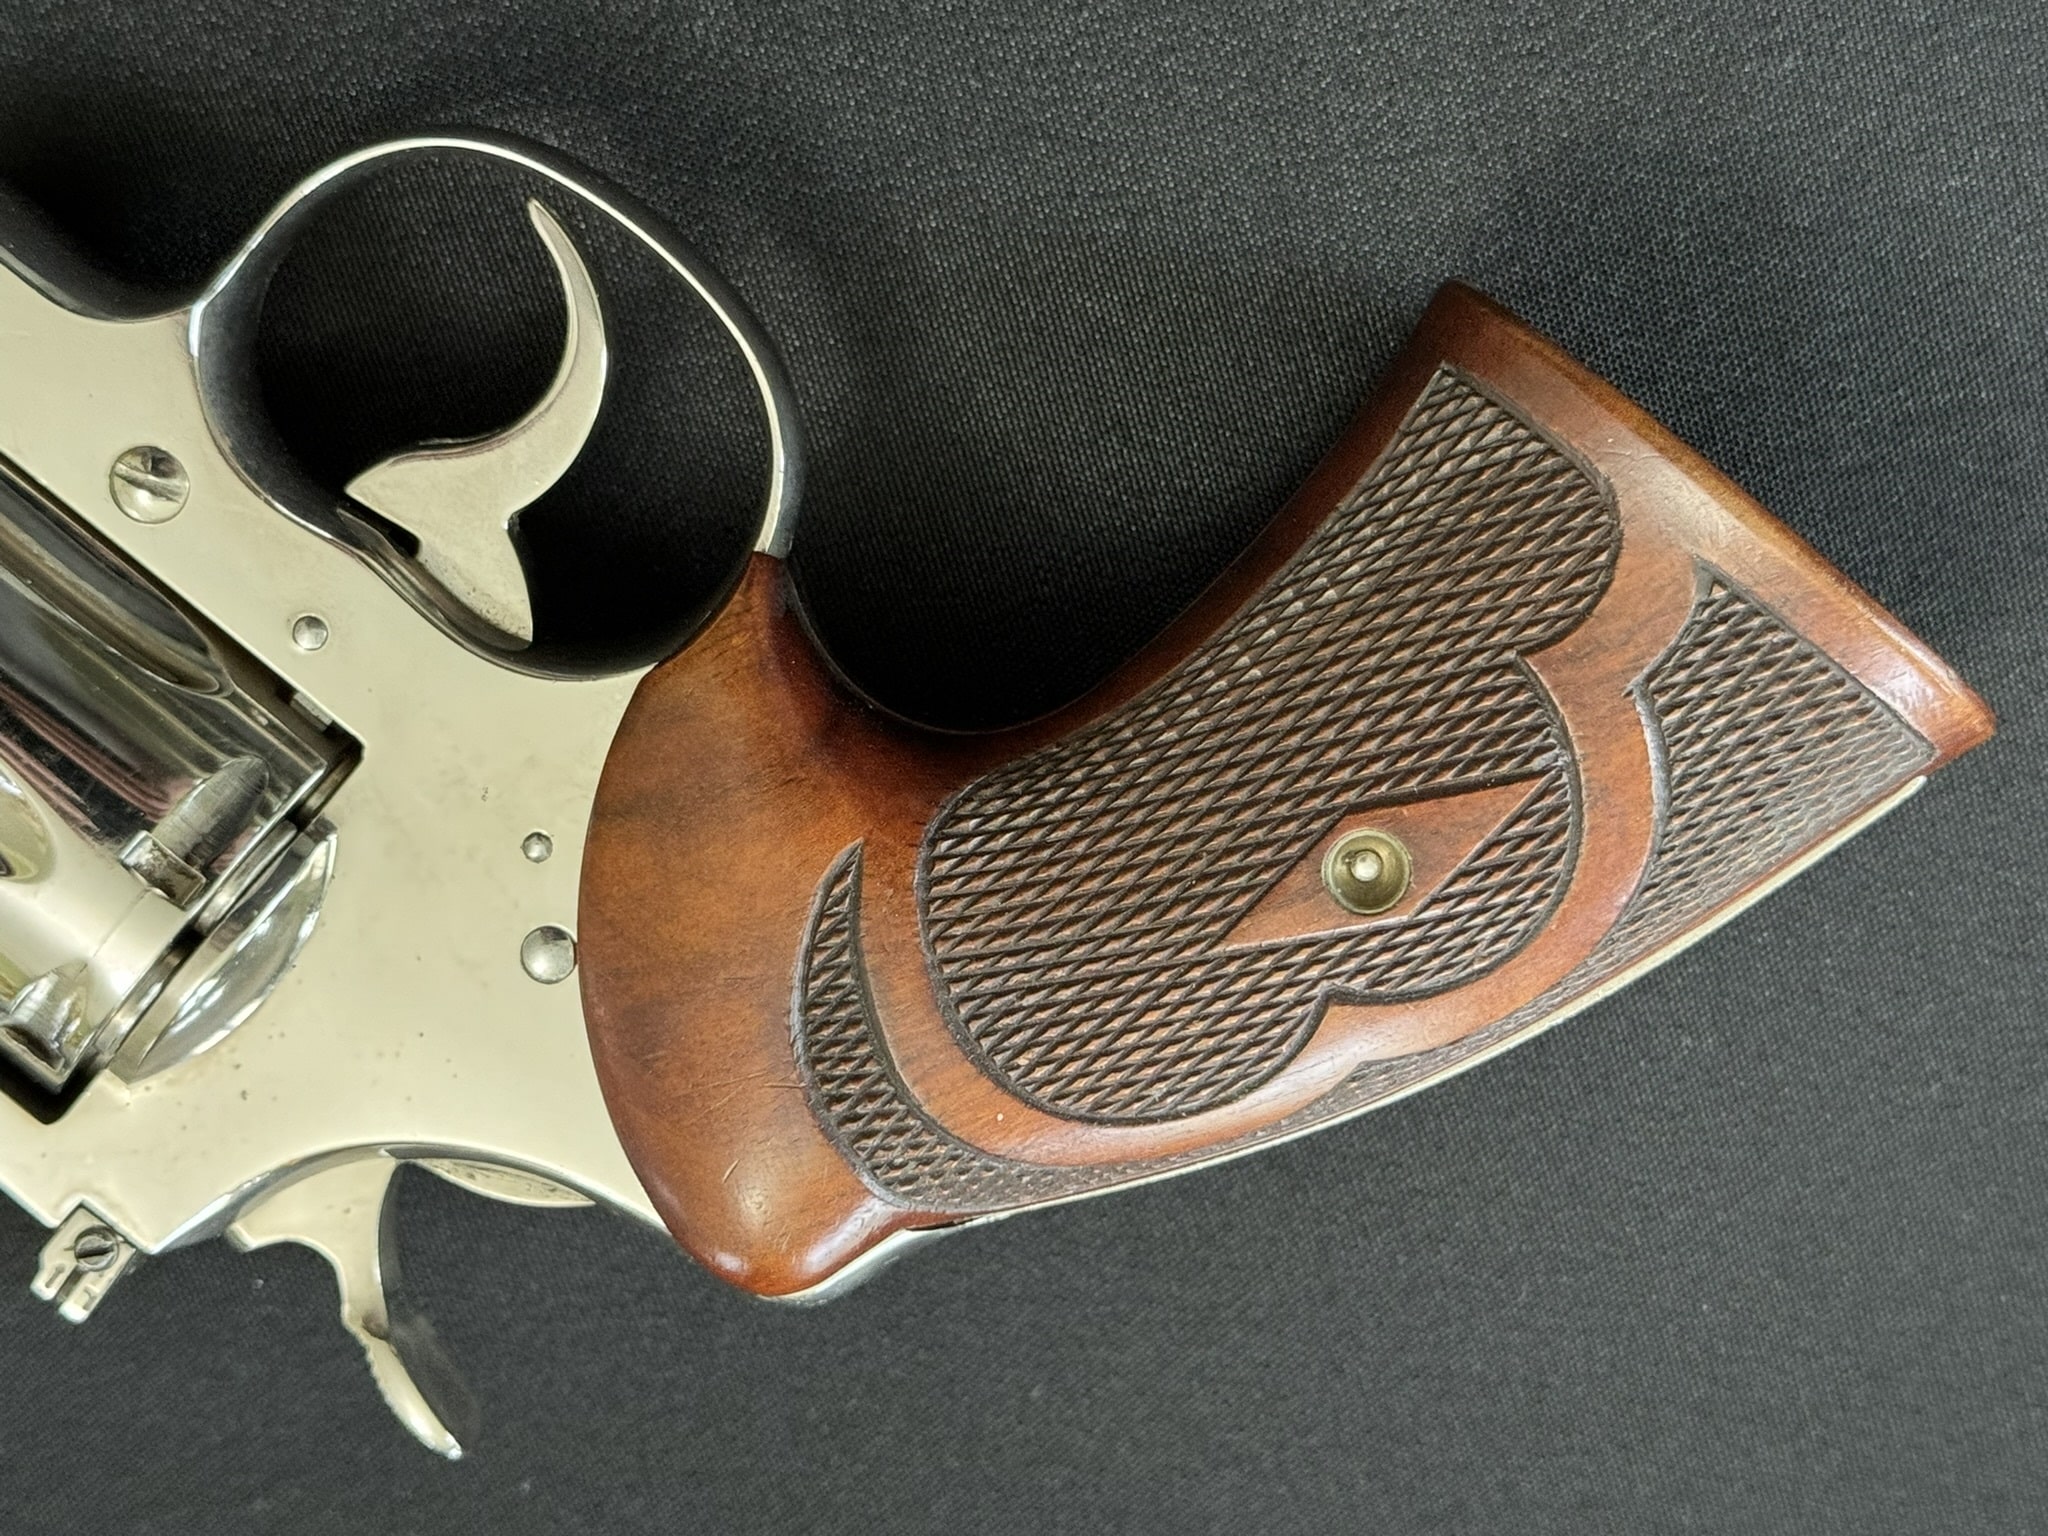
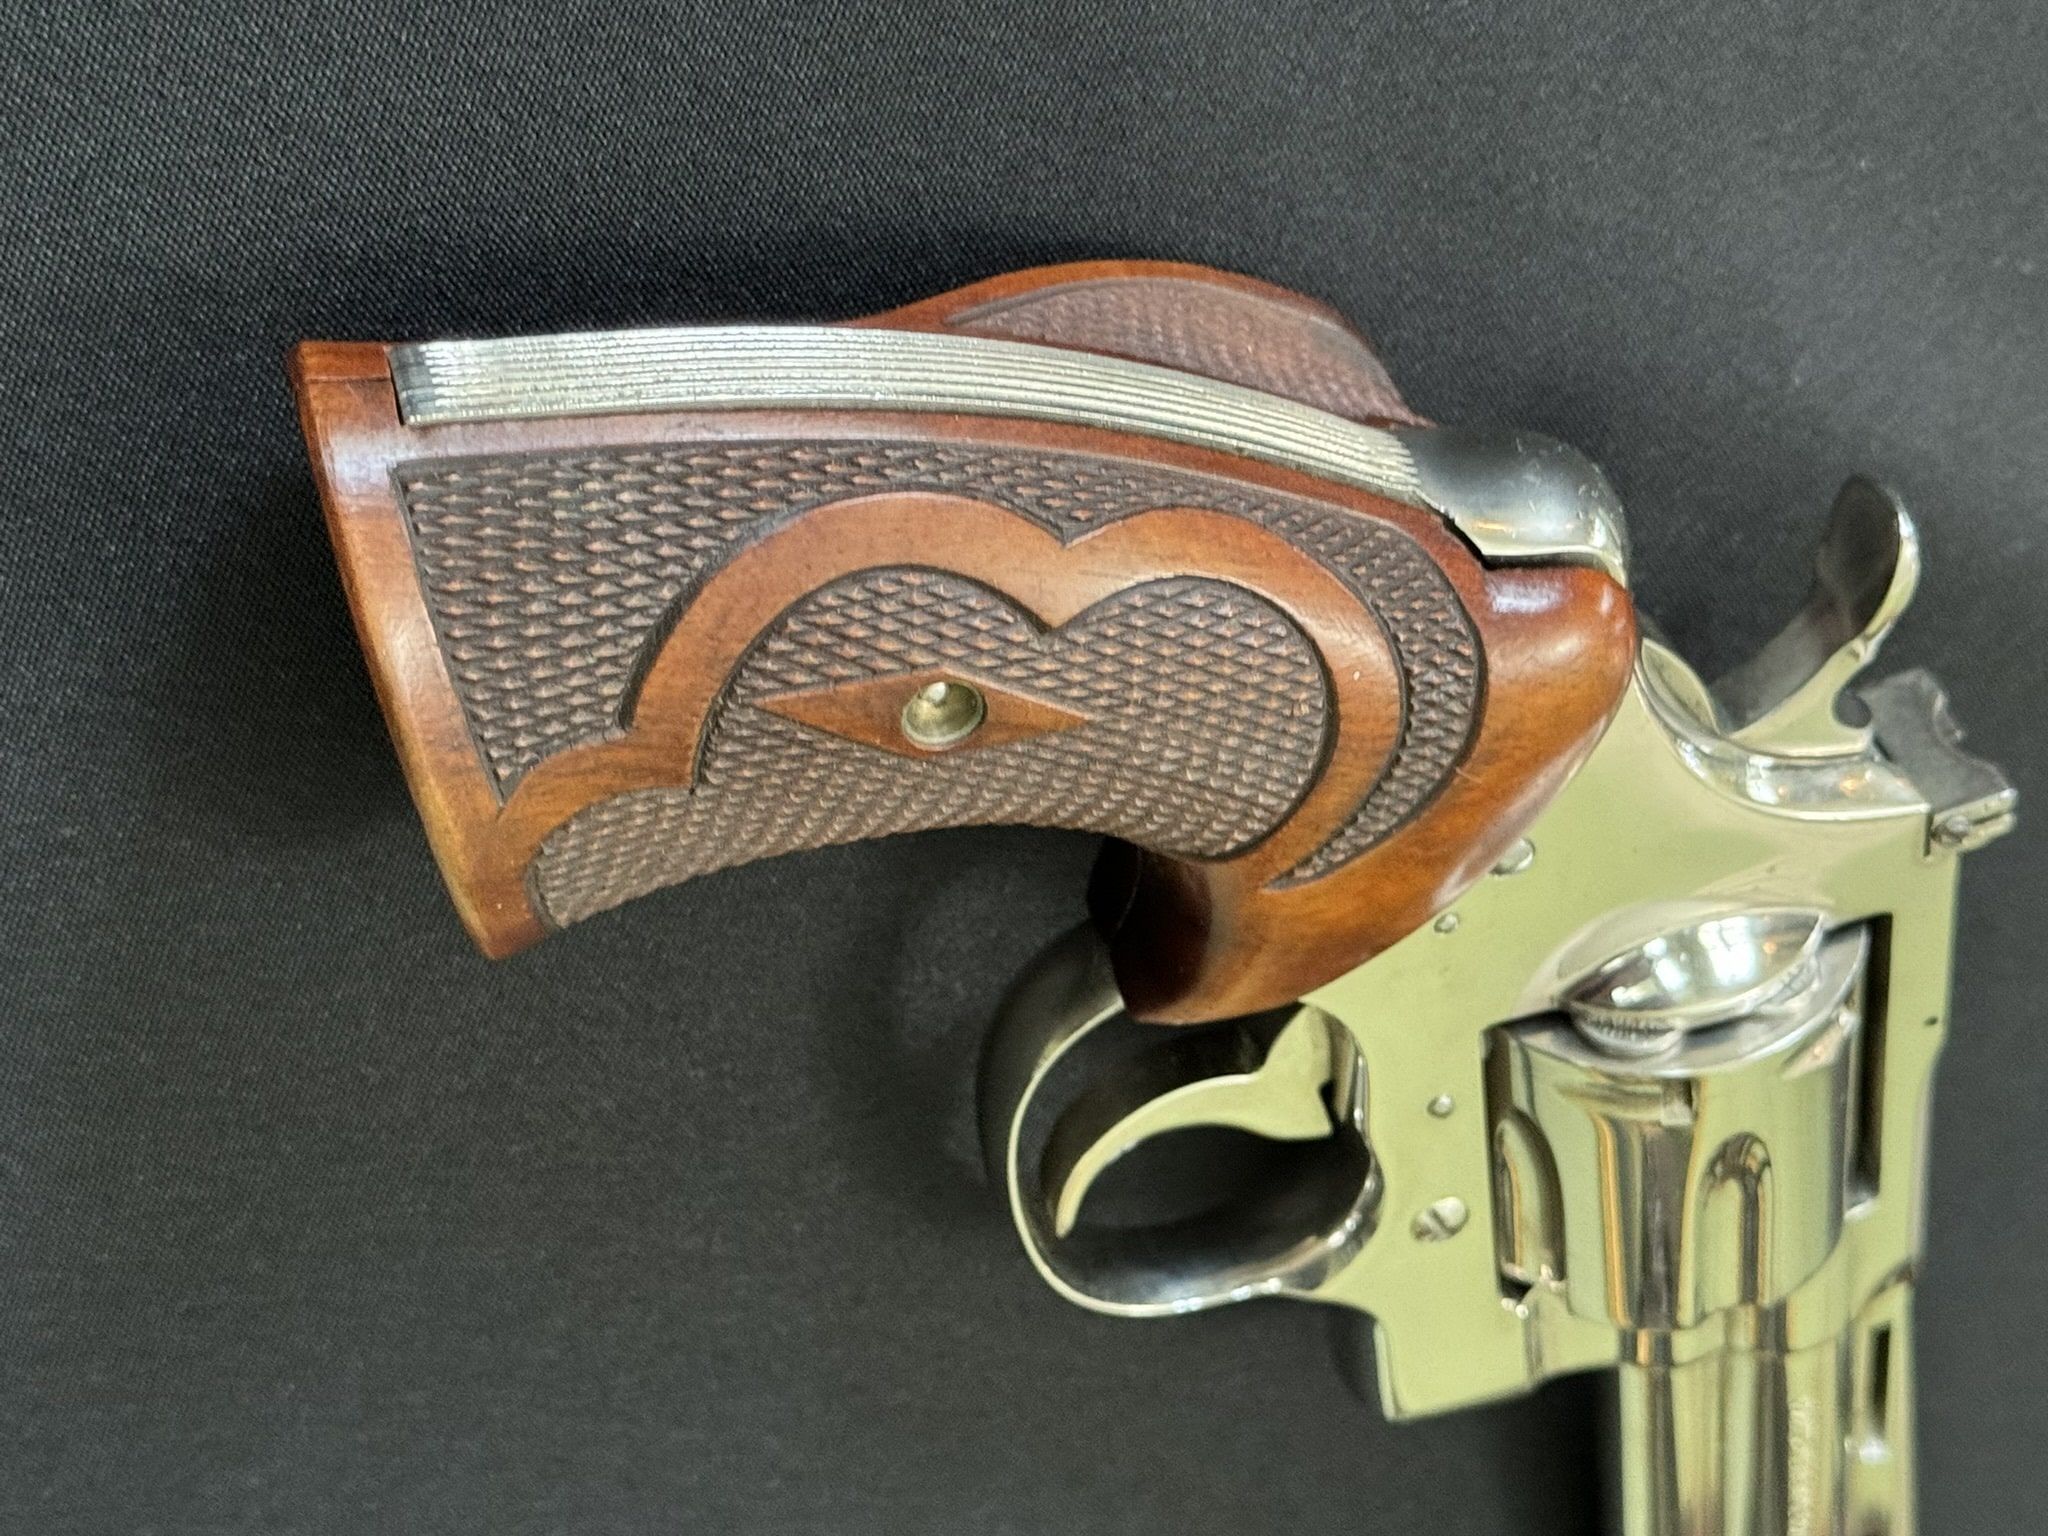
The gallery below focuses on the exterior form: frame coverage, thumb shelf, checkering, screw diamond, backstrap fit, lower flare, and hand position.
Red Flags and Common Misreadings
| Issue | Why It Matters | What to Do |
|---|---|---|
| Only the outside looks right | Many later makers copied the Roper look. | Remove the panels carefully and inspect reverse-side construction clues. |
| Jig holes are treated as absolute proof | Collector discussions note exceptions and similar shop marks from other makers. | Use jig holes as supporting evidence, not the whole case. |
| Fresh inletting or new holes | May indicate conversion to another frame or a reproduction made to fit a valuable gun. | Photograph the cuts and compare color, edges, and screw alignment. |
| Over-restored finish | Sanding and refinishing can erase tool marks, soften borders, and reduce collector value. | Prefer careful preservation over cosmetic improvement. |
Care and Preservation
Old custom stocks should be stabilized, not modernized. Avoid sanding, reshaping, soaking, aggressive oiling, and experimental finishes. Store wood away from high heat, long sunlight exposure, and damp conditions. When removing panels, use a correctly fitting screwdriver and support the wood so the escutcheon area is not stressed.
The goal is not to make vintage grips look new. The goal is to preserve the honest evidence that lets the next collector understand what they are.
Roper Grips FAQs
Do jig holes prove a set is original?
No. They are an important clue, especially when small square or rectangular marks appear on both reverse-side panels, but they should be evaluated with checkering, inletting, wood age, screw hardware, frame fit, and provenance.
Can genuine Roper grips lack visible jig holes?
Collector discussions describe possible exceptions, so absence alone should not end the analysis. It should make the rest of the evidence more important.
What is the difference between Roper and Roper-style?
Roper-style means the shape or checkering pattern follows Roper influence. Original Roper is a stronger claim that requires evidence connecting the stocks to period Roper-shop work.
Should old Roper grips be refinished?
Usually, no. Refinishing can remove age evidence, soften borders, alter color, and make reverse-side details harder to interpret.
Related Collector Pages

About Greg Cook
Greg writes these pages as a collector and hobbyist. The firearms and accessories shown are presented for historical reference, photographs, and collector discussion; they are not sale listings.
Collector Reference Books
Good books, careful photographs, and honest notes are the backbone of serious collecting.
Research Notes
Sources & References
Use these sources as starting points, then verify any high-value grip set with direct photographs, side-by-side comparison, and knowledgeable collector review.
- GUNS Magazine, “Resurrecting The Roper Grip” — background on Walter Roper, Mathias Gagne, and the hand-made character of surviving Roper grips.
- GUNS Magazine, “Past Masters of the Double-Action Sixgun: Part 4” — discussion of Roper’s design principles and Gagne’s woodworking role.
- Smith & Wesson Forum, “Vintage Custom Grips by Gagne, Sanderson, Farrant, Hurst…” — collector discussion of jig holes, ribbon checkering, wood, fit notes, and authentication caveats.
- Smith & Wesson Forum, “Roper style grips (pics)” — detailed discussion of reverse-side rectangular jig indentations and comparison with other makers’ marks.
- Sack Peterson, “Roper’s grips were made by two stock makers in his employ” — collector reference on Roper production, Gagne/Nichols shop work, and checkering-saddle jig holes.
- American Handgunner, “A True Sixgunner’s Dream” — modern context for Roper-style stocks and their continuing influence among sixgun collectors.